Windows 10 includes a touch keyboard for computers and tablets with a touch screen. When you touch any text field on your tablet, the touch keyboard appears on the screen. If you don't have a touch screen, you can still launch it. Windows 10 "Redstone 4" version 1803 comes with a new options which allow you to enable Auto Correction and Text Suggestions for a hardware keyboard connected to your device.
Advertisеment
 It is possible to enable or disable Auto Correction for the hardware keyboard in Windows 10 with either Settings or a Registry tweak. In this article, we will see how it can be done.
Auto Correction for Hardware Keyboard in Windows 10
The Auto Correction feature comes in handy for people who happen to be poor spellers and/or poor typists (for instance, myself). Everyone makes typos and the Auto Correct feature is incredibly useful to fix them, just like you can do on smartphones.
To disable Auto Correction for the hardware keyboard Windows 10, do the following.
- Open Settings.
- Go to Time & language - Keyboard.
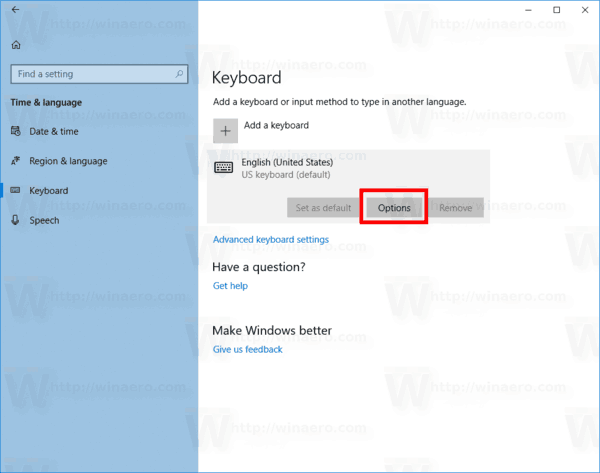
- On the right, select your keyboard in the list and click on the Options button.
- On the next page, disable the check box Autocorrect misspelled words as I type under the Hardware keyboard section as shown below.
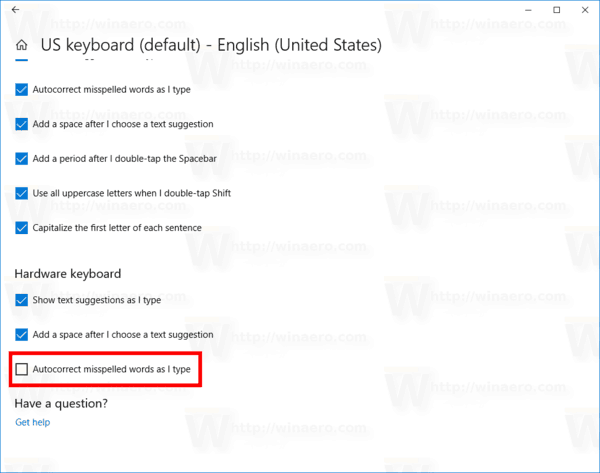
This will disable Auto Correction for the hardware keyboard in Windows 10.
To enable Auto Correction for the hardware keyboard Windows 10, do the following.
- Open Settings.
- Go to Devices - Typing.
- On the right, select your keyboard in the list and click on the Options button.

- On the next page, enable the option Autocorrect misspelled words as I type under Hardware keyboard as shown below.
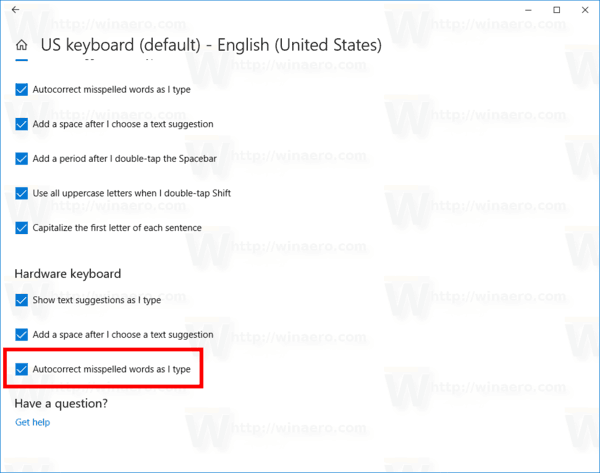
This will enable Auto Correction for the hardware keyboard in Windows 10.
You are done!
Alternatively, you can apply a simple Registry tweak.
Disable or Enable Auto Correction for Hardware Keyboard with Registry Tweak
- Open the Registry Editor app.
- Go to the following Registry key.
HKEY_LOCAL_MACHINE\SOFTWARE\Microsoft\Input\Settings
See how to go to a Registry key with one click.
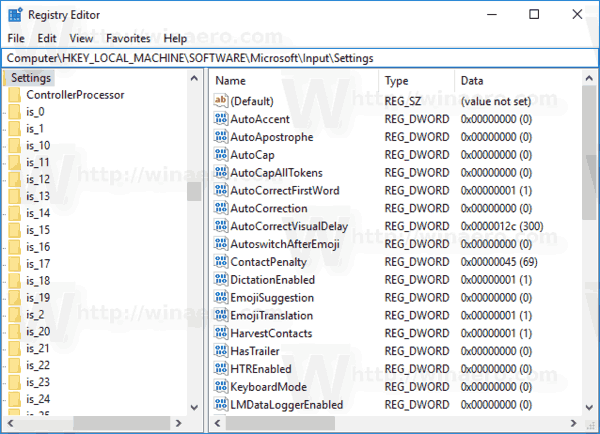
- On the right, create a new 32-Bit DWORD value EnableHwkbAutocorrection.
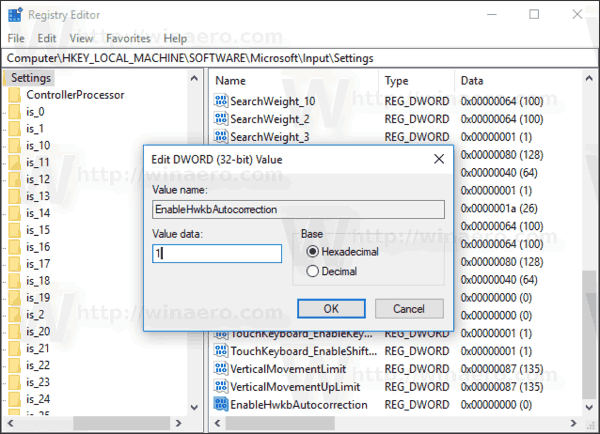
Note: Even if you are running 64-bit Windows you must still create a 32-bit DWORD value.
Set its value data to 1. This will enable the Auto Correction feature for the hardware keyboard. - Set the value data to 0 to disable the Auto Correction feature for the hardware keyboard.
- Restart Windows 10.
To save your time, you can download the following ready-to-use Registry files:
That's it.
Support us
Winaero greatly relies on your support. You can help the site keep bringing you interesting and useful content and software by using these options:
