If your Windows 10 device comes with a wireless network adapter, then it can be configured to connect to a wireless network in advance. You can define a wireless network profile for a network which is currently out of range in order to connect to it later. Sometimes this is very useful.
Advertisеment
Wi-Fi is a technology which allows a user to connect to a wireless local area network (WLAN). It is a communications standard that describes how high-frequency radio waves can be used to provide wireless high-speed Internet and network connections.
Wi-Fi hardware can be embedded in your device's motherboard or it can be installed as an internal module inside the device. Wireless network adapters exist as an external device which can be connected to a USB port.
In Settings, Wi-Fi options can be used to connect your device to a wireless network, to enable a random MAC address (if supported), to find your IP address and for other related tasks. 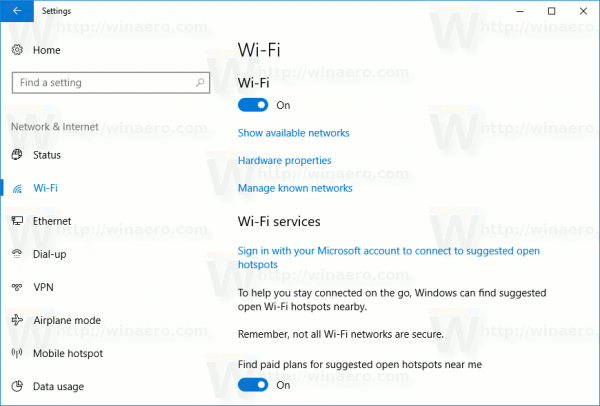
Tip: Windows 10 provides special commands to open various pages of Settings directly. Refer to the following articles to learn more about them.
- Open various Settings pages directly in Windows 10 Anniversary Update
- How to open various Settings pages directly in Windows 10
Add a Wireless Network Profile in Windows 10
You may need to create a profile for a wireless network which is currently out of range, making the OS able to connect to it later when then that network becomes reachable. Here is how it can be done.
To add a Wireless Network profile in Windows 10, do the following.
- Open Settings.
- Navigate to Network & Internet.
- On the left, click on Wi-Fi.
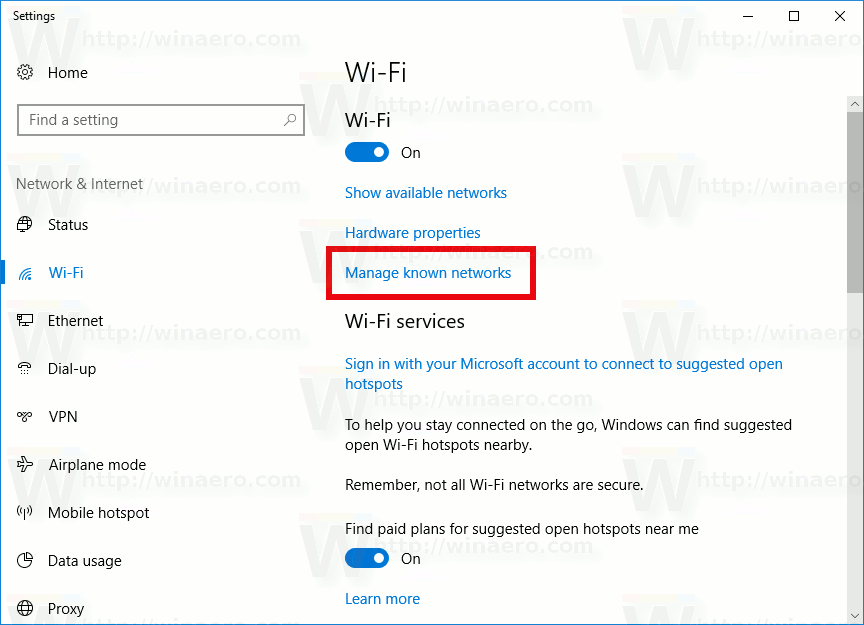
- On the right, click on the link Manage known networks.
- On the next page, click on Add a new network.

- Provide the parameters of your network, such as the wireless network name (SSID), security type, the password, and change any other parameter you need.
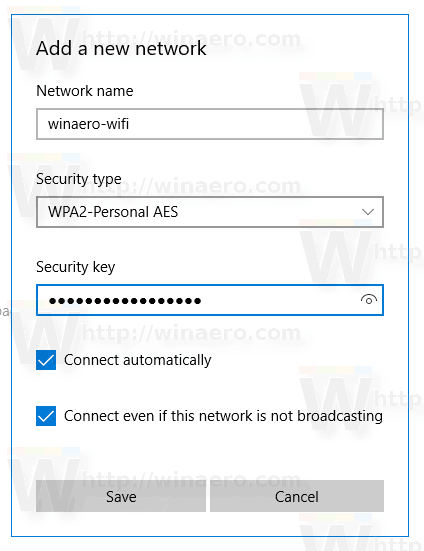
- Click on the Save button.
The next time the network will be in range, your device will connect to it automatically.
As of this writing, the same can be done using the classic Control Panel.
Add a Wireless Network Profile using the Control Panel
- Open the Control Panel.
- Go to the following location: Control Panel\Network and Internet\Network and Sharing Center.
- On the right, click on the link Set up a new connection or network.

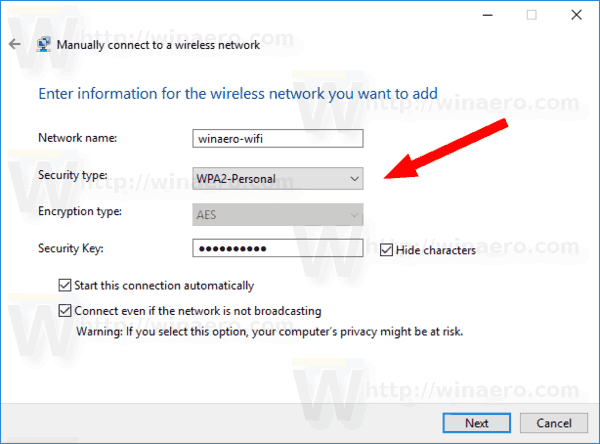
- In the setup dialog, select the option Manually connect to a wireless network.
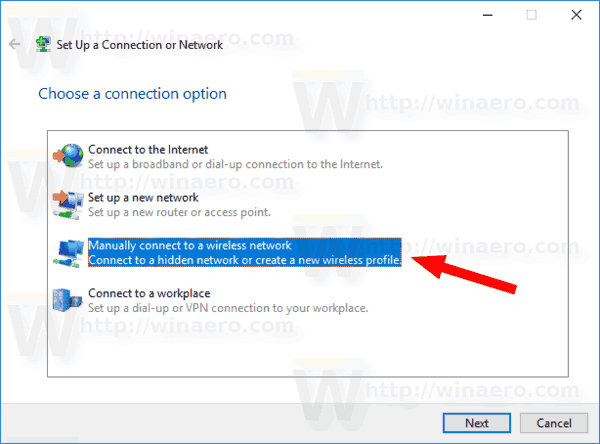
- On the next page, provide the parameters of your network, such as the wireless network name (SSID), security type, the password, and change any other parameter you need.
- The next time the network will be in range, your device will connect to it automatically.
That's it.
Related articles:
- Change WiFi network priority in Windows 10
- See the ethernet or wifi adapter speed in Windows 10
- How to make Windows 10 forget a WiFi network
- Stop Windows 10 From Connecting Automatically to a Wi-Fi Network
- Create a Wi-Fi history report in Windows 10 (Wlan Report)
- Create Wi-Fi Settings Shortcut in Windows 10
- How to disable Wi-Fi in Windows 10
- How to view and recover a Wi-Fi password stored in Windows 10
- Backup and restore Wireless network profiles in Windows 10
- How to set up Windows 10 ad hoc wireless hotspot
Support us
Winaero greatly relies on your support. You can help the site keep bringing you interesting and useful content and software by using these options:

Any idea how to import wifi xml profiles?