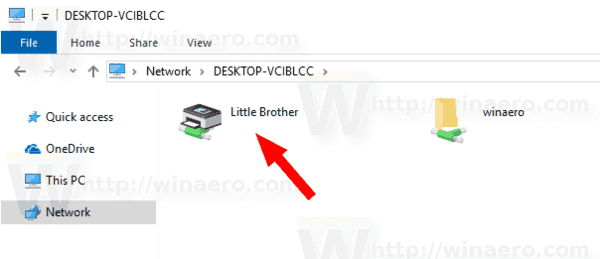
Windows allows connecting a shared printer connected to a PC on your network. A shared printer can be used by others to send print jobs. It will be visible in the shared network resources of the remote computer, so other users will be able to install (add) it to their printers. Today, we will see how to add (connect) a shared printer to your PC.
Advertisеment
A shared printer is available to other users when the computer it is connected to is turned on and its operating system is running. Also, the printer must be turned on.
As you may already know, Windows 10 doesn't include the HomeGroup feature starting in version 1803. For many users, HomeGroup was a convenient way to share files and folders over a network. Fortunately, it is possible to add a shared a printer without using HomeGroup.
First of all, you need to enable the File and Printer Sharing feature in Windows 10. For reference, see the article
Disable or Enable File and Printer Sharing in Windows 10
Note: If you are running Windows 10 version 1803, please read the article (and its comments) Network Computers are Not Visible in Windows 10 Version 1803. Ensure that you have the services Function Discovery Resource Publication and Function Discovery Provider Host enabled (their startup type is set to automatic) and running. This needs to be done on each Windows 10 PC you want to set up for printer sharing.
Also, you need to sign in as Administrator before proceeding.
Add a Shared Printer in Windows 10, do the following.
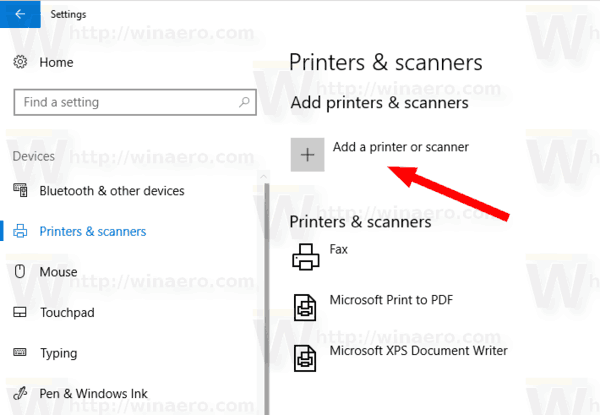
- Open the Settings app.

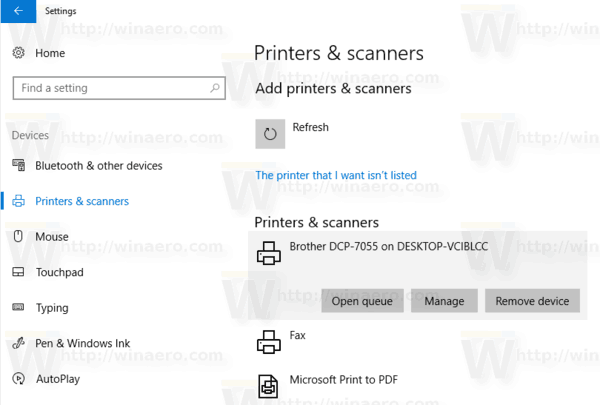
- Go to Devices -> Printers & scanners.
- On the right, click on the button Add a printer or scanner.
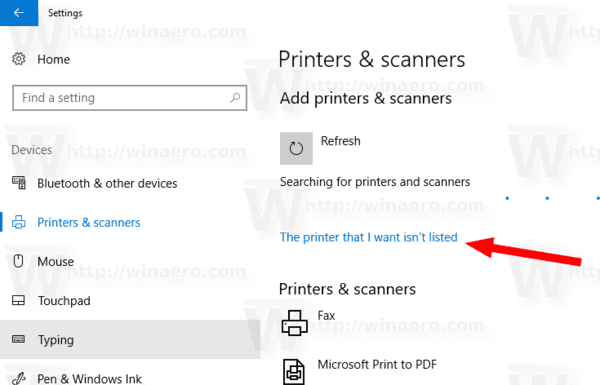
- Wait a few seconds and then click on the link The printer that I want isn't listed when available.
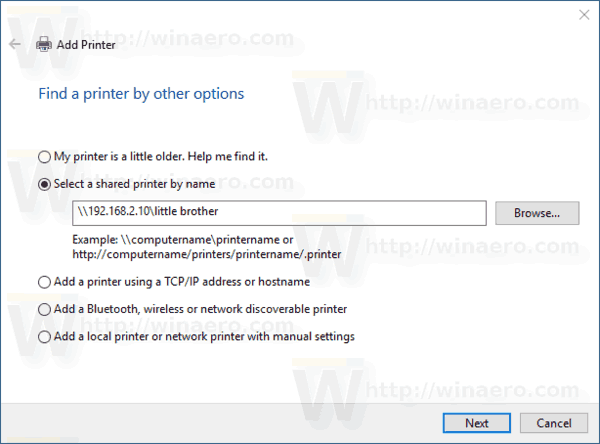
- In the next dialog, turn on the option Select a shared printer by name and type the network path of the shared printer, e.g. \\desktop-pc\my printer.
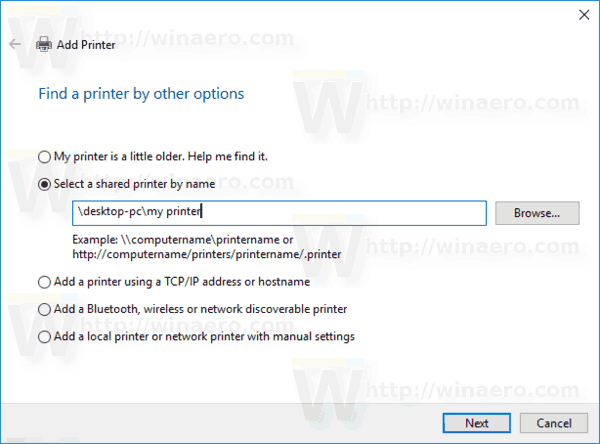
- Alternatively, you can type the IP address of the computer the shared printer is connected to.
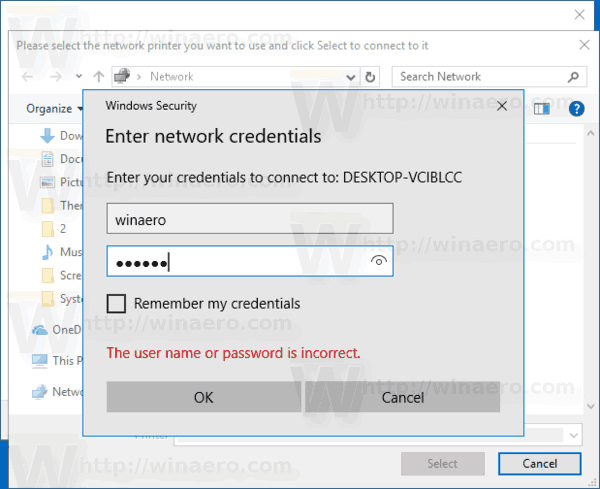
- Provide the user account credentials for the remote PC if prompted.
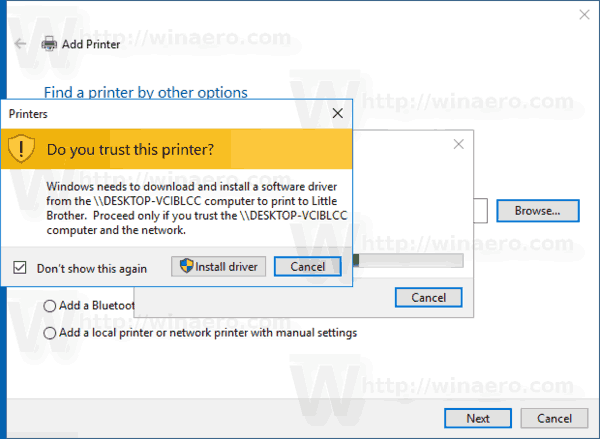
- Confirm the driver installation.

- Click on the next button to close the wizard.
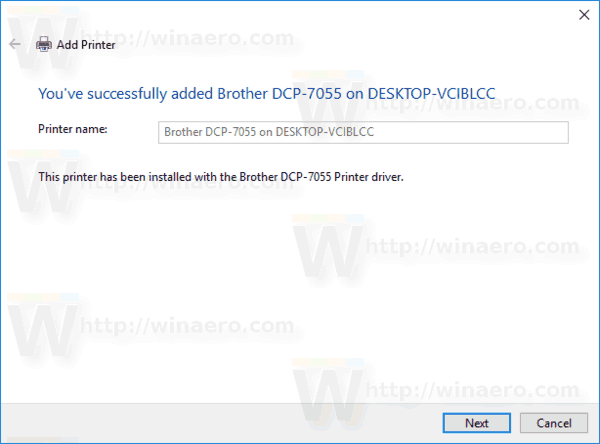
The printer is now installed. It is listed under Printers in the Settings app. There, you can manage or remove it.
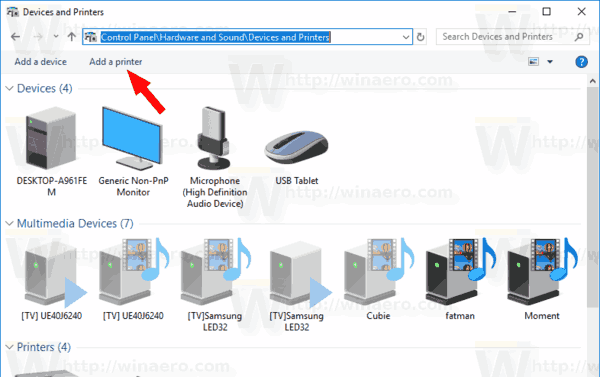
Alternatively, you can run the Add printer' wizard from the Control Panel\Hardware and Sound\Devices and Printers folder by clicking on the button Add a printer.
Finally, you can use PowerShell to add a shared printer in Windows 10.
- Open PowerShell as Administrator. Tip: You can add "Open PowerShell As Administrator" context menu.
- Type or copy-paste the following command:
Add-Printer -ConnectionName "Computer Name\Shared Printer Name"
Substitute the 'Computer Name' portion with the actual name of the remote computer. You can use its IP address instead. Replace the Shared Printer Name portion with the printer's name. - The command may look as follows:
Add-Printer -ConnectionName "192.168.2.10\Little Brother". - You are done. Now you can close the PowerShell window.
Related articles:
- How to Share a Printer in Windows 10
- Backup and Restore Printers in Windows 10
- Open Printer Queue With a Shortcut in Windows 10
- Set Default Printer in Windows 10
- How to stop Windows 10 from changing the default printer
- Open Printer Queue in Windows 10
- Create Printers Folder Shortcut in Windows 10
- Clear Stuck Jobs from Printer Queue in Windows 10
- Create Devices and Printers Shortcut in Windows 10
- Add Devices and Printers Context Menu in Windows 10
- Add Devices and Printers To This PC in Windows 10
Support us
Winaero greatly relies on your support. You can help the site keep bringing you interesting and useful content and software by using these options:
