How to add the Settings context menu in Windows 10.
In this article, we will see how to add any page of Settings to the context menu in Windows 10. So you can try out this ability, we will create a special context menu with categories of the Settings app and add it to the Desktop.
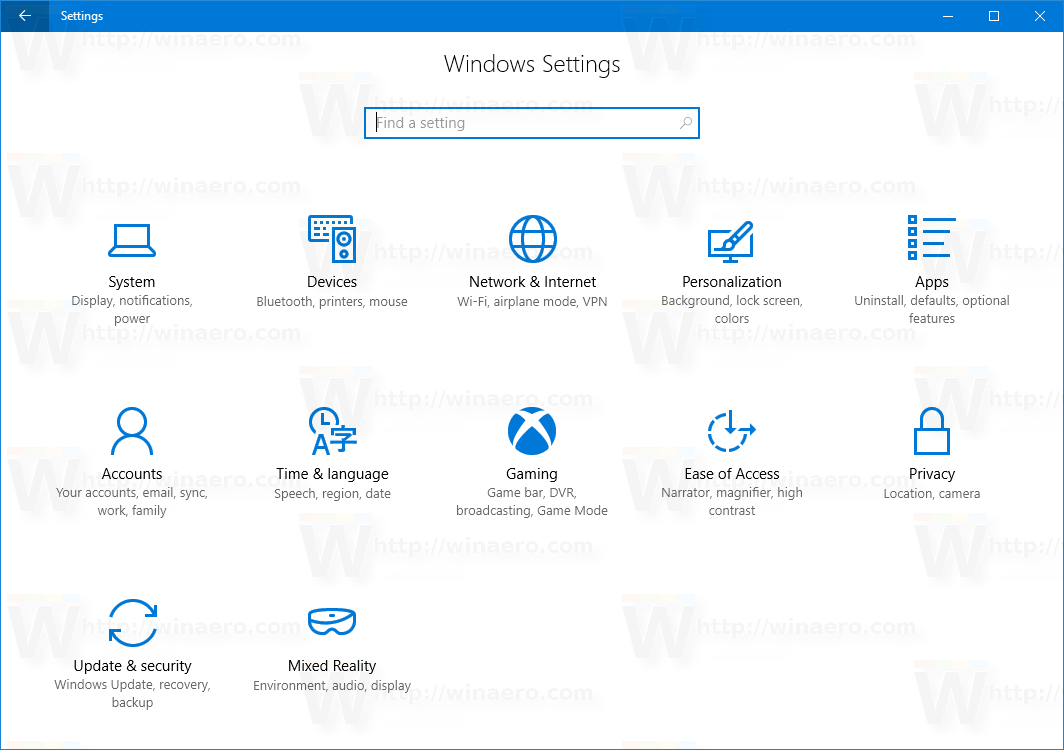
The Settings app in Windows 10 replaces the classic Control Panel. It consists of many pages and inherits a lot of classic settings. Almost every Settings page has its own URI, which stands for Uniform Resource Identifier (URI). It starts with the 'ms-settings' prefix (protocol).
Advertisеment
As you may remember, I covered the ms-settings commands in Windows 10 that you can use to open various pages of the Settings app directly. Refer to the following articles to learn more about them.
- ms-settings Commands in Windows 10 Fall Creators Update
- ms-settings Commands in Windows 10 Creators Update
- Open various Settings pages directly in Windows 10 Anniversary Update
- How to open various Settings pages directly in Windows 10
Recently, I discovered that it is possible to use the ms-settings URIs in right-click menu items. The following article demonstrates this trick in action:
Add Windows Update Context Menu In Windows 10
In short, see the following example:
[HKEY_CLASSES_ROOT\DesktopBackground\Shell\WindowsUpdate]
"MUIVerb"="Windows Update"
"Icon"="%SystemRoot%\\System32\\bootux.dll,-1032"
"SettingsURI"="ms-settings:windowsupdate"

[HKEY_CLASSES_ROOT\DesktopBackground\Shell\WindowsUpdate\command]
"DelegateExecute"="{556FF0D6-A1EE-49E5-9FA4-90AE116AD744}"
You can specify the SettingsURI string value under the context menu identifier and set it to the desired ms-settings command. A special object {556FF0D6-A1EE-49E5-9FA4-90AE116AD744} called from the command subkey performs the operation. So, the pages of the Settings app will be opened natively.
Let's see how to add the following context menu:
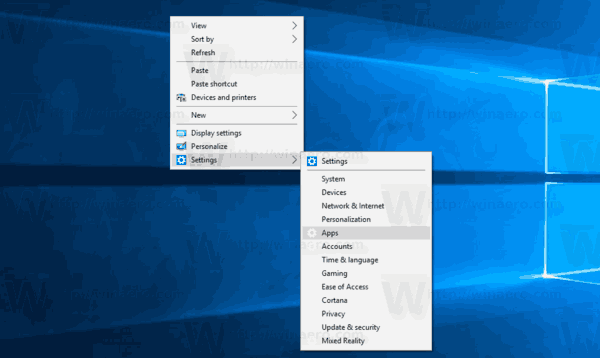
Add Settings Context Menu in Windows 10
To add the Settings context menu in Windows 10, do the following.
- Download the following ZIP archive: Download ZIP archive.
- Unblock the file.
- Extract its contents to any folder. You can place the files directly to the Desktop.
- Double click the "Add Settings Context Menu.reg" file.
- Confirm UAC by clicking on Yes.
- Right-click on the desktop to see the new Settings menu you have added.
Note: The ZIP archive you have downloaded also includes an undo tweak, Remove Settings context menu.reg. Click on it to undo the change and remove the menu.
The desktop right-click menu will include the following the following categories of the Settings app:
- Settings
- System
- Devices
- Network && Internet
- Personalization
- Apps
- Accounts
- Time && language
- Gaming
- Ease of Access
-
Cortana(removed in version 2004) - Privacy
- Update && security
- Mixed Reality
Alternatively, you can use Winaero Tweaker. There is an option under Context Menu\Settings which you can enable to add the menu quickly.
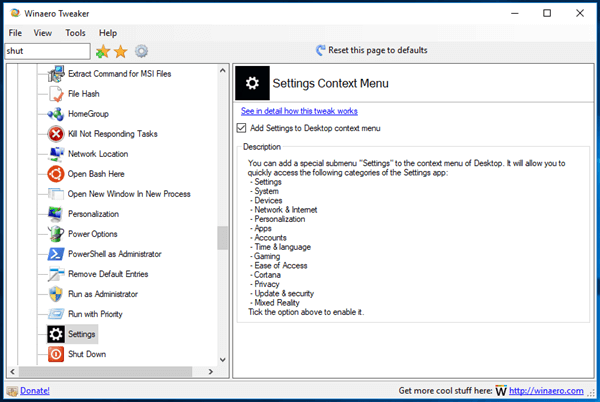
You can download Winaero Tweaker from here:
The contents of the registry tweak file is as follows:
Windows Registry Editor Version 5.00

[HKEY_CLASSES_ROOT\DesktopBackground\Shell\Settings]
"Position"="Bottom"
"Icon"="SystemSettingsBroker.exe"
"SubCommands"=""

[HKEY_CLASSES_ROOT\DesktopBackground\Shell\Settings\shell\01Settings]
"Icon"="SystemSettingsBroker.exe"
"MUIVerb"="Settings"
"SettingsURI"="ms-settings:"

[HKEY_CLASSES_ROOT\DesktopBackground\Shell\Settings\shell\01Settings\command]
"DelegateExecute"="{556FF0D6-A1EE-49E5-9FA4-90AE116AD744}"

[HKEY_CLASSES_ROOT\DesktopBackground\Shell\Settings\shell\02System]
"CommandFlags"=dword:00000020
"MUIVerb"="System"
"SettingsURI"="ms-settings:display"
"Icon"="%SystemRoot%\\System32\\bootux.dll,-1032"

[HKEY_CLASSES_ROOT\DesktopBackground\Shell\Settings\shell\02System\command]
"DelegateExecute"="{556FF0D6-A1EE-49E5-9FA4-90AE116AD744}"

[HKEY_CLASSES_ROOT\DesktopBackground\Shell\Settings\shell\03Devices]
"MUIVerb"="Devices"
"Icon"="%SystemRoot%\\System32\\bootux.dll,-1032"
"SettingsURI"="ms-settings:bluetooth"

[HKEY_CLASSES_ROOT\DesktopBackground\Shell\Settings\shell\03Devices\command]
"DelegateExecute"="{556FF0D6-A1EE-49E5-9FA4-90AE116AD744}"

[HKEY_CLASSES_ROOT\DesktopBackground\Shell\Settings\shell\04Network]
"MUIVerb"="Network && Internet"
"Icon"="%SystemRoot%\\System32\\bootux.dll,-1032"
"SettingsURI"="ms-settings:network"

[HKEY_CLASSES_ROOT\DesktopBackground\Shell\Settings\shell\04Network\command]
"DelegateExecute"="{556FF0D6-A1EE-49E5-9FA4-90AE116AD744}"

[HKEY_CLASSES_ROOT\DesktopBackground\Shell\Settings\shell\05Personalization]
"MUIVerb"="Personalization"
"Icon"="%SystemRoot%\\System32\\bootux.dll,-1032"
"SettingsURI"="ms-settings:personalization"

[HKEY_CLASSES_ROOT\DesktopBackground\Shell\Settings\shell\05Personalization\command]
"DelegateExecute"="{556FF0D6-A1EE-49E5-9FA4-90AE116AD744}"

[HKEY_CLASSES_ROOT\DesktopBackground\Shell\Settings\shell\06Apps]
"MUIVerb"="Apps"
"Icon"="%SystemRoot%\\System32\\bootux.dll,-1032"
"SettingsURI"="ms-settings:appsfeatures"

[HKEY_CLASSES_ROOT\DesktopBackground\Shell\Settings\shell\06Apps\command]
"DelegateExecute"="{556FF0D6-A1EE-49E5-9FA4-90AE116AD744}"

[HKEY_CLASSES_ROOT\DesktopBackground\Shell\Settings\shell\07Accounts]
"MUIVerb"="Accounts"
"Icon"="%SystemRoot%\\System32\\bootux.dll,-1032"
"SettingsURI"="ms-settings:yourinfo"

[HKEY_CLASSES_ROOT\DesktopBackground\Shell\Settings\shell\07Accounts\command]
"DelegateExecute"="{556FF0D6-A1EE-49E5-9FA4-90AE116AD744}"

[HKEY_CLASSES_ROOT\DesktopBackground\Shell\Settings\shell\08Time]
"MUIVerb"="Time && language"
"Icon"="%SystemRoot%\\System32\\bootux.dll,-1032"
"SettingsURI"="ms-settings:dateandtime"

[HKEY_CLASSES_ROOT\DesktopBackground\Shell\Settings\shell\08Time\command]
"DelegateExecute"="{556FF0D6-A1EE-49E5-9FA4-90AE116AD744}"

[HKEY_CLASSES_ROOT\DesktopBackground\Shell\Settings\shell\09Gaming]
"MUIVerb"="Gaming"
"Icon"="%SystemRoot%\\System32\\bootux.dll,-1032"
"SettingsURI"="ms-settings:gaming-gamebar"

[HKEY_CLASSES_ROOT\DesktopBackground\Shell\Settings\shell\09Gaming\command]
"DelegateExecute"="{556FF0D6-A1EE-49E5-9FA4-90AE116AD744}"

[HKEY_CLASSES_ROOT\DesktopBackground\Shell\Settings\shell\10Ease]
"MUIVerb"="Ease of Access"
"Icon"="%SystemRoot%\\System32\\bootux.dll,-1032"
"SettingsURI"="ms-settings:easeofaccess-narrator"

[HKEY_CLASSES_ROOT\DesktopBackground\Shell\Settings\shell\10Ease\command]
"DelegateExecute"="{556FF0D6-A1EE-49E5-9FA4-90AE116AD744}"

[HKEY_CLASSES_ROOT\DesktopBackground\Shell\Settings\shell\12Privacy]
"MUIVerb"="Privacy"
"Icon"="%SystemRoot%\\System32\\bootux.dll,-1032"
"SettingsURI"="ms-settings:privacy"

[HKEY_CLASSES_ROOT\DesktopBackground\Shell\Settings\shell\12Privacy\command]
"DelegateExecute"="{556FF0D6-A1EE-49E5-9FA4-90AE116AD744}"

[HKEY_CLASSES_ROOT\DesktopBackground\Shell\Settings\shell\13Update]
"MUIVerb"="Update && security"
"Icon"="%SystemRoot%\\System32\\bootux.dll,-1032"
"SettingsURI"="ms-settings:windowsupdate"

[HKEY_CLASSES_ROOT\DesktopBackground\Shell\Settings\shell\13Update\command]
"DelegateExecute"="{556FF0D6-A1EE-49E5-9FA4-90AE116AD744}"

[HKEY_CLASSES_ROOT\DesktopBackground\Shell\Settings\shell\14Mixed]
"MUIVerb"="Mixed Reality"
"Icon"="%SystemRoot%\\System32\\bootux.dll,-1032"
"SettingsURI"="ms-settings:holographic"

[HKEY_CLASSES_ROOT\DesktopBackground\Shell\Settings\shell\14Mixed\command]
"DelegateExecute"="{556FF0D6-A1EE-49E5-9FA4-90AE116AD744}"
Edit it according to your preferences. Add or remove pages you want to have in the context menu. Use the commands available in the ms-settings command list mentioned in the beginning of the article to customize your context menu.
Note: The undo tweak is included in the ZIP archive.
Support us
Winaero greatly relies on your support. You can help the site keep bringing you interesting and useful content and software by using these options:

is it possible to add the sub categories in a sub menu with the main categories?
yep. you can add “Subcommands” to the root item and them add regular commands there.
Thanks Sergey! Waiting for next version of Winaero. :)
hehehe :-)
Hi,
I wonder if you can help me wit this. I’ve looked around in Winaero tweaker but I cannot find an answer. I’m having difficulties. In some of the settings “some Settings are Hidden or Managed by Your Organization”. Can you help me find te right place to unlock this?
I’ve tried several options: https://www.xtremerain.com/some-settings-are-managed-by-your-organization/ and
https://answers.microsoft.com/en-us/windows/forum/windows_10-update/system-file-check-sfc-scan-and-repair-system-files/bc609315-da1f-4775-812c-695b60477a93
But that didn’work well. I hope to hear from you.
Rgds
Kees (Netherlands)
Please see this: https://winaero.com/blog/hide-settings-pages-windows-10/
If you have Windows 10 Pro, use gpedit as described in the post.
If not, open Registry at
HKEY_LOCAL_MACHINE\SOFTWARE\Microsoft\Windows\CurrentVersion\Policies\Explorer
Remove the
SettingsPageVisibilityparameter.If doesn’t help, Reset All Local Group Policy Settings at once in Windows 10
To add the Settings context menu in Windows 10 “Lines!?”
Em Language Português:
Como fazer para aumentar o números de linhas de registro no Setting Context!? Por que não é suficiente para aparecer as opções!?
Ou
Qual o comando no regedit, que aumenta o numeros de linhas padrão do Setting Context!? 15 lines!? Como almentar paraa 30 lines!?
Folks, a bug in Winaero Tweaker 0.18 prevents the appropriate tweak from working properly.
Reportedly, it affects recent builds like Windows 10 version 20H2.
This will be fixed in the next version of Winaero Tweaker in early 2021.
Thanks Sergey for your December 24 2020 post about the bug in Winaero Tweaker 0.18 causing this tweak to not work.
I have just done 2 clean installs of Win 10 20H2 and could not get the tweak to work in either. However the .reg files you provide in the Zip archive download do still work so I have gone back to those.
Many thanks.
Peter (New Zealand)
Yep, the tweak works.
The bug is also fixed, but I didn’t release a new version yet. I need to finish some things before it.