Editing a video can be a need of any hour these days. People hunt for the best way to get the task done and end up possessing the tools that they shouldn’t have. We are here going to acquaint you if you aren’t with Windows Movie Maker. It is a built-in video editor for Windows7/8. There are lots of users who are happy with this and have created their impressive projects.
Advertisеment
Besides, editing videos with Windows Movie Maker, you can easily make slideshow with it. Adding text to the projects, music and the like are easy for this tool. However, Microsoft is no longer continuing to develop the program. We don’t know the reason though.
There is no need to be sad about it. We can have a lot of alternatives in the market for it. One of the most recommended among those is an advanced video editor FilmoraPro. While you have this, no one can stop you from producing a high quality video irrespective of how pro you are. FilmoraPro is indeed a helpful and powerful tool for semi-pros if you want to improve your video editing experience quickly. Another Windows Movie Maker alternative Filmora9 is easy to use if you are new to video editing industry.
Well! Let’s now cut to the chase! We, through this article, are going to let you understand why Windows Movie Maker is popular among users. The section that follows it will show you how you can edit videos in Windows Movie Maker. Please scroll down and get the questions answered.
Why Windows Movie Maker is Popular
You can use it to make slideshow easily
With the free Windows Movie Maker, there is a provision of creating the slideshows to make the memories collected in an interesting way. Using the perfect themes, transitions and having the permission to add music, it’s not difficult to guess why Windows Movie Maker is still popular among users.
It is free and easy
Apart from providing the fun elements, Windows Movie Maker demands no cost from you. Where there are alternatives in the market that can come with a huge bill, this tool is great to have if one gets displeasured with the thought of spending money on editing video Windows Movie Maker.
Moreover, when you are a newbie, this tool can be a great companion of yours. This is because it is extremely easy to learn and use. Having an effortless and intuitive tool and work sans any cost is what makes Windows Movie Maker so well liked.
Edit video with Windows Movie Maker
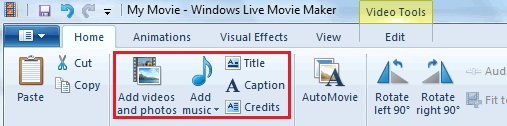
Step 1: How to add video/audio/image to Windows Movie maker
First things first! You need to add the movie or the video that is to be edited with Windows movie Maker. In order to do this, click on Import Video and browse for the location where the source video file is stored. Choose one or more than one videos as per the needs. To add still images or audio/music files, you can click the corresponding buttons i.e. Import pictures and Import audio or music respectively.
Step 2: How to cut/split video in Windows Movie Maker
Launch the tool on your PC and drag the video that needs to be cut or split. When you’re done adding the file, the Windows Movie Maker will begin to analyze it. The frames on the right side will be shown now.
Move to the frame that should be the initial point of the edited video. Upon reaching the correct frame, right click and choose Set Start Point. Now, navigate to the frame that you decide to be the end point. Click Set End Point.
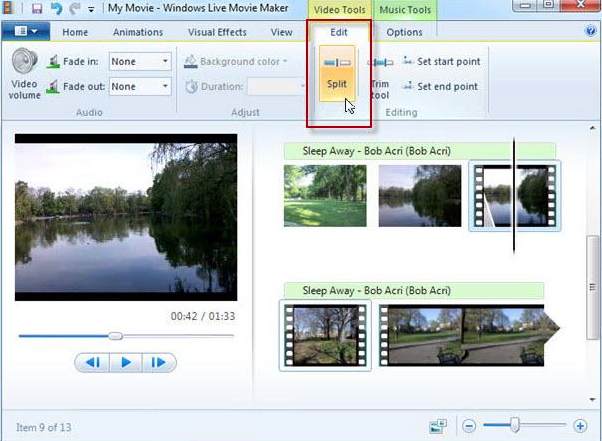
You can now preview your output. If you are satiated with editing through Windows Movie Maker, click on Save Movie given in the main menu. After cutting, either upload to the social network or keep it save din your hard disk.
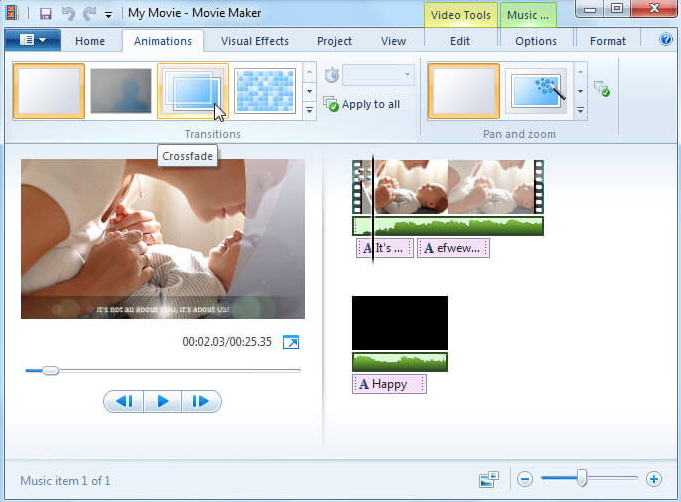
Step 3: How to add Transition to Windows Movie Maker
Transition is one of the most vital things that need to be done if one wants a perfect video editing. To add one free from Windows Movie Maker, all you need is to open the project and then pick out the clip where you want to add transition. A blue highlighted boundary will appear on the selected clip.
Now, go to the Animations tab and you will see two options i.e. Transitions and Pan and zoom. In the Transitions section, you can use the drop-down icon so that more of the transition effects will be seen. You can hover the cursor over a transition effect to preview how the effect is. Now, choose the transition that you feel suitable and export your video with it.
Step 4: How to Save Movie in Windows Movie Maker
After editing video with Windows Movie Maker and getting satisfied, you need to know how you can save your project. Simply hit on the Save Movie button in the Home menu. The entire default settings will be applied. Hit on the tiny triangle next to Save Movie button and place the mouse Recommend for this project. This will show the detailed settings of the project. Lastly, type the file name and save the video.
Conclusion
Having a tool like Windows Movie Maker can be a blessing when you are trying your hands on some video editing functionality. We have provided greatly detailed information that we felt you should know about video editing through Windows Movie Maker. If you want more of such topics, please stay tuned with us.
Support us
Winaero greatly relies on your support. You can help the site keep bringing you interesting and useful content and software by using these options:
