If you want to sign in automatically without a password in Windows 11, you can create a local profile and use an empty password. While that method works fine, many people want to use their Microsoft Accounts in Windows 11 for additional services, sync, apps, etc.
Advertisеment
When you sign in to Windows 11 with a Microsoft Account, the operating system forces you to use your password or a PIN code. Some users may find it annoying to enter a password every time. Because no other people have access to their computers, security is not a concern. This article will show you how to sign in to Windows 11 without a password.
It is worth mentioning that you can substitute clunky passwords with a more convenient and secure biometric authentication. So, if your device has a Windows Hello-compatible webcam or a fingerprint scanner, you can sign in to Windows 11 using face recognition or your fingerprint.
Sign in automatically without a password in Windows 11
Before you enable automatic sign-in without a password in Windows 11, you need to disable Windows Hello. After that, you need to make the OS use your account data in order to proceed. The latter can be done with a classic Control Panel applet, or with a Registry tweak.
Disable Windows Hello on Windows 11
- Press Win + I to open Windows Settings in Windows 11.
- Go to Accounts > Sign-in Options.
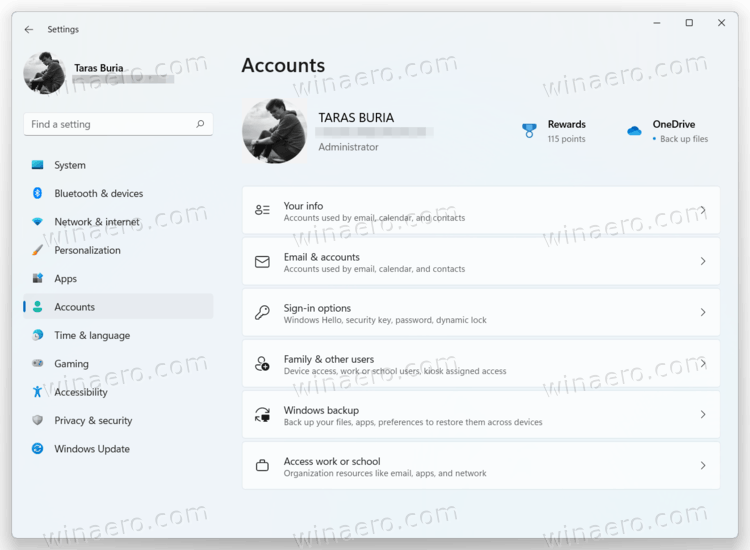
- Disable the For improved security, only allow Windows Hello sign-in for Microsoft Accounts on this device (Recommended) option.
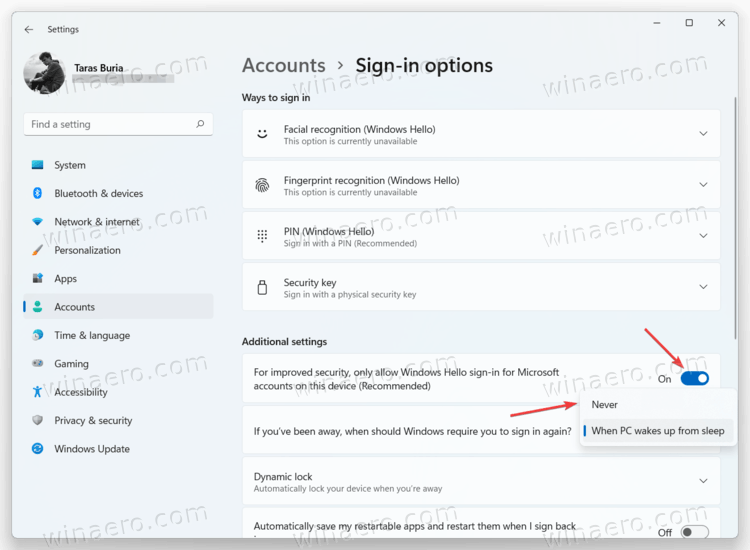
- Next, select Never from the "If you've been away, when should Windows require you to sign in again" drop-down list.
- Now, click your current sign-in method in the Ways to sign-in list.
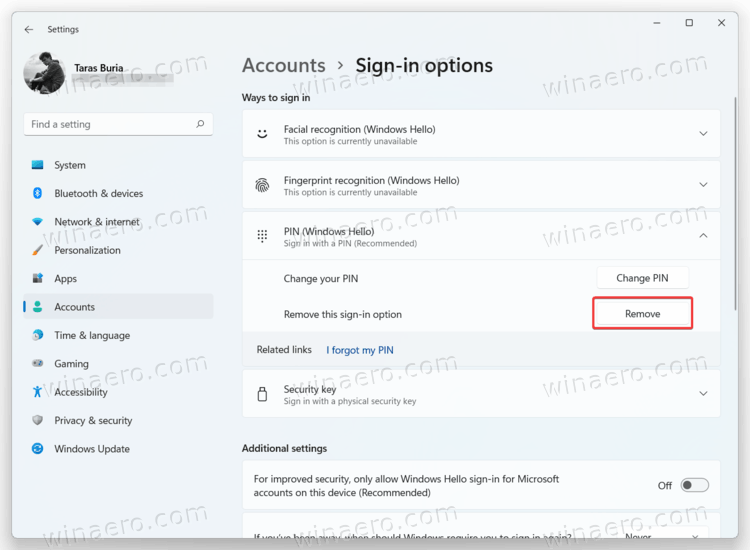
- Click Remove.
- Finally, confirm your identity by entering the password from your Microsoft Account.
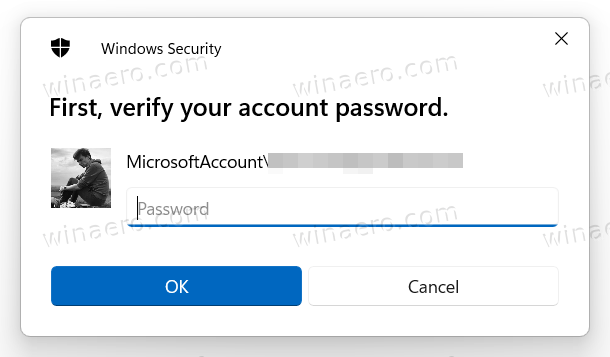
With Windows Hello disabled, you can now move to the next chapter and learn how to sign in automatically to Windows 11 without a password.
Sign in automatically in Windows 11
- Press Win + R and enter the
netplwizcommand into the Run box.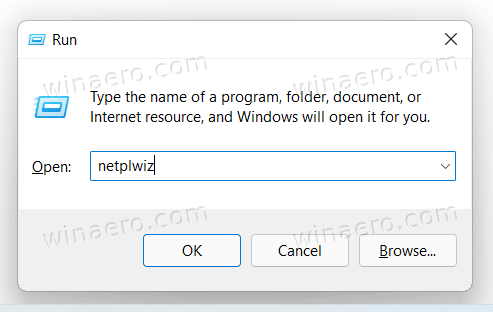
- Select your user account in the window that opens and uncheck the "Users must enter a user name and password to use this PC" option.
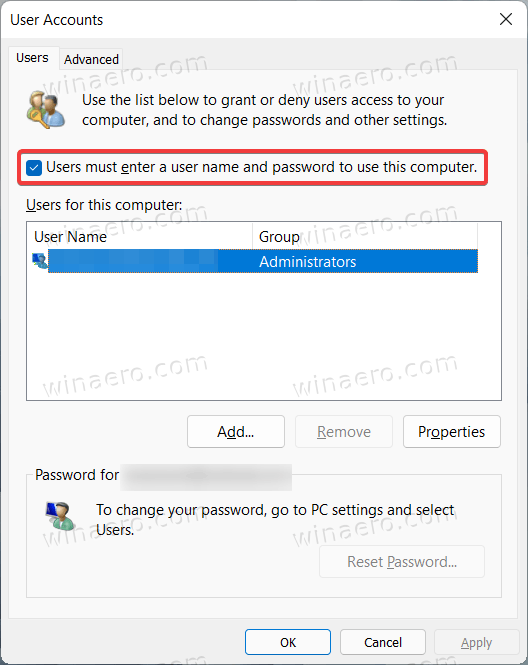
- Click OK to apply changes.
- Now you need to enter your credentials. For a local account, Windows will automatically populate the User name field, leaving you to type just your password. For a Microsoft Account, type your email address in the user name field. Now, fill in your password and confirm it in the corresponding field; click OK.
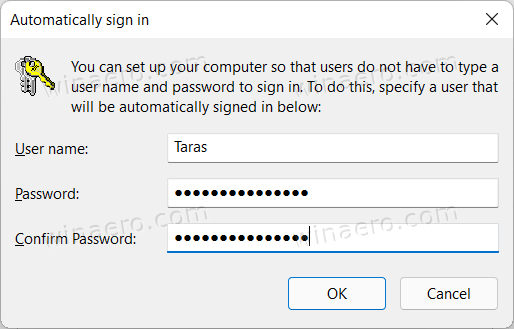
- Finally, restart your computer. After Windows 11 starts, it will not ask you for a password, PIN, or biometrical authentication.
You are done!
Alternatively, you can use Sysinternal's AutoLogon app to configure the same with a more convenient UI.
Using the AutoLogon tool
Microsoft also provides a little tool that takes care of automatic sign-in without a password in Windows 11. It stores your encrypted username and password in the Windows registry, preventing other people from finding your credentials.
To automatically sign in to Windows 11 using the AutoLogon app, do the following.
- Download the AutoLogon tool from the official website. It weighs just a few hundred kilobytes and does not require installation.
- Unpack files to any preferable folder. Do not delete the files after completing the process.
- Run the
AutoLogon64.exefile.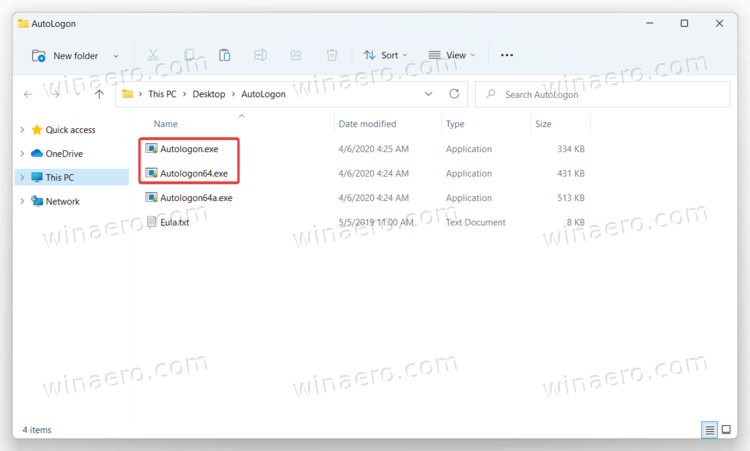
- Enter your password and click Enable. Note that the app should automatically populate the first two fields with your user name and domain name. Tip: On personal computers, a domain name is just the name of your current device. You can learn how to rename a PC in Windows 11.
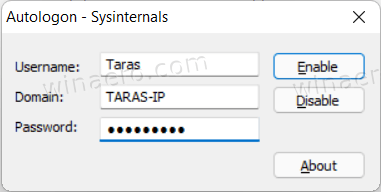
- Restart your computer to apply changes.
Enable sign-in with a password in Windows 11 (restore defaults)
Suppose you want to restore defaults and turn back on sign-in with a password in Windows 11. In such a case, here is what you need to do.
- Press Win + R and type
netplwiz. Press Enter. - In a new window, select your user and place a checkmark next to the "User must enter a user name and password..." option.
- Press OK and restart your computer. Unlike the first part of this guide, Windows 11 does not require entering credentials when you turn back on sign-in with a password.
Restore defaults with AutoLogon
If you used the AutoLogon tool to disable sign-in with a password in Windows 11, do the following:
- Find the folder with the AutoLogon tool and open the exe file.
- Click Disable. Again, no need to enter any password.
- Restart your computer.
Use Windows Registry to sign in without a password
Warning: This method is obsolete! It stores your credentials as plain text in Windows Registry, visible to any user with physical access to your device. This part of the article is for educational purposes only, and we strongly recommend not using it in practice.
To automatically sign in to Windows 11 without a passwords with a Registry tweak, do the following.
- Press Win + R and enter the
regeditcommand. - Go to
HKEY_LOCAL_MACHINE\SOFTWARE\Microsoft\Windows NT\CurrentVersion\Winlogon. Copy and paste the pass into the address bar. - Click Edit > New > DWORD (32-bit) Value and rename the new value to
AutoAdminLogon.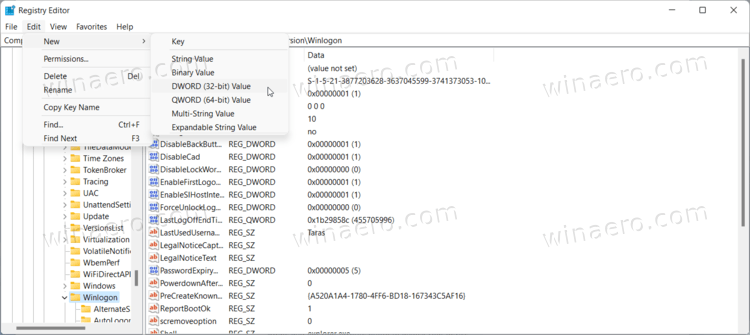
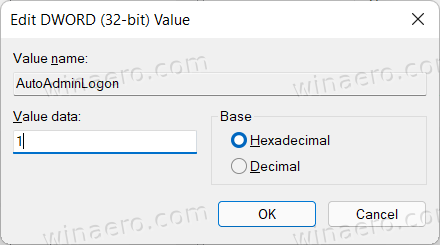
- Double-сlick the value and change its value data to
1.
- Click Edit > New > String Value and rename the new value to
DefaultUserName. - Open the value and change its value data to your user name. To find your real user name in Windows (not your first and second name in Microsoft Account), open a new Windows Terminal and type
echo %username%under the Command Prompt profile.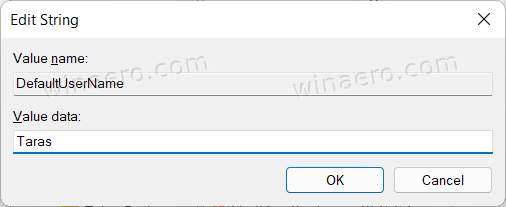
- Next, click Edit > New > String Value and rename it to
DefaultPassword.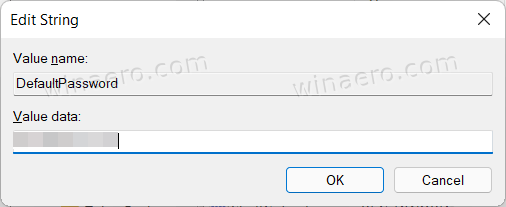
- Double-click the value and fill in the Value Data field with your password.
- You can now restart your PC and see all the changes in action.
Finally, to make Windows 11 ask you for a password on sign-in, repeat steps 1 and 2 and remove values AutoAdminLogon, DefaultUserName, and DefaultPassword.
Support us
Winaero greatly relies on your support. You can help the site keep bringing you interesting and useful content and software by using these options:

Brilliant. Works with Windows 11.
Nice guide. still new to win 11. This helped a lot.
Second one (netplwiz) doesn’t work, there’s no checkbox to disable password requirement.
This does’t work anymore. If I use “netplwiz” there is no box. “userpasswords2” doesn’t work either. Now my pc can’t boot fully and ends up returning a “could not sign on” message and leaves you at a generic desktop with no taskbar.
Disable Windows Hello to see the check box.
Thank you so much for this very detailed and awesome explanation!!!
Windows 11 sign in automatically without a password
Disable Windows Hello on Windows 11
Step 7. Finally, confirm your identity by entering the password from your Microsoft Account.
Where do I go to enter my password? I did not see the pop up that you are showing. I would appreciate an answer. I did not follow the procedure, because I was afraid that I could not get back into my tablet.
Thank you!