If you have a printer installed in Windows 10 that you no longer use, then it is a good idea to remove its drivers. It can be a shared printer that is no longer accessible, a physically disconnected printer or a software-only printer to print to a specific format. When you remove a printer, its drivers remain installed in Windows 10. Here is how to remove the drivers.
Advertisеment
To uninstall a printer driver in Windows 10, you must be signed in with an administrative account. You need to use the Print Server Properties app. There are various methods to open it, including the Control Panel, the Settings app, the Print Management MMC snap-in, and the good old Printers folder. Let's review these methods.
As you may already know, Windows 10 includes a Print Management MMC snap-in that offers extended options to manage your local and network printers. See the article on how to Backup and Restore Printers in Windows 10. The Print Management snap-in can be used to remove a printer driver.
To uninstall a printer driver in Windows 10, do the following.
- Press the Win + R keys on the keyboard and type
printmanagement.mscinto the Run box.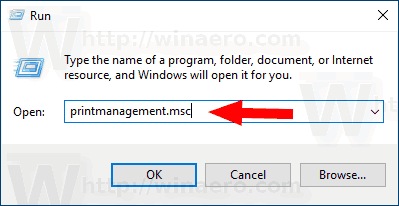
- On the left side of Print Management, select Print Servers and expand it to the local print server item.
- On the left, click on the Drivers item. You'll see the list of installed printer drivers.
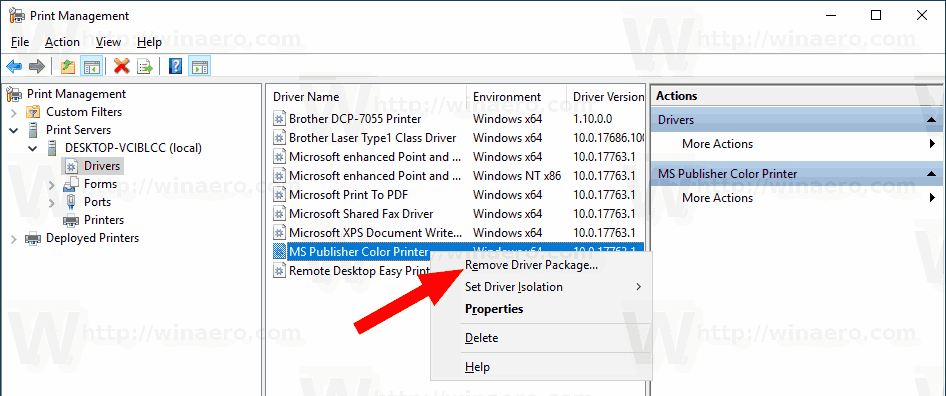
- Select one or several printer drivers you want to uninstall in the middle pane, and right-click on the selected lines.
- From the context menu, select Remove Driver Package....
- In the next dialog, click on the Delete button to remove the drivers.
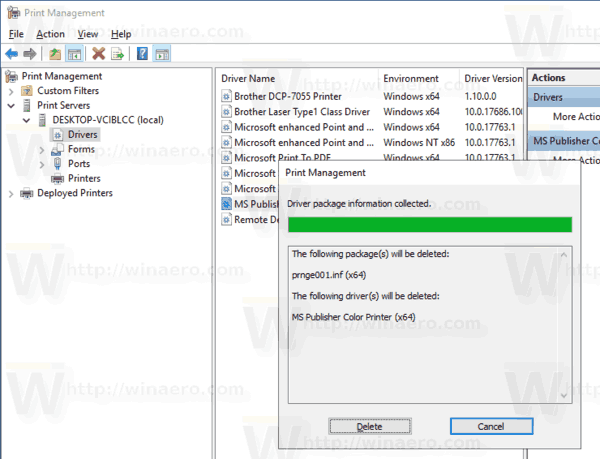
You are done!
Alternatively, you can use the following methods to open the Print Server properties.
Extra methods to manage installed printer drivers
printui.exe
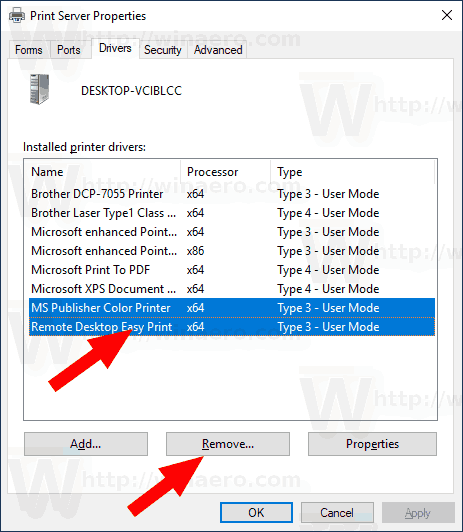
Windows 10 comes with a special tool, printui.exe, that provides the ability to manage a printers using a command line. Using it, you can open the Print Server properties dialog and remove a printer driver.
- Press the Win + R keys on the keyboard and type
printui /s /t2into the Run box.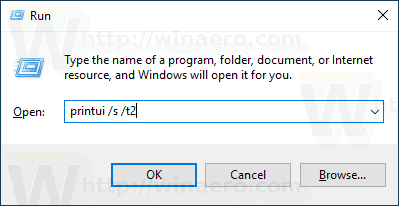
- Open the Drivers tabю
- Select one or more drivers in the list.
- Click on the Remove button.
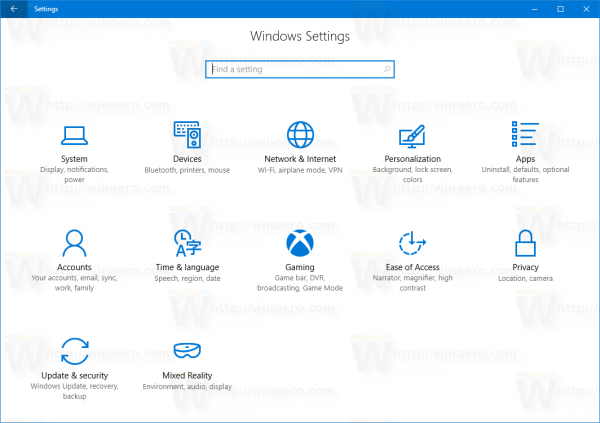
Settings
- Open the Settings app.
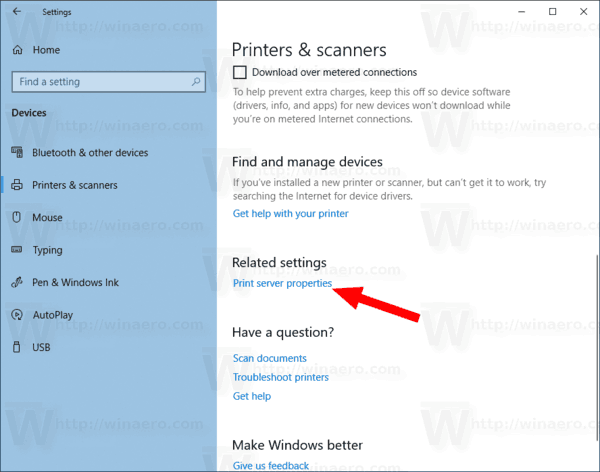
- Go to Devices -> Printers & scanners.
- On the right, click on the link Print server properties.
Control Panel
- Open the classic Control Panel app.
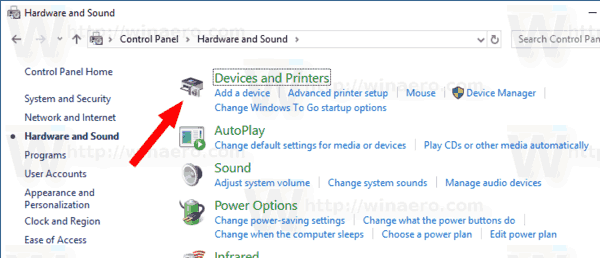
- Go to Control Panel\Hardware and Sound\Devices and Printers.
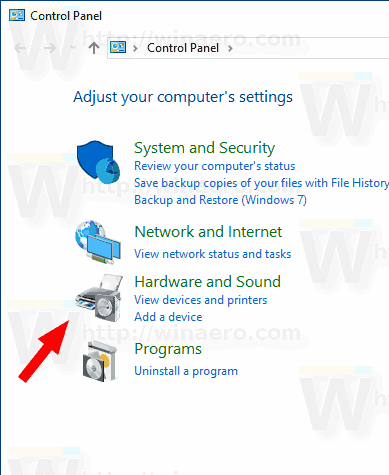
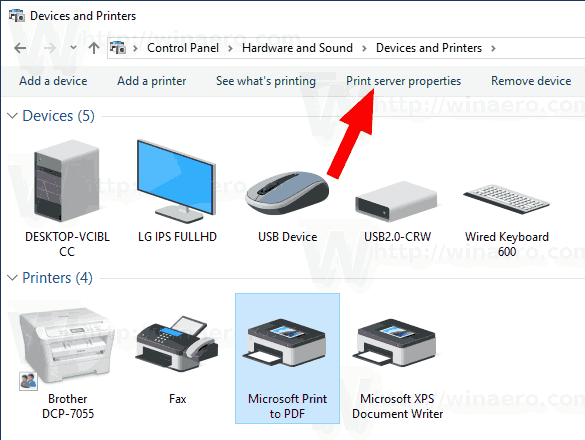
- Select any printer, then click on the Print server properties button on the toolbar.
The classic Printers folder
- Press the Win + R keys to open the Run dialog. Type the command
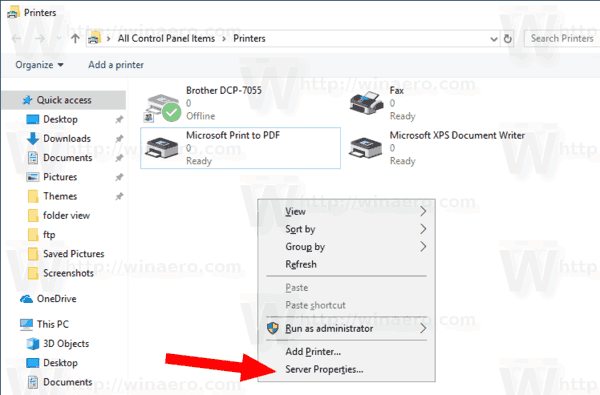
shell:PrintersFolderinto the Run box. - In the Printers folder, right-click on an empty area in the printer list.
- Select Server properties... from the context menu.
Tip: See the article Create Printers Folder Shortcut in Windows 10 to learn more about the shell:PrintersFolder command.
That's it.
Related articles:
- Remove Printer in Windows 10
- Rename Printer in Windows 10
- Add Shared Printer in Windows 10
- How to Share a Printer in Windows 10
- Backup and Restore Printers in Windows 10
- Open Printer Queue With a Shortcut in Windows 10
- Set Default Printer in Windows 10
- How to stop Windows 10 from changing the default printer
- Open Printer Queue in Windows 10
- Create Printers Folder Shortcut in Windows 10
- Clear Stuck Jobs from Printer Queue in Windows 10
- Create Devices and Printers Shortcut in Windows 10
- Add Devices and Printers Context Menu in Windows 10
- Add Devices and Printers To This PC in Windows 10
Support us
Winaero greatly relies on your support. You can help the site keep bringing you interesting and useful content and software by using these options:

Thank you for the information..