Recent Windows 10 builds come with a new "Region & Language" page in the Settings app. It completely replaces the classic "Language" applet of Control Panel, which is removed starting with Windows 10 Build 17063. The new page allows users to change the display language, text-to-speech, speech recognition, and handwriting options. Here is how to create a special "Text Services and Input Languages" shortcut to open the classic applet directly with one click.
Advertisеment
If you upgraded to a build from the Windows 10 version 1803 branch, its new language options can look strange to you. Unlike previous releases, it does not include the Language settings UI in the Control Panel. Now you have to use Settings to configure language settings in Windows 10.
As of this writing, Windows 10 version 1803 doesn't offer any Settings page which could allow you to change the hotkeys for the input language or enable the Language bar. Instead, it offers a link which opens the classic Control Panel applet. Ironically, this applet is not accessible from the classic Control Panel any more. The situation should be changed with the final release version of Windows 10 version 1803.
Now, to open the Text Services and Input Languages applet, you need to go through many Settings pages and perform many mouse clicks. To save your time, you can create a special shortcut. Here is how.
To create the Text Services and Input Languages shortcut in Windows 10, do the following.
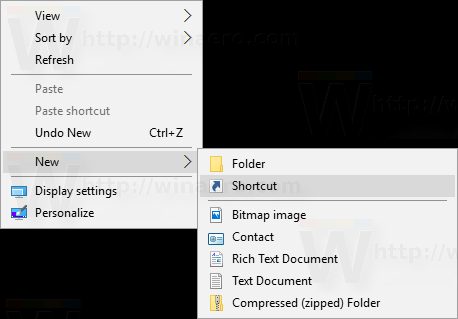
- Right click the empty space on your Desktop. Select New - Shortcut in the context menu.
- In the shortcut target box, type or copy-paste the following:
Rundll32 Shell32.dll,Control_RunDLL input.dll,,{C07337D3-DB2C-4D0B-9A93-B722A6C106E2}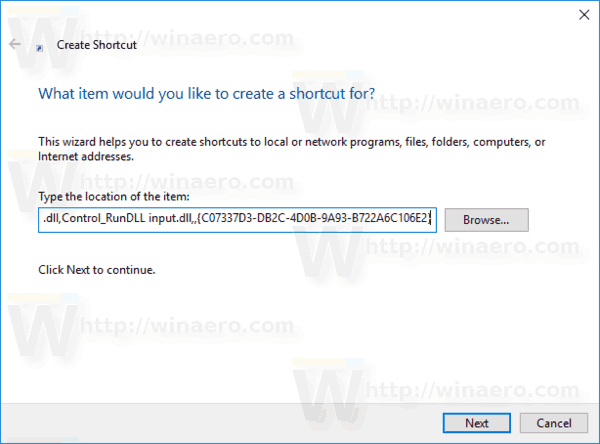
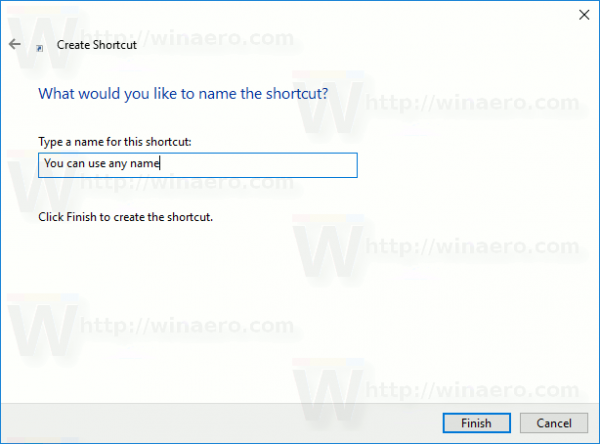
- Use the line "Text Services and Input Languages" without quotes as the name of the shortcut. Actually, you can use any name you want. Click on the Finish button when done.
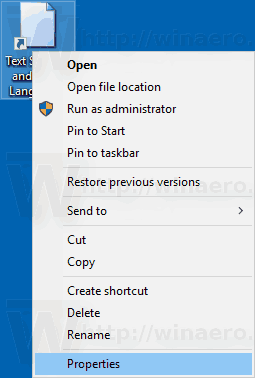
- Now, right click the shortcut you created and select Properties.
- On the Shortcut tab, you can specify a new icon if you wish. You can use the icon from the file
C:\Windows\System32\input.dll.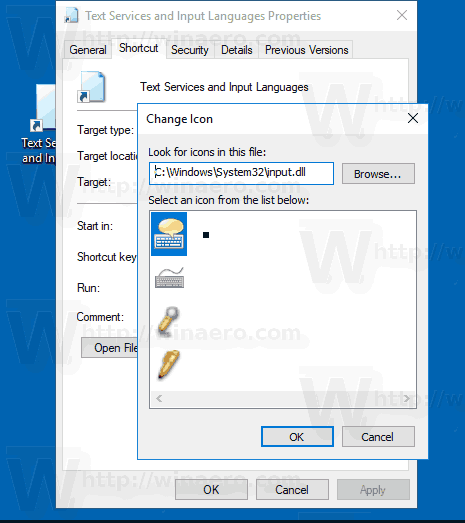
- Click OK to apply the icon, then click OK to close the shortcut properties dialog window.
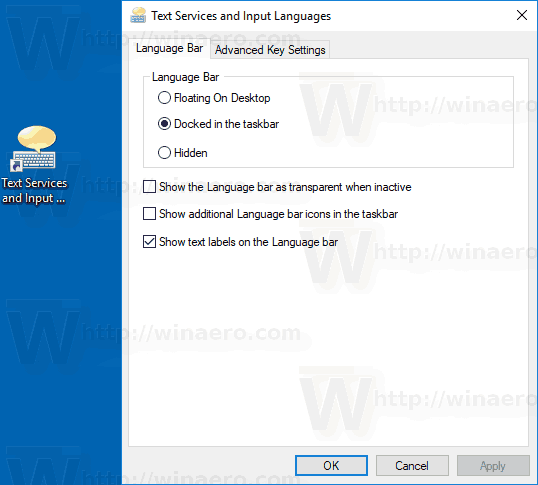
You are done. Double-click the shortcut to open the following dialog:
Now, you can move this shortcut to any convenient location, pin it to taskbar or to Start, add to All apps or add to Quick Launch (see how to enable Quick Launch). You can also assign a global hotkey to your shortcut.
Support us
Winaero greatly relies on your support. You can help the site keep bringing you interesting and useful content and software by using these options:

I am not able to type in Japanese Font
Thanks man, it helped a lot