A default printer is the one to which all documents are sent by default for printing. Due to constant changes to the user interface in Windows 10, many novice users may have issues changing the default printer. Here is how it can be done.
Advertisеment
As you may already know, Microsoft has implemented a new behavior for printers in Windows 10. Starting in Build 10565, Windows 10 changes the default printer to the last used one automatically. While this can be useful for some users, many others might prefer to set the default printer manually.
Here is how it can be done.
To set the default printer in Windows 10, do the following.
- Open the Settings app.
- Navigate to the following page: Settings -> Devices -> Printers and Scanners.
- See the option named "Let Windows manage my default printer". Turn it off as shown below.
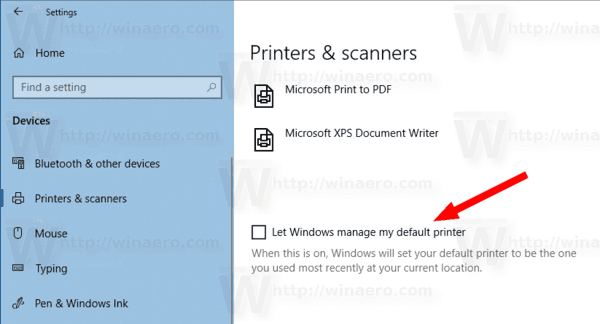
- Now, select the desired printer in the list.
- Click on the 'Manage' button.
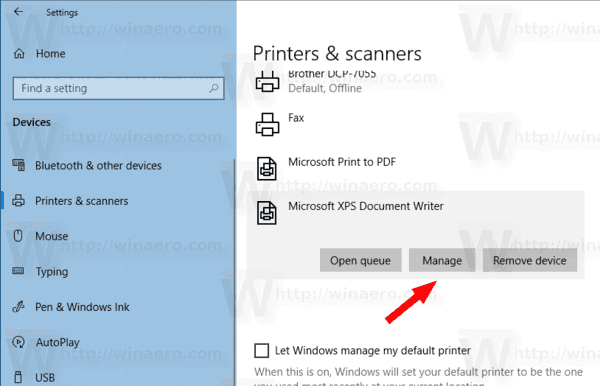
- On the next page, click on the 'Set default' button.
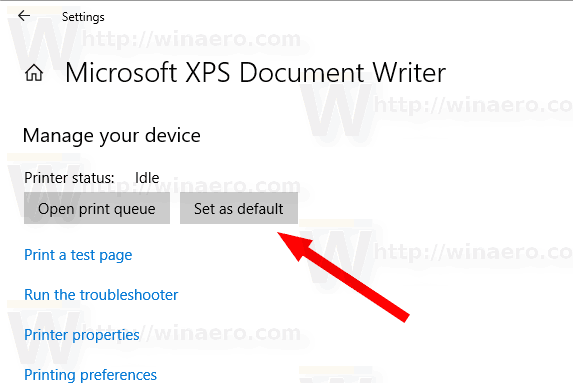
The selected printer is now your default printer. Also, Windows 10 will not change your default printer every time you select some other printer in the print dialog.
Alternatively, you can use the classic Control Panel app to set your default printer in Windows 10.
Set the Default Printer using the Control Panel
- Open the classic Control Panel app.
- Go to Hardware and Sound \ Devices and Printers.
- Under Printers, right-click on the desired printer.
- Select Set as default printer from the context menu.
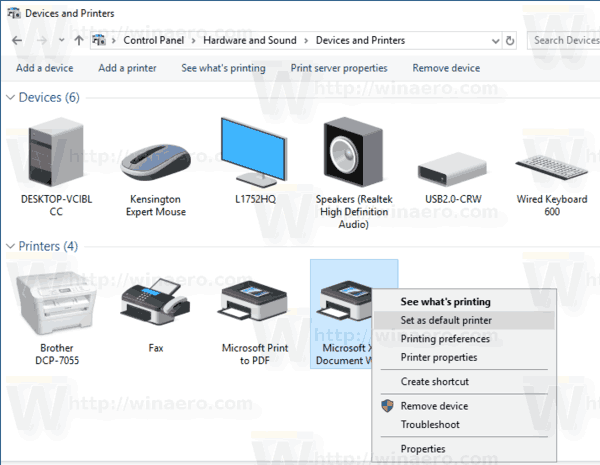
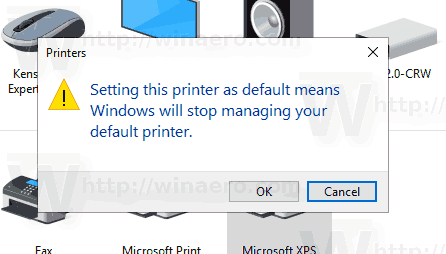
- If you have the Let Windows manage my default printer option enabled, you will need to confirm the operation and disable the feature.
The printer will now be set as your default printer.
Tip: If you have a local or network printer connected to your Windows 10 PC, you may need to open its queue or printing status window occasionally to remove print jobs which have got stuck or pause printing. You can create a special shortcut with a rundll32 command which will allow you to access the printing queue directly with one click. See the article:
Open Printer Queue With a Shortcut in Windows 10
Other articles of interest:
- How to stop Windows 10 from changing the default printer
- Open Printer Queue in Windows 10
- Create Printers Folder Shortcut in Windows 10
- Clear Stuck Jobs from Printer Queue in Windows 10
- Create Devices and Printers Shortcut in Windows 10
- Add Devices and Printers Context Menu in Windows 10
- Add Devices and Printers To This PC in Windows 10
Support us
Winaero greatly relies on your support. You can help the site keep bringing you interesting and useful content and software by using these options:
