If you use the System Restore function in Windows 10 occasionally to revert your operating system to the last known stable point when it was working correctly, you might be interested in creating a new restore point automatically on a schedule. In this article, we will see how it can be done.
Advertisеment
System Restore isn't a new feature of Windows 10. This technology was introduced in 2000 with Windows Millenium Edition. It allows you to roll back the installed operating system to the previous state. System Restore creates restore points which keep a complete state of Registry settings, drivers and various system files. The user can roll back the operating system to one of the restore points if Windows 10 becomes unstable or unbootable.
Ensure that your user account has administrative privileges.
Now, enable System Restore if it is disabled.
Before proceeding, you need to increase the system restore point frequency. This can be done with a simple Registry tweak which is described here:
Increase System Restore Point Frequency in Windows 10
Now, follow the instructions below.
To create system restore point on a schedule in Windows 10, do the following.
- Open Administrative tools and click on the Task Scheduler icon.
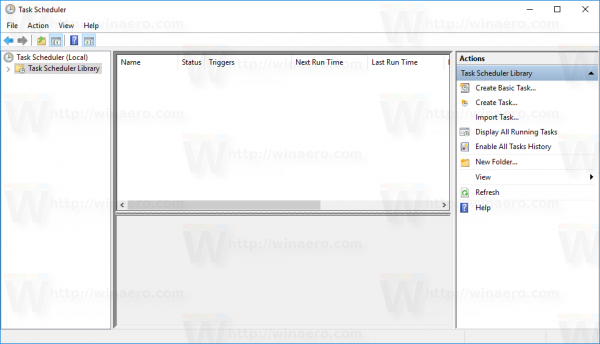
- In the left pane, click the item "Task Scheduler Library":
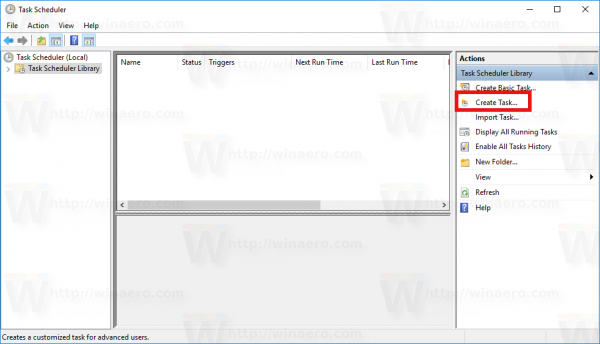
- In the right pane, click on the link "Create task":
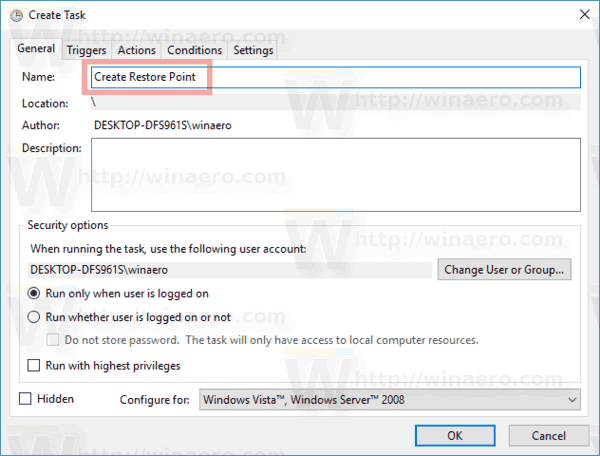
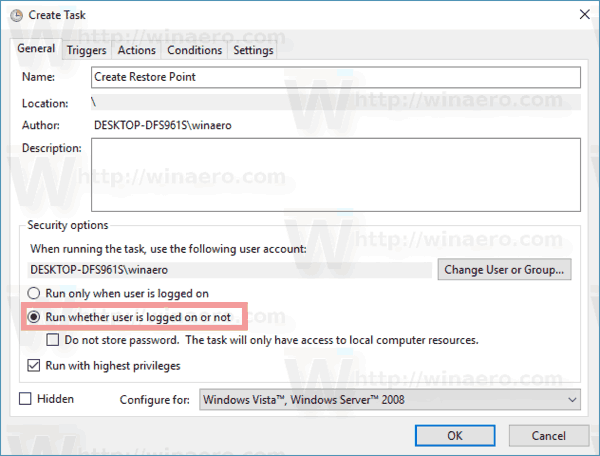
- A new window titled "Create Task" will be opened. On the "General" tab, specify the name of the task. Pick an easily recognizable name like "Create Restore Point".
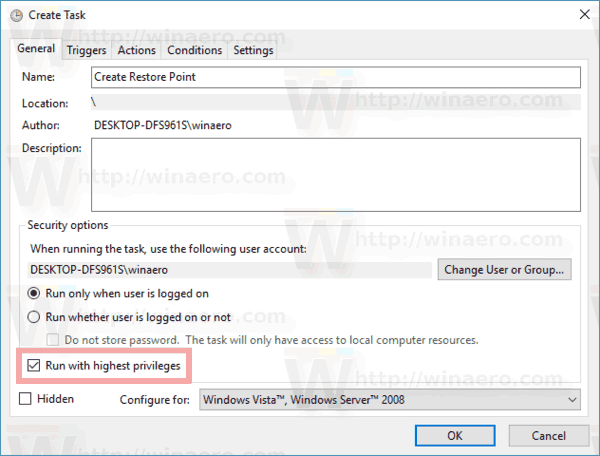
- Tick the checkbox named "Run with highest privileges".
- Enable the option "Run whether user is logged on or not".
- Switch to the "Actions" tab. There, click the "New..." button:
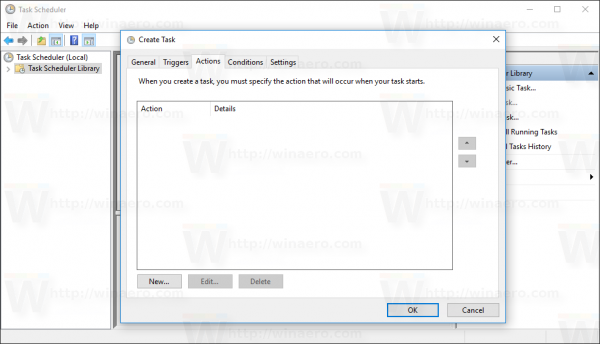
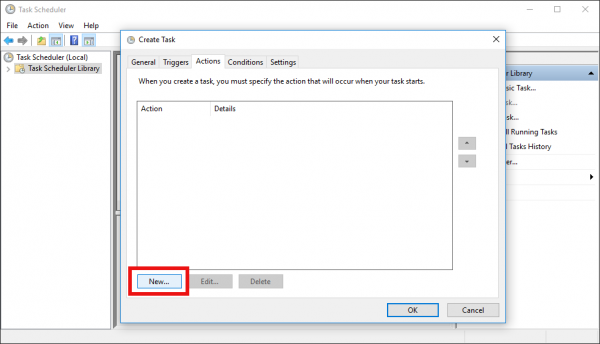
- The "New Action" window will be opened. There, you need to specify the following data.
Action: Start a program
Program/script: powershell.exe
Add arguments(optional): -ExecutionPolicy Bypass -Command "Checkpoint-Computer -Description \"Restore Point (Automatic)\" -RestorePointType \"MODIFY_SETTINGS\""
Tip: To learn more about this PowerShell command, see the following article: Create A Restore Point in Windows 10 with PowerShell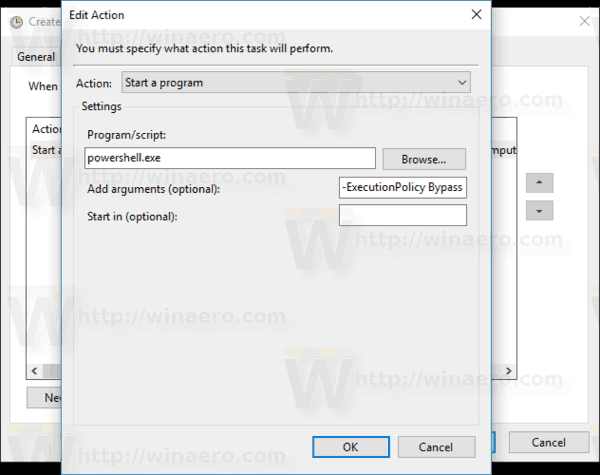
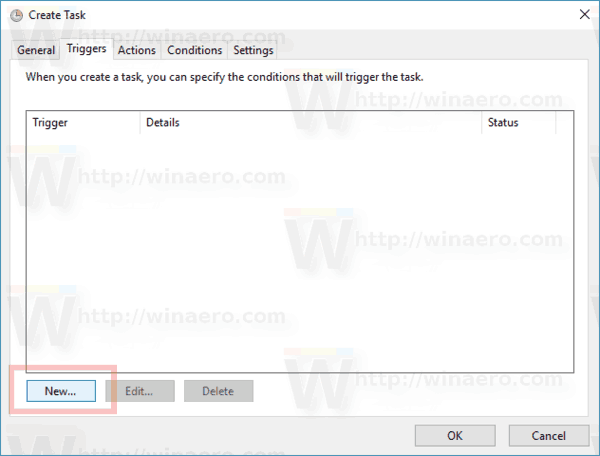
- Go to the Triggers tab in your task. There, click on the New button.
- Under Begin the task, select "On a schedule" in the drop down list. Select a Daily, Weekly, or Monthly schedule you and configure its settings.
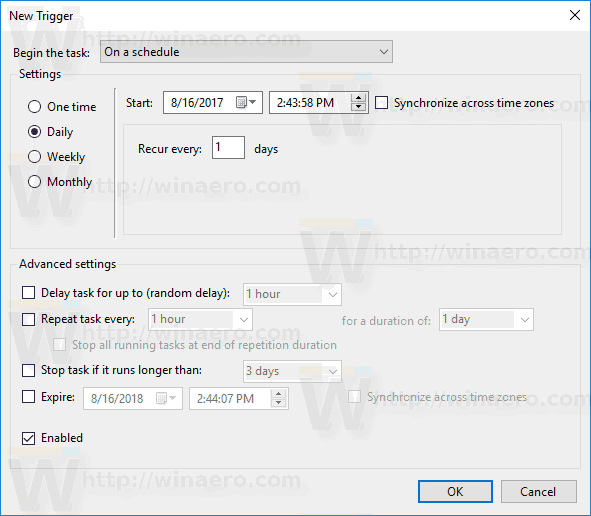 Now, click the OK button.
 - Switch to the "Conditions" tab:
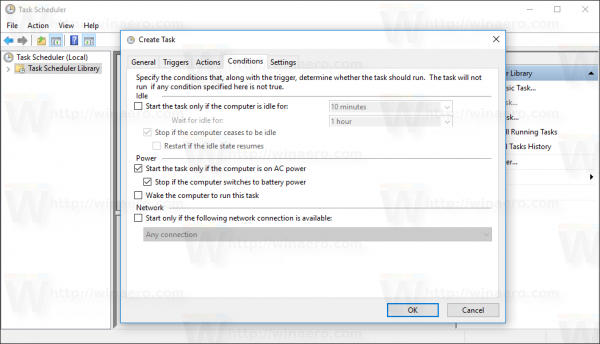
Untick these options:
- Stop if the computer switches to battery power
- Start the task only if the computer is on AC power
See the following screenshot: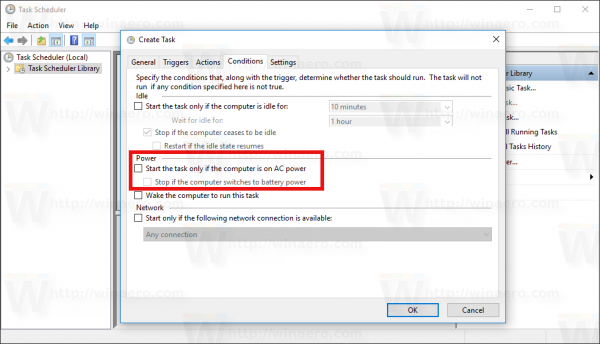
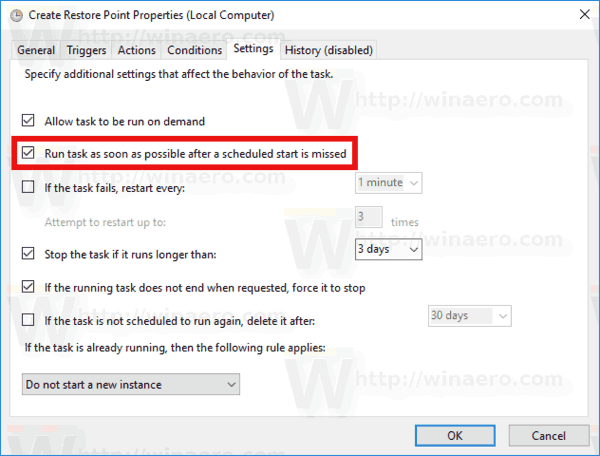
- On the Settings tab, enable the option "Run task as soon as possible after a scheduled start is missed".
- Click OK to create your task and type your password when prompted.
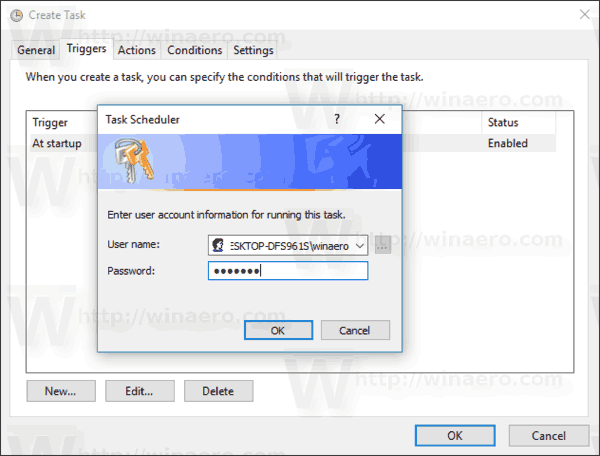
Note: Your user account should be password protected. By default, unprotected user accounts cannot be used with scheduled tasks.
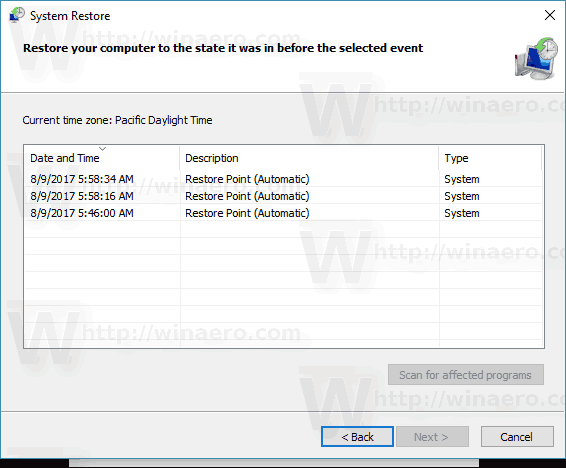
Now, every time you start Windows 10, it will create a new restore point automatically. You can use it later to restore your PC.
That's it.
Support us
Winaero greatly relies on your support. You can help the site keep bringing you interesting and useful content and software by using these options:

After creating this scheduled task, I don’t see the task in scheduled tasks. Where can I find this and how would I modify it? Thanks.
it should be right in that folder where you created it.
Thanks for these great instructions.
I’ve changed my password. How do I get back in to change it for the task?
Just modify the task in TS.
I set this up and restore points are created. However, I tried to restore from a restore point and it didn’t work – the message was that a file is missing. Any idea what I missed?
Hi, i try to schedule a restore point for every day with powersell,wmic.exe,wscrip.exe no one works,tell me what to do….thanks
Method 1 for Win 10 Pro
Automatically create daily restore points via GPEdit.msc:
gpedit.msc > in left pane Computer Configuration > Administrative Templates > Windows Components > Windows Defender Antivirus > Scan > in right panel edit and enable “Create a system restore point.”
Caution: daily restore points make consume lots of space!
^From
——————————-
Method 2 for Win10 Home
Automatically create daily restore points via regedit:
regedit > HKEYLOCAL_MACHINE\SOFTWARE\Policies\Microsoft\Windows Defender >
in left pane, right-click Windows Defender > New > Key > Name = Scan > in right pane of Scan, right-click > New > DWORD (32-bit) Value > Name = DisableRestorePoint > Value = 0. May require reboot.
Caution: daily restore points make consume lots of space!
^From
Thank you! I’m amazed it’s still SO hard to setup what ought to be simple tasks on Windows. I guess Microsoft will always be Microsoft.
The proposed command parameters unfortunatelly do not work on WINDOWS 10 (!)
Problem is with the quotes. Quotes are not necessary at all.
So corrected command should be:
-ExecutionPolicy Bypass -Command ” Checkpoint-Computer -Description RestorePoint -RestorePointType MODIFY_SETTINGS ”
Also I suggest do not use MODIFY_SETTINGS parameter because restore point will not show up as the latest point. So the even better solution is:
-ExecutionPolicy Bypass -Command ” Checkpoint-Computer -Description RestorePoint -RestorePointType APPLICATION_INSTALL ”
And you need to remember to add some trick to the registry, if you are plan to schedule points often then 24h. Default delay is 1440 minutes. To change this create a .reg file and import it to the system.
– – – – – – – – – – – – – – – – – – – – – – – – – – – – – – – – – – – – – – – – – – – – – – – – – – – – – – –
Windows Registry Editor Version 5.00
[HKEY_LOCAL_MACHINE\SOFTWARE\Microsoft\Windows NT\CurrentVersion\SystemRestore]
“SystemRestorePointCreationFrequency”=dword:00000001
– – – – – – – – – – – – – – – – – – – – – – – – – – – – – – – – – – – – – – – – – – – – – – – – – – – – – – –
Anyway thanks for your work, it seems to be the fastest help in the web to create manual restore points.
Regards,
Window’s Administrator
excellent…just one further question…how do I view a listing of the available restore points?
Thanks…Brendan
I know that is a old thread and I don’t want to seem dumb but with Windows 10, you said that the proposed command parameters unfortunately do not work on WINDOWS 10 (!). Problem is with the quotes. Quotes are not necessary at all, but the new parameters that you give have quotes in them. Should it be -ExecutionPolicy Bypass -Command ” Checkpoint-Computer -Description RestorePoint -RestorePointType APPLICATION_INSTALL or -ExecutionPolicy Bypass -Command Checkpoint-Computer -Description RestorePoint -RestorePointType APPLICATION_INSTALL without the quotes?
Method 1 for Win 10 Pro
Automatically create daily restore points via GPEdit.msc:
gpedit.msc > in left pane Computer Configuration > Administrative Templates > Windows Components > Windows Defender Antivirus > Scan > in right panel edit and enable “Create a system restore point.”
Caution: daily restore points make consume lots of space!
^From
——————————-
Method 2 for Win10 Home
Automatically create daily restore points via regedit:
regedit > HKEYLOCAL_MACHINE\SOFTWARE\Policies\Microsoft\Windows Defender >
in left pane, right-click Windows Defender > New > Key > Name = Scan > in right pane of Scan, right-click > New > DWORD (32-bit) Value > Name = DisableRestorePoint > Value = 0. May require reboot.
Caution: daily restore points make consume lots of space!
^From