A power plan in Windows is a set of hardware and system options that defines how your device uses and preserves power. There are three built-in power plans in the OS. Your PC can have additional power plans defined by its vendor. Also, you can create a custom power plan that will include your personal preferences. Today, we will see how to restore any missing power plan in Windows 10.
Advertisеment
Windows 10 comes with a new UI again to change the operating system's power related options. The classic Control Panel is losing its features and probably will be replaced by the Settings app. The Settings app has already got many settings which were exclusively available in the Control Panel. For example, the battery notification area icon in the Windows 10 system tray was also replaced with a new Modern UI. However, the Settings app doesn't include the ability to delete a power plan as of this writing. You still need to use the classic Control Panel.
A custom power plan can be deleted by any user. However, only users signed in as an administrator are able delete any of the built-in power plans like High Performance, Power Saver and so on.
Tip: before deleting power plans, it is a good idea to export them to a file. Refer to the following article How to Export and Import a Power Plan in Windows 10.
If any of built-in power plans are missing on your computer, you can quickly restore them as shown below.
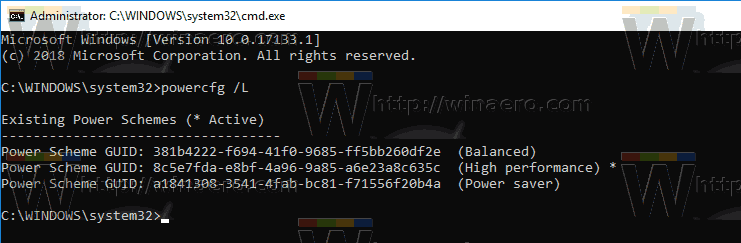
To restore default Power Plans in Windows 10, do the following.
- Open an elevated command prompt.
- To restore the Power saver scheme, execute the command:
powercfg.exe -duplicatescheme a1841308-3541-4fab-bc81-f71556f20b4a
- To restore the Balanced scheme, execute the command:
powercfg.exe -duplicatescheme 381b4222-f694-41f0-9685-ff5bb260df2e
- To restore the High Performance scheme, execute the command:
powercfg.exe -duplicatescheme 8c5e7fda-e8bf-4a96-9a85-a6e23a8c635c
- To restore the High Performance scheme, execute the command:
powercfg.exe -duplicatescheme e9a42b02-d5df-448d-aa00-03f14749eb61
Note: The Ultimate Performance power plan is available starting in Windows 10 version 1803. It is designed to reduce micro-latencies and will require the system to consume more power to give full performance. This power plan is not available on systems powered by batteries (such as laptops). However, with a simple trick you can activate it in any edition of the OS. Refer to the article
Enable Ultimate Performance Power Plan in Windows 10 (Any Edition)
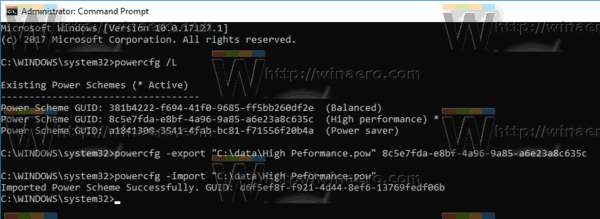
Alternatively, you can import the following POW files to restore the power schemes.
After downloading them, you can import the desired power plan as follows.
Import a Power Plan
- Open an elevated command prompt.
- Type the following command:
powercfg -import "The full path to your .pow file". - Provide the correct path to your *.pow file and you are done.
That's it.
Related articles:
- How to Restore Power Plan Default Settings in Windows 10
- How to open advanced settings of a power plan directly in Windows 10
- Add Switch Power Plan context menu to Desktop in Windows 10
- How to change the power plan from the command line or with a shortcut
Support us
Winaero greatly relies on your support. You can help the site keep bringing you interesting and useful content and software by using these options:

Greetings,
to anyone who might have the same issues, regarding not being able to restore Power Plans via the above-mentioned commands and instructions, for me the culprit was Modern Standby.
The Win10 machine I use would turn off by itself when not active for more than an hour.
Upon further examination multiple BSOD’s referenced DRIVER_POWER_STATE_FAILURE.
If you do powercfg.exe -a in an elevated CMD or PWSH, and only see one plan(balanced), you most likely have the same issue as I did.
Disable Modern Standby via Registry Editor:
1. Go to HKEY_LOCAL_MACHINE\SYSTEM\CurrentControlSet\Control\Power
2. Change cSEnabled to value 0.