In Windows 11, there are multiple ways to take a screenshot. There is a dedicated Snipping Tool for that which offers extra annotation and editing options. Also, there are hotkeys like PrintScreen and Win + Shift + S, and finally the Win + PrintScreen hotkey. The latter is the fastest option as it allows you to directly save an image to a PNG file, without a confirmation or dialog.
Advertisеment
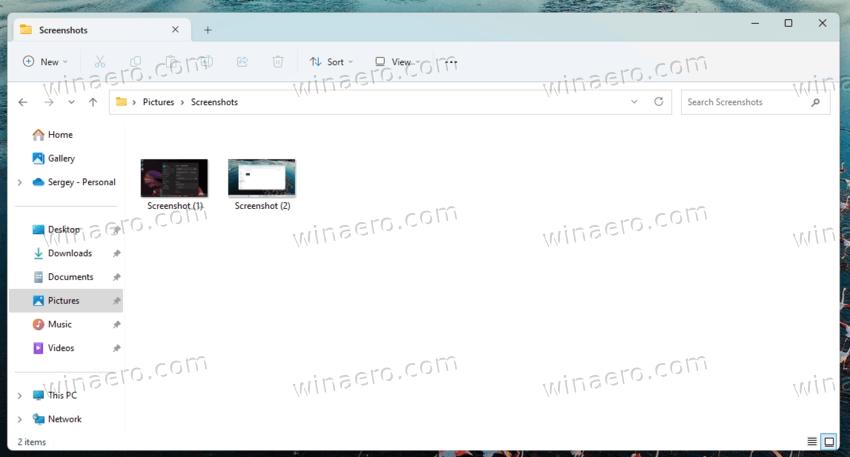
Although in Windows 11 Microsoft is pushing the Snipping Tool as the default screenshot utility and makes it open with PrintScreen, many still prefer the he Win + PrintScreen method. The key sequence directly saves a screenshot of the screen contents to the %userprofile%\Pictures\Screenshots folder. The file will be named Screenshot (#).png where # indicates the screenshot index.
💡If you press Alt + Win + PrintScreen, Windows will only capture the active window instead of the whole screen. However, in latest releases of Windows 11 this hotkey is remapped to Xbox Gamebar. You may need to change the hotkey in Gamebar settings to get it working.
Say you have Screenshot (1).png, Screenshot(2).png, and Screenshot(3).png files in your Pictures\Screenshots folder. You may want to remove the Screenshot(3).png file and expect Windows to use its name for the next image you capture. However, Windows remembers the screenshot number, so the next one will be Screenshot(4).png.
ℹ️Even if you remove all your screenshot images, the next screenshot you take will have a higher index. This won't make it start again from 1.
This is the reason why some users want to reset the screenshot index number. For that, you will need to apply a small simple Registry tweak. Do it as follows.
Reset Screenshot Index Number
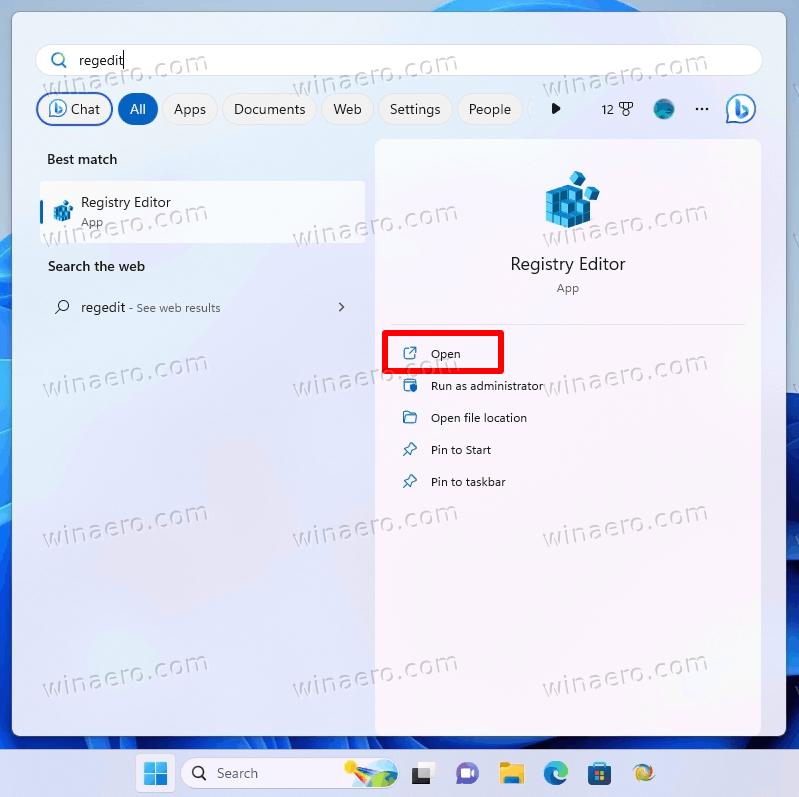
- Type regedit in the Start menu, and select Registry Editor from the search pane.
- Browse the left pane to the following key:
HKEY_CURRENT_USER\Software\Microsoft\Windows\CurrentVersion\Explorer. You can paste this path right into the address bar of regedit to open the key faster. - On the right, find the DWORD value ScreenshotIndex. It stores the index for the next image you will capture.
- To reset the screenshot index number, double-click the ScreenshotIndex and set its value data to 1.
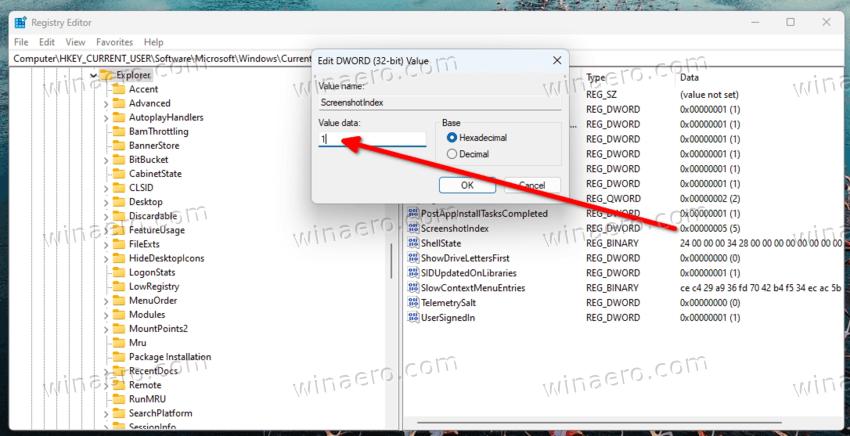
- To set the index to a specific number, change the value to next index value that will be used to the screenshot you will take next time. Set it in decimals.
You are done! I would like to point you that if the Pictures\Screenshots folder already has a Screenshot (1).png file, and you reset the counter, then do not expect the file to be replaced. Windows will find that the file already exists, and then will automatically increase the screenshot index.
How Windows calculates the screenshot index
To illustrate this behavior, let's review the following examples.
- You have set the screenshot index in the Registry to 1. But you have the files Screenshot (1).png and Screenshot (2).png in the Pictures\Screenshots folder. When you take a screenshot, Windows will save it as Screenshot (3).png.
- You have the screenshot index set to 1 in the Registry. In the Pictures\Screenshots folder, you have the Screenshot (1).png and Screenshot (5).png files. The next screenshot you take will be saved as Screenshot (2).png.
- Finally, having ScreenshotIndex = 1 in the Registry and the Screenshot (2).png and Screenshot (3).png files in the Pictures\Screenshots folder will make Windows save the next capture as Screenshot (1).png.
Ready-to-use REG file
If you would like to avoid the manual Registry editing, I have prepared a read-to-use REG file for you.
Click the following link to download the zipped REG file, and extract it to any location.
Download Reset Screenshot Index Tweak
By default, the file will set the Screenshot Index to 1. But you can open it in Notepad, and change the desired value to any number of your choice.
Unlike the Snipping Tool, the Win + Print Screen feature doesn't come with any button or shortcut to launch it with. It is exclusively available via the hotkey. Some find it inconvenient. Here's how you can create a shortcut for it.
Create Shortcut for Win + Print Screen Screenshot feature
It is possible to automate this action using special scripting tools. AutoHotkey perfectly fits this task, so, we can create a AutoHotkey script which can be compiled into an executable file.
To create a shortcut for Win + Print Screen, do the following.
- Download AutoHotkey, and install it.
- Create a new text file with the following contents.
#Requires AutoHotkey v2.0 #NoTrayIcon Send "#{PrintScreen}" - Save the above lines to a file with the *.ahk extension. In Notepad's save dialog, type the name "screenshot.ahk", including quotes.
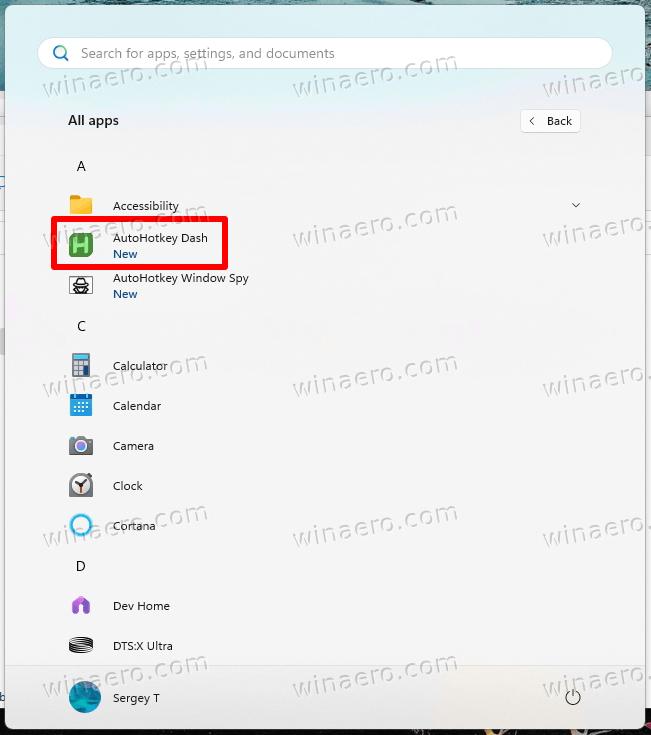
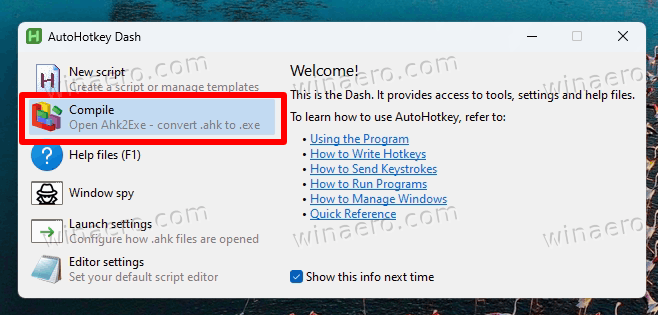
- From the Start menu, select Autohotkey Dash.
- In the AutoHotkey dash dialog, click on Compile, and agree to download and install the script compiler.
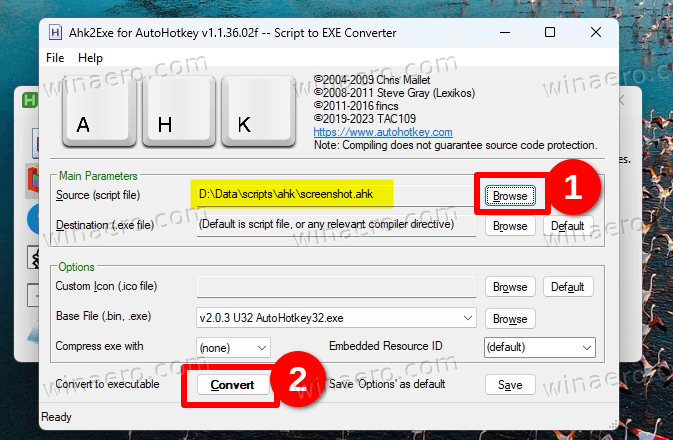
- Finally, in the "Script to Exe converter" window, click on Browse next to Source, and click Convert. You now have the screenshot.exe file.
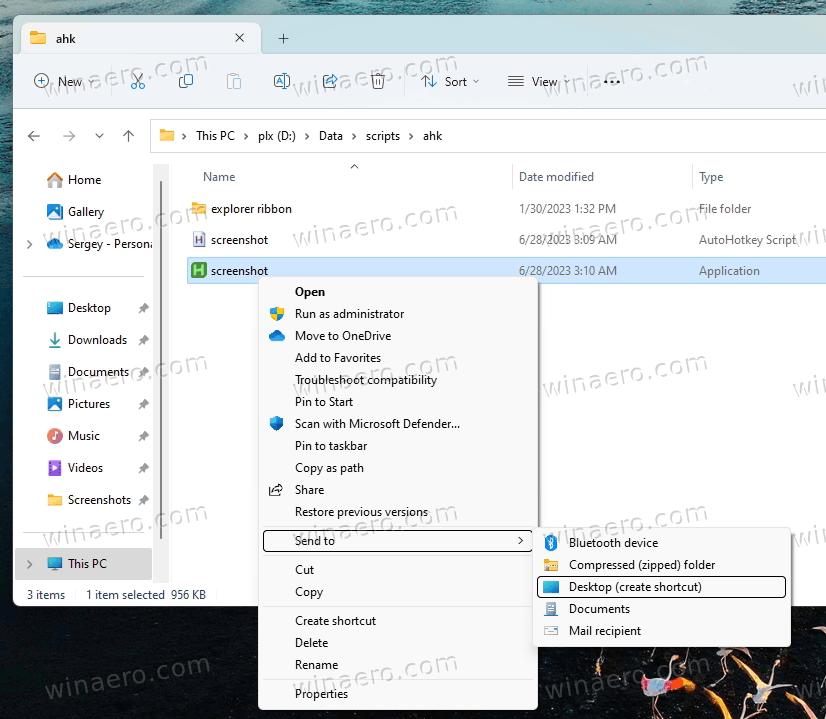
- Right-click the screenshot.exe file you have built and select Show More Options > Send to > Desktop (create shortcut) to create a shortcut for it.
That's it. Now you can launch the exe file and it will take the screenshot for you.
Alternatively, you can download the screenshot.exe file compiled by me from here:
When you take a screenshot using the Win + PrintScreen shortcut keys, the screen dims for a brief moment. If your screen doesn't change brightness, it's hard to tell if a screenshot has been taken or not. Here's what to do if the screen doesn't dim.
Fix the screen doesn't dim when you press Win + PrintScreen
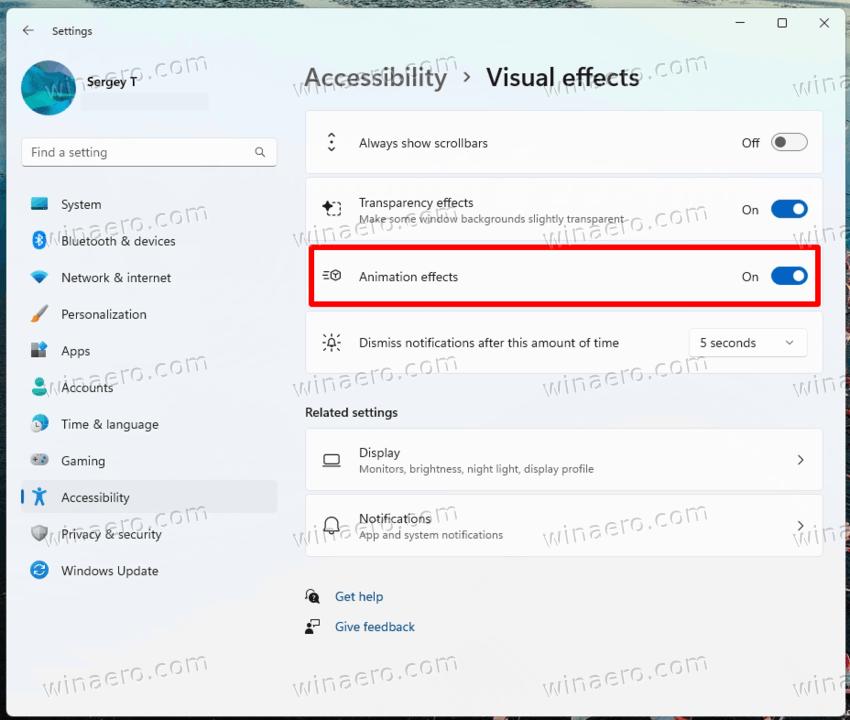
- Open the Settings app, e.g. with the Win + I hotkey or using any other method.
- Click Accessibility on the left.
- On the right, click Visual Effects under Vision.
- Finally, on the next page, enable the Animation Effects toggle option. This will enable the screen dimming for the screenshot.
You are done.
However, if the option reviewed above is enabled, but the screen still doesn't dim, there is one more thing to try.
You need to check out if you have the Animate windows when minimizing and maximizing option, which you will find in the classic "Advanced system properties" applet.
For that, press Win + R and type SystemPropertiesAdvanced in the Run box. In the System Properties dialog, click the Settings button under the Performance section.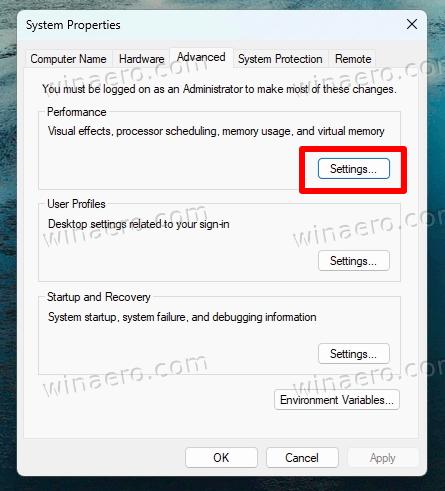
Finally, place the checkmark for the Animate windows when minimizing and maximizing option. If it is disabled, the screen will not dim when you take a screenshot with Win + PrintScreen.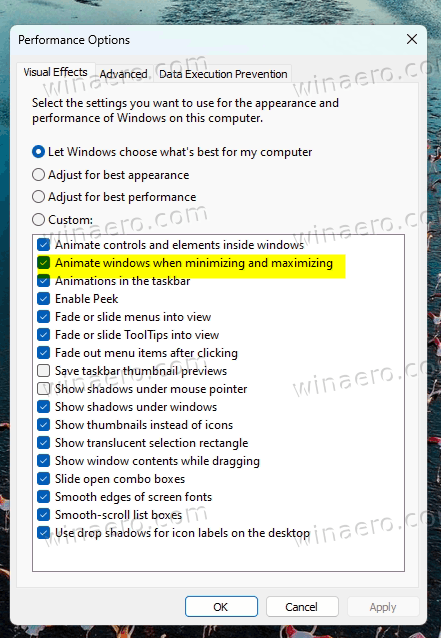
So, If the screen does not dim when taking a screenshot, it could indicate an issue with the Windows animation settings. The screen dimming feature is dependent on these settings, and if the appropriate option may be disabled by either the user or software. This causes the screen to no longer be dim.
That's it!
Support us
Winaero greatly relies on your support. You can help the site keep bringing you interesting and useful content and software by using these options:
