When installing a printer, Windows 10 will assign the default name to it. Its default name is usually defined by the vendor and includes its manufacturer name and model. If you are not happy with the default name of your printer, here are a number of methods you can use to rename it.
Advertisеment
To rename a printer, you must be signed in with an administrative account. You can use either the Control Panel, Settings, or PowerShell. Let's review these methods.
We will start with Settings. Settings is a Universal app bundled with Windows 10. It is created to replace the classic Control Panel for both touch screen users and mouse and keyboard Desktop users. It consists of several pages which bring new options to configure Windows 10 along with some older options inherited from the classic Control Panel. In every release, Windows 10 is getting more and more classic options converted to a modern page in the Settings app. At some point, Microsoft might remove the classic Control Panel completely.
To rename a printer in Windows 10, do the following.
- Open the Settings app.

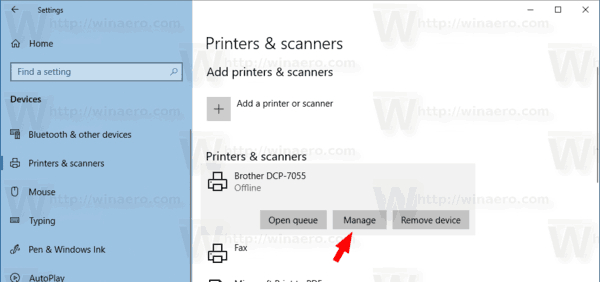
- Go to Devices -> Printers & scanners.
- On the right, click on the printer you want to rename and then click on the Manage button.
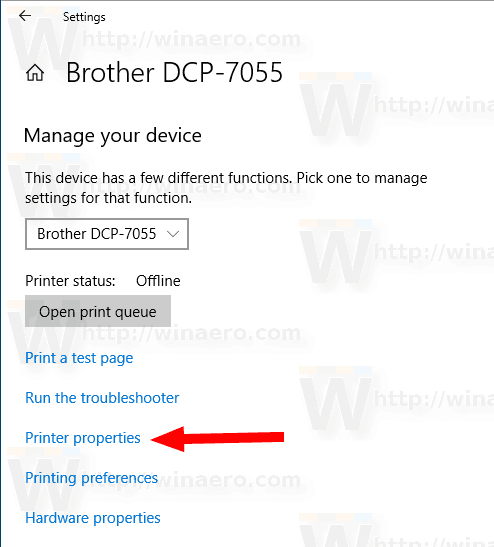
- On the next page, click on the Printer properties link.
- In the Printer Properties dialog, type the new name on the General tab.
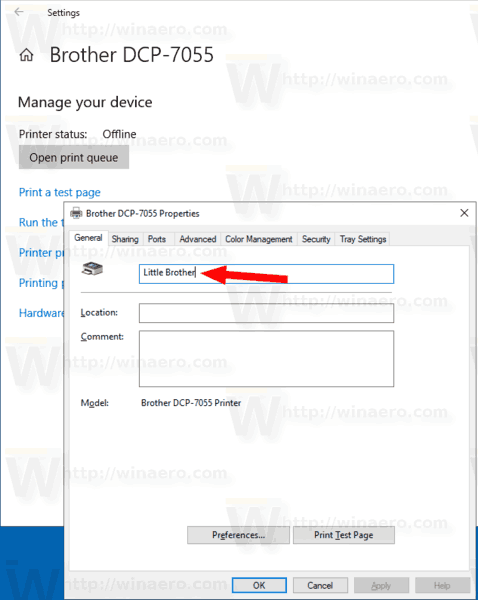
- Click on Apply, then click OK.
You just renamed the printer.
Note: If you have the Change Properties button on the General tab of the Printer properties dialog, click on it. This will open an extra dialog, where you will be able to rename the printer. See the following screenshot.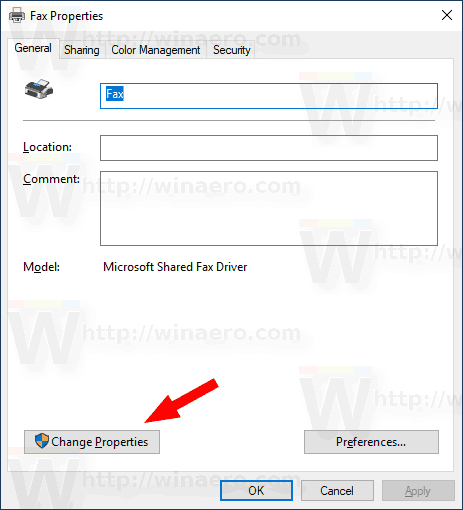

If you are trying to rename a shared printer, you will be prompted to confirm the operation. Renaming a shared printer will break all existing connections to it, so other users on the network won't be able to access it any more until they re-add it to their Printers folder.

Please keep this in mind.
Rename a printer with the Control Panel
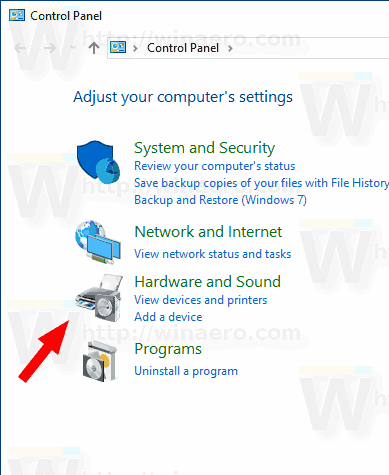
- Open the classic Control Panel app.
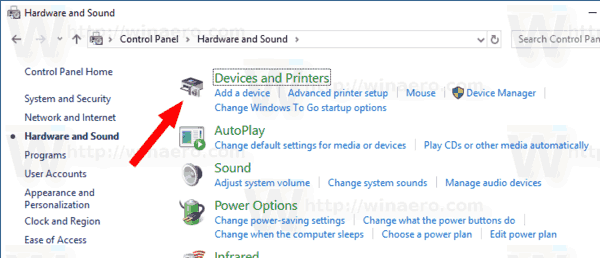
- Go to Control Panel\Hardware and Sound\Devices and Printers.
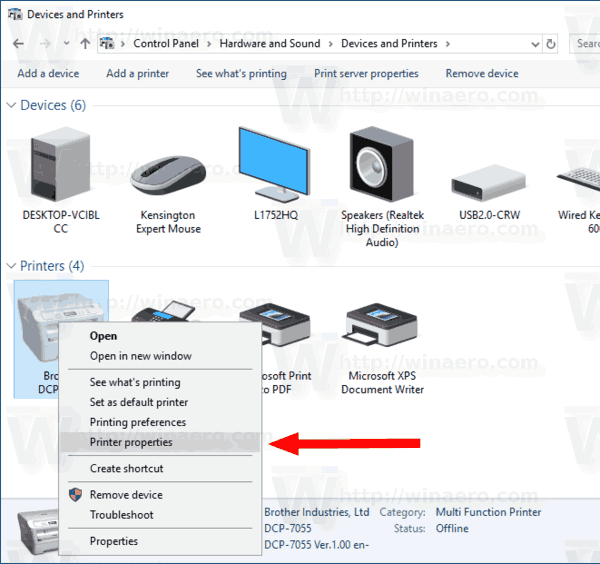
- Right-click on the printer you want to rename, and select Printer properties from the context menu.
- In the Printer Properties dialog, type the new name on the General tab.
- Click on Apply, then click OK.
- See notes related to the Settings app above.
Rename a printer using PowerShell
- Open PowerShell as Administrator. Tip: You can add "Open PowerShell As Administrator" context menu.
- Type or copy-paste the following command:
Get-Printer | Format-Table Name,ShareName,Shared
The command will print a table with your printers and their sharing status.

- Type the following command:
Rename-Printer -Name "Your current printer name" -NewName "New printer name".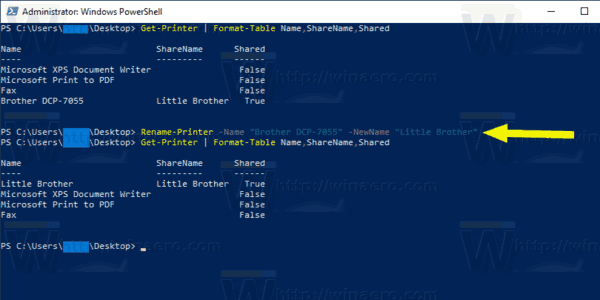
- Your printer is now renamed.
That's it.
Related articles:
- Add Shared Printer in Windows 10
- How to Share a Printer in Windows 10
- Backup and Restore Printers in Windows 10
- Open Printer Queue With a Shortcut in Windows 10
- Set Default Printer in Windows 10
- How to stop Windows 10 from changing the default printer
- Open Printer Queue in Windows 10
- Create Printers Folder Shortcut in Windows 10
- Clear Stuck Jobs from Printer Queue in Windows 10
- Create Devices and Printers Shortcut in Windows 10
- Add Devices and Printers Context Menu in Windows 10
- Add Devices and Printers To This PC in Windows 10
Support us
Winaero greatly relies on your support. You can help the site keep bringing you interesting and useful content and software by using these options:
