In Windows 10, most of the network options were moved to Settings. The Setting app and the new Network flyout are completely different from Windows 7 and Windows 8.1. The options have been moved around, so it takes longer to open the classic Network Connections folder when needed. To save your time, you can create a special shortcut to access it.
Advertisеment
In Windows 10, there is a special network flyout which shows a list of available wi-fi networks to which your PC can connect. It also shows the network that you are currently connected to. Using the Network flyout, you can open Network & internet settings or enable or disable Wi-Fi, Mobile Hotspot and Airplane mode.
Unfortunately, there is no quick way to open the classic Network Connection folder. This folder is very useful when you need to disable a network connection, set your IP address manually, or change your DNS server options. If you often manage your network connections using the classic Control Panel applet, it is a good idea to create a shortcut to open it directly.
There are two ways to create the Network Connections shortcut in Windows 10. Let's review them.
To create the Network Connections shortcut in Windows 10, do the following.
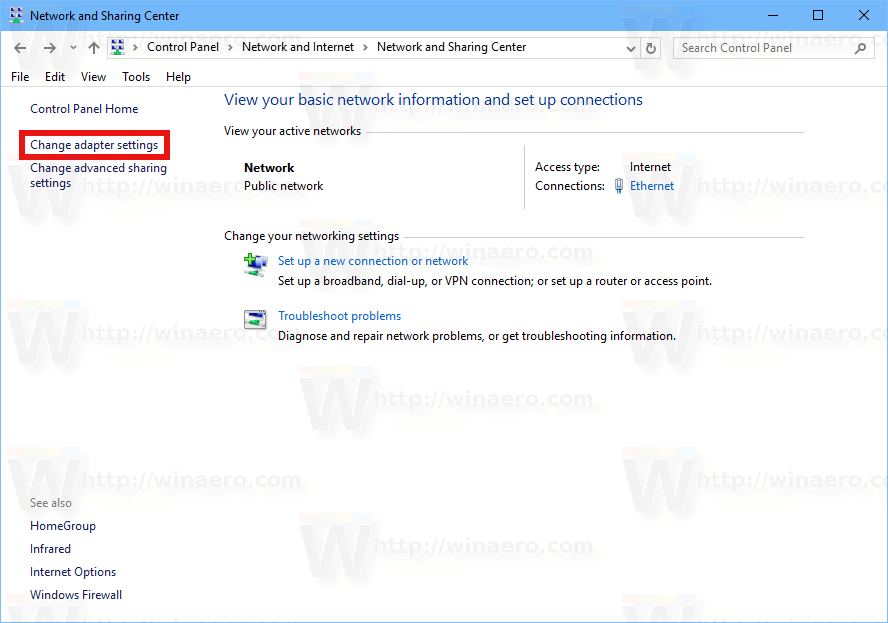
- Open the Control Panel.
- Go to Control Panel\Network and Internet\Network and Sharing Center.
- On the right, click on the Change adapter settings link.
- Now, click on the folder icon in the address bar and drag and drop it to your desktop. You should drag and drop the following icon:
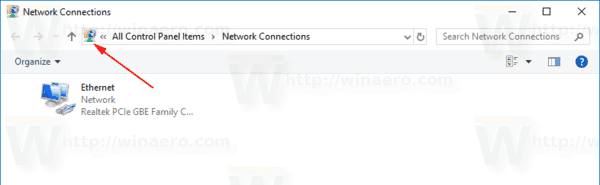
- The new shortcut will appear on the Desktop.

You are done.
Alternatively, you can create the shortcut manually with a special shell command.
Create Network Connections Shortcut Manually
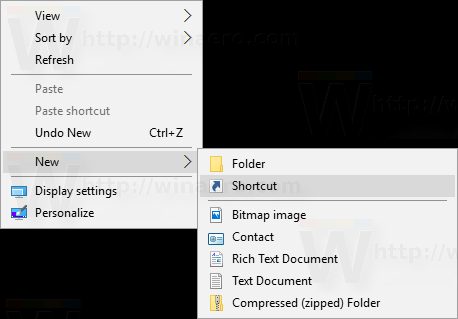
- Right click the empty space on your Desktop. Select New - Shortcut in the context menu (see the screenshot).
- In the shortcut target box, type or copy-paste the following:
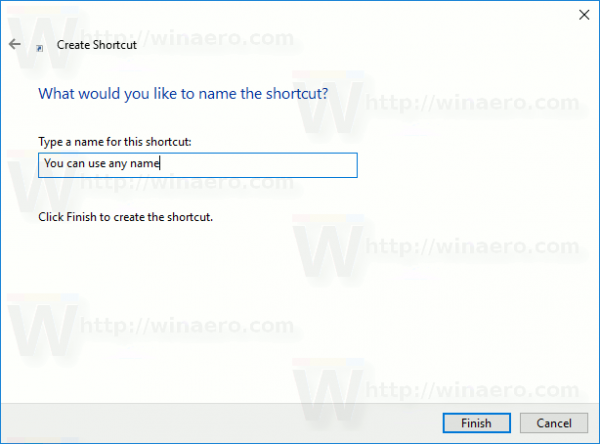
explorer.exe shell:::{992CFFA0-F557-101A-88EC-00DD010CCC48} - Use the line "Network Connections" without quotes as the name of the shortcut. Actually, you can use any name you want. Click on the Finish button when done.
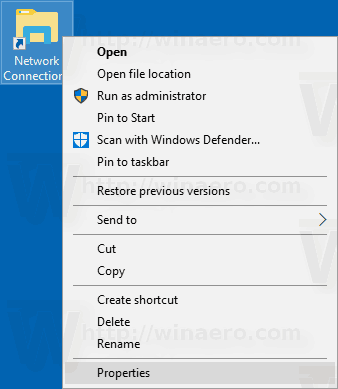
- Now, right click the shortcut you created and select Properties.
- On the Shortcut tab, you can specify a new icon if you wish. You can use the icon from the
%SystemRoot%\system32\netshell.dllfile.Click OK to apply the icon, then click OK to close the shortcut properties dialog window.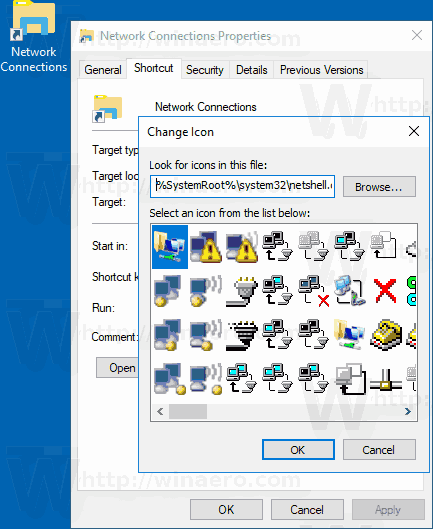
The command used for the shortcut is a special shell:command which allows opening various Control Panel applets and system folders directly. To learn more about shell: commands available in Windows 10, refer to the following article:
The list of shell commands in Windows 10
Now, you can move this shortcut to any convenient location, pin it to taskbar or to Start, add to All apps or add to Quick Launch (see how to enable Quick Launch). You can also assign a global hotkey to your shortcut.
Related articles:
- Create Show Available Networks Shortcut in Windows 10
- How to Rename Network Profile in Windows 10
- Change network icon click action in Windows 10
- Change network card MAC address in Windows 10
That's it.
Support us
Winaero greatly relies on your support. You can help the site keep bringing you interesting and useful content and software by using these options:

Or you can use :
ncpa.cpl
Great tip! As @cirederf points out, a shortcut to C:\Windows\System32\ncpa.cpl also works.