Regardless of what you think and not think – your Wi-Fi signal strength affects the quality of your life. It plays a crucial role in how efficient you do your job. It figures into how enjoyable your experience streaming your favorite shows online would be.
Advertisеment

Fact is, more often than not, your smartphones and other nifty gadgets require an internet connection to function properly. As a matter of fact, what is a smartphone without a strong Wi-Fi signal connection?
So, it’s not surprising that one of the first things you do when you move to a new place – read: cafe, public buildings, parks, hotels, or even neighborhoods – is to check for available Wi-Fi signals in the area.
Spotty Wi-Fi signal strength can trigger mood changes. It can even cause you to relocate. Or change rooms if it’s a hotel and you’ve got work to do. Or even, make you get so impatient to finish whatever you’re doing in the weak or Wi-Fi(less) area and get back to civilization.
Ok, now you know how vital Wi-Fi is to your daily life and work; you may wonder how do I measure the Wi-Fi signal strength in an area?
What is Wi-Fi Signal strength?
However, before diving into the steps you can take to measure the quality of your internet connection, you’d first, want to learn about Wi-Fi signal strength.
Wi-Fi signal strength from its name implies the quality of a wireless network in a particular location. It indicates how strong reception is.
![]()
Think of it as a measure of how quickly you can upload or download data on a Wi-Fi connection.
A quick way to check Wi-Fi signal strength is usually to look at the number of network availability bars. Remember those network indication bars? Depending on the device model you’re using to connect to the wireless – you can have anything between three bars to six.
Where the last bar, in this case, three or six indicates strong network and one bar shows the area has weak network reception.
How to Measure Wi-Fi Signal Strength
Thankfully, there are several apps available today you can use to scan Wi-Fi signal strength.
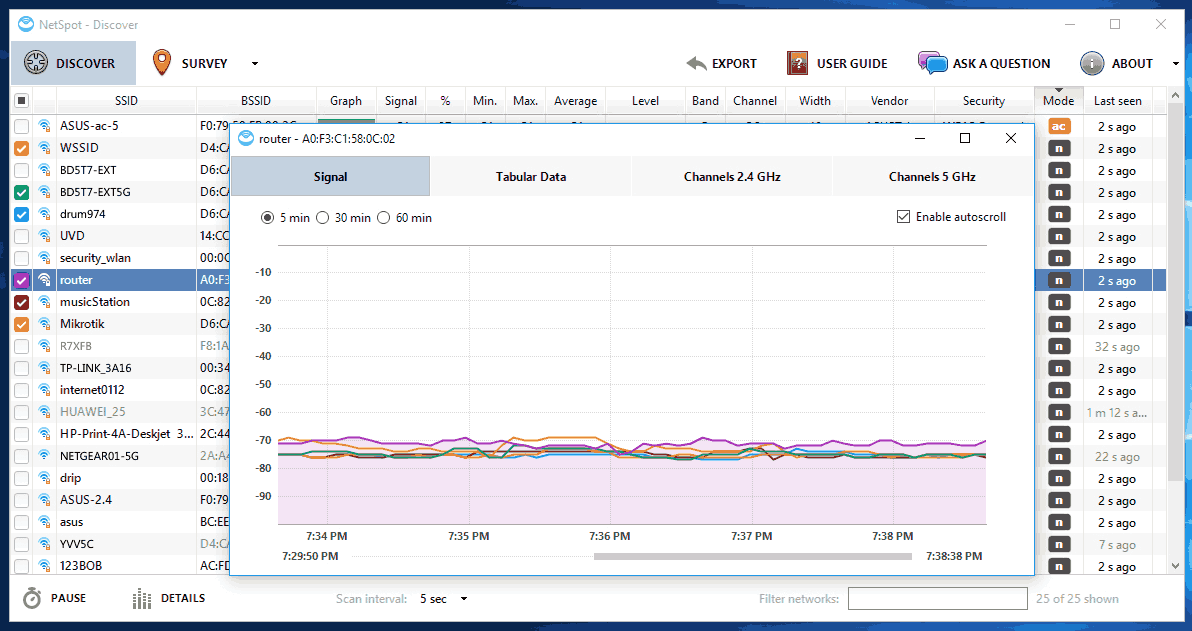
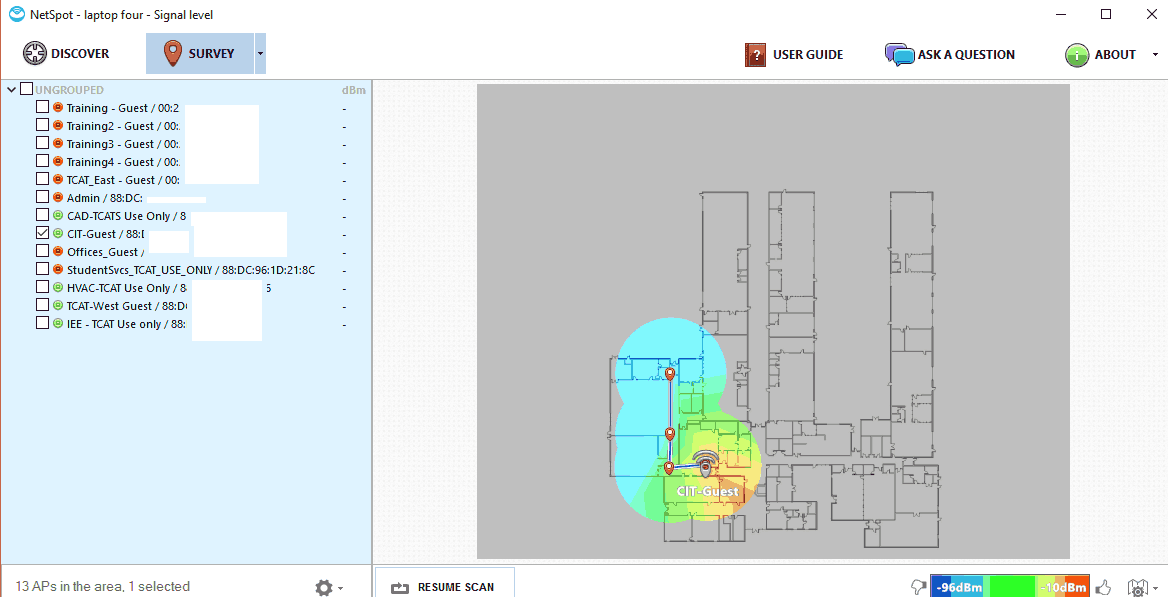
Some of these apps like NetSpot come with built-in capability to scan for available networks, pinpoint weak and strong Wi-Fi connections and map out the best possible position with the strongest signal for you.

To measure Wi-Fi signal strength, the NetSpot app usually tries to set up multiple connections to remote servers; then it calculates how long it takes to send and receive data from these locations.
These latency tests – the measure of how long in milliseconds it takes for data to travel from one point to another – ensure the Wi-Fi speed app is able to determine with precision the strength of your internet connection.
Fortunately, you can use the free NetSpot version to test Wi-Fi strength. The intuitive user interface, ease of navigation, and handy help wizard makes NetSpot the choice app for testing Wi-Fi signal.
What is considered a Good, Acceptable or Poor Wi-Fi Signal Strength?
Note though that Wi-Fi signal strength is measured in decibel milliwatts (dBm) usually indicated with negative values.
A -30 dBm is the maximum Wi-Fi signal strength. Anything down to -50 dBm is considered excellent signal strength. A -60 dBm to -67 dBm signal strength is reliable.
At -70 dBm you have a not so strong signal that’s only suitable for light browsing and email. Further down to -80 dBm the signal is quite unreliable and you can barely connect to the network. -90 dBm signal strength is the weakest Wi-Fi signal and chances are you can’t even connect to the network at this level.
How to Check Wi-Fi Signal Strength with NetSpot
Step 1: launch the NetSpot app.
Step 2: Select scan area for active Wi-Fi networks.
Step 3: select a network from the listed wireless connections and initiate the test.
Step 4: wait as the app measures the signal strength of the selected network. It can take between a couple of seconds for uber-fast networks to few minutes for NetSpot to compute all the data.

You can test each of the available networks. Once the survey is finished, check the visualization report for the tested wireless connections.
Why your Wi-Fi signal is spotty
Factors like data plan, location, and distance can significantly impact the strength of your Wi-Fi connection.
The distance between your workstation and the Wi-Fi router
The farther you are from a Wi-Fi router, the weaker the signal gets. That’s because the signal dilutes as it travels the distance.
So, ensure your workstation is as close to the hotspot as possible. If that’s not physically possible, you may also consider, moving the router to a more central position.
There are barriers
Metals, concrete, and other forms of barriers often affect Wi-Fi signal. These obstructions usually bounce the signal thereby extending the distance it has to travel before getting to you.
Eliminate these barriers, or better still place the router in a free-view space.
Height also plays an important role
From experience, the higher an elevation a router is placed, the stronger the signal it sends.
And if for whatever reason, the router is left say, under a desk, on the floor, or even inside a shelf – the slower its signal.
So, for the best strongest Wi-Fi signal possible, position your router in high elevation.
Wrapping it up
Spotty Wi-Fi network is an internet user’s worst nightmare. It becomes incredibly frustrating if you have loads of work to do, but the network speed is crawling.
Save yourself from this headache by scanning and testing the Wi-Fi speed and signal strength before connecting to any wireless network.
NetSpot is a robust, easy to use, user-friendly solution that scans every available network within your location, generates a heatmap that shows areas with the strongest coverage, while also indicating the upload and download strength for each network.
Support us
Winaero greatly relies on your support. You can help the site keep bringing you interesting and useful content and software by using these options:
