You can rename your PC in Windows 11 if you are not happy with its current name. It could be set during a clean install, or at some point later. Once you decide to change its name, you can using any method reviewed in this post.
Advertisеment
It is a good idea to assign a meaningful name assigns to all your computers. A random name for your device is not suitable for a number of reasons. A long or random name is far from convenient, especially if you have several devices. Besides, those cryptic names make it harder to find a needed computer when you share files between PCs using Wi-Fi and Nearby Share or connect new devices. Renaming Windows 11 PC to something more convenient is a preferable option for many. For example, Winaero-PC, Taras-Laptop, Sergey-IP, etc. This post will show you how to rename your PC in Windows 11.
Rename PC in Windows 11
You can use any name you want as long as it includes Latin letters, numbers, and hyphens. Spaces and symbols (except hyphen) are not allowed. Taras-PC-1 will work, but Taras PC 1 won't.
There are several ways to rename your Windows 11 PC. You can use the Settings, Control Panel, PowerShell, or even the classic Command Prompt. Let's review these methods.
Using Windows 11 Settings
- Press Win + I to open Windows Settings. You can also use the Start menu or Windows Search. Learn more about how to open Windows Settings in Windows 11.
- Go to System > About.
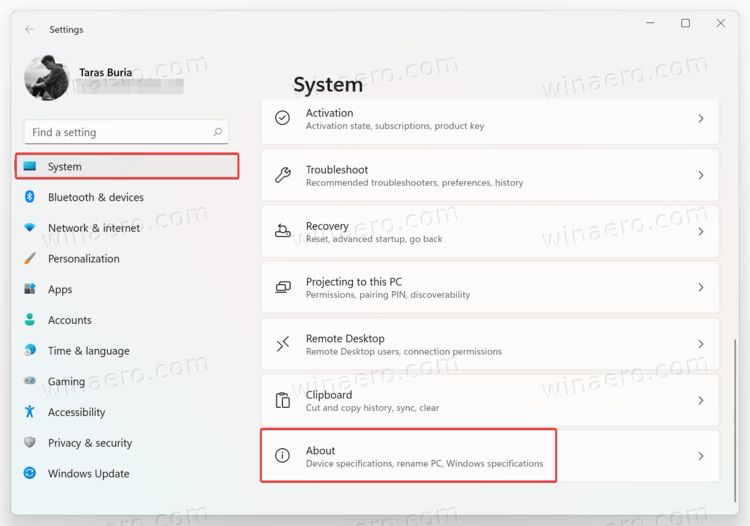
- Click Rename this PC.
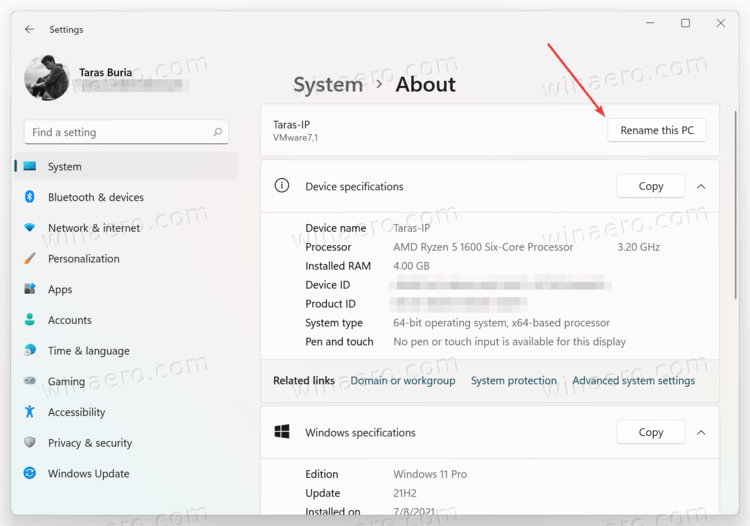
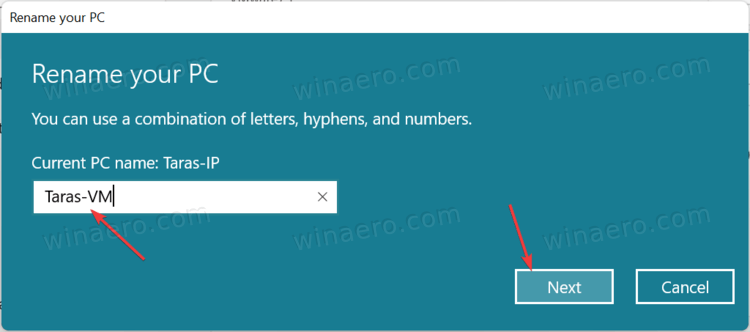
- Enter a new name, then click Next.
- Click Restart Now or Restart Later. There is no need to restart your computer right away, but a restart is required to apply the new name. Also, note that you cannot change the name again until you restart the computer.
Rename your Windows 11 computer in Control Panel
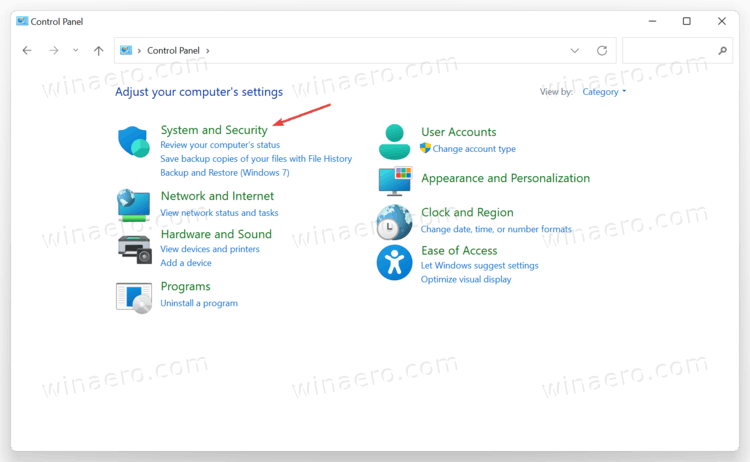
- Open the classic Control Panel using any preferred method, for example, Win + R >
control. Learn more about how to open Control Panel in Windows 11. - Go to the System and Security. Note: You need to switch to the Categories view; otherwise, Windows 11 will open the Windows Settings app instead of the required applet.
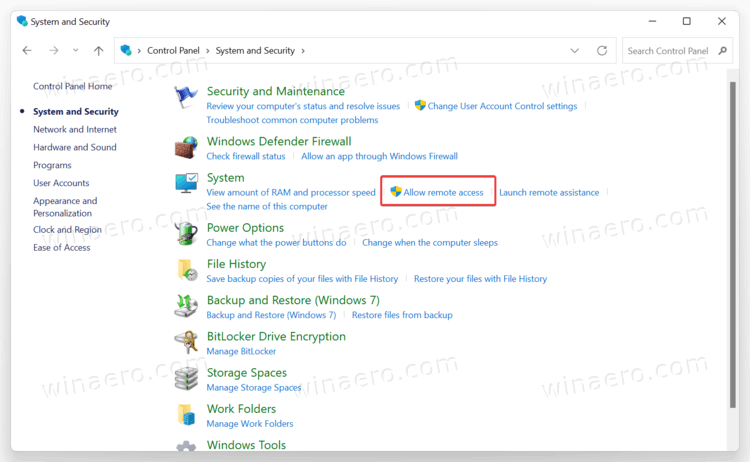
- Click Allow Remote Access to open the classic System Properties.
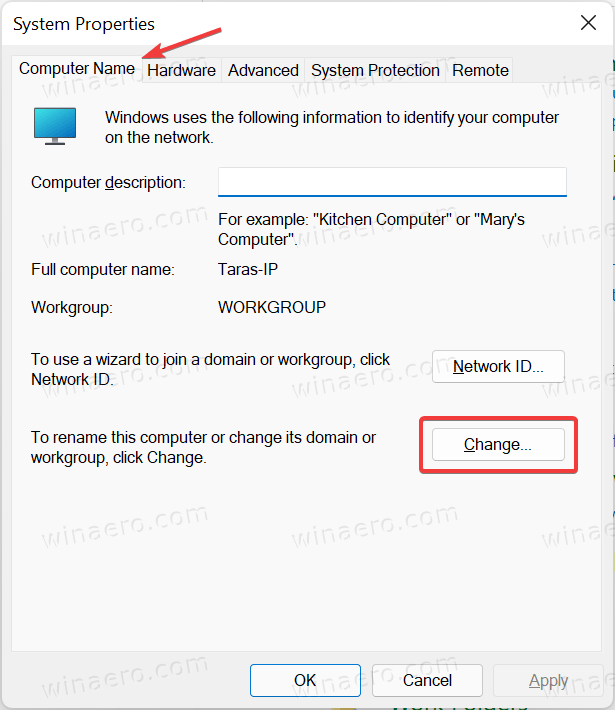
- Switch to the Computer Name tab, then click Change.
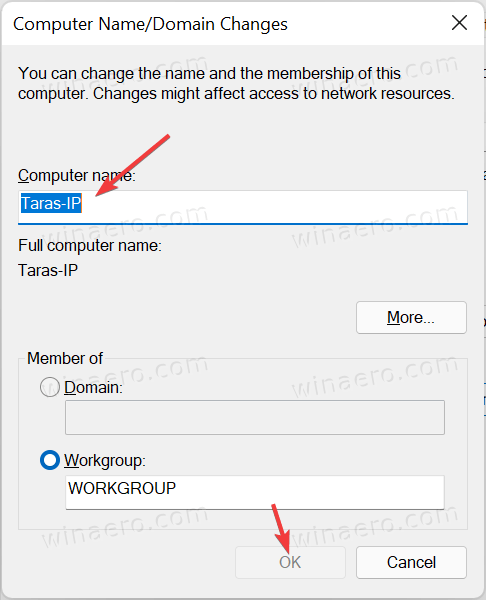
- Enter a new name into the Computer name field, then click OK.
- Restart your PC to apply changes.
Tip: You can get to the System Properties window without opening the classic Control Panel. Open Windows Settings, then go to System > About. Click the Domain and Workgroup link. Alternatively, use the systempropertiesadvanced direct Control Panel command in the Run dialog.
Change the computer name from Command Prompt
You can also try a nerdy way to rename a Windows 11 computer. Apart from regular Windows Settings and Control Panel apps, there are special commands to rename a computer using Command Prompt or PowerShell.
- Launch Command Prompt with elevated privileges (run it as an Administrator). You can use Windows Terminal with the Command Prompt profile.
- Enter the following command:
wmic computersystem where caption='XXX' rename 'YYY'. ReplaceXXXwith your current PC name andYYYwith a new name. Here is an example of a working command on a PC named DESKTOP- N69ICEE:wmic computersystem where caption='DESKTOP-N69ICEE’ rename 'Winaero-PC'.
- Restart your computer to apply changes.
Finally, here is the same procedure executed in PowerShell instead of Command Prompt.
Rename your Windows 11 PC with PowerShell
- Launch elevated PowerShell.
- Enter the following command:
Rename-Computer -NewName "YYY". ReplaceYYYwith a new name. Here is an example:Rename-Computer -NewName "Winaero-PC".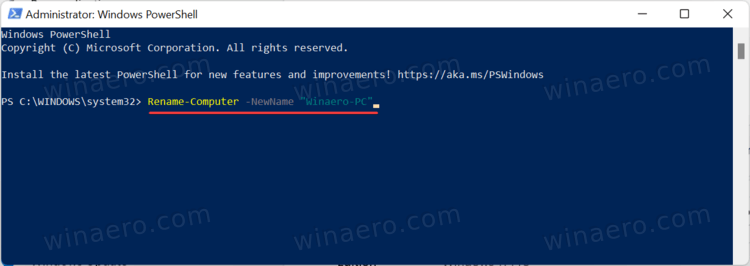
- Restart your PC.
That is how you rename a computer in Windows 11.
Support us
Winaero greatly relies on your support. You can help the site keep bringing you interesting and useful content and software by using these options:

What words and or names are not allowed in renaming a computer? I have repeatedly tried to name my computer Windows 11 – 1 to no avail.