The first time you connect to a network, Windows 10 automatically creates a network profile and stores it on your computer. It can be a wired network or a wireless network. Some day you might want to rename the network profile Windows 10 created for you. Here is how it can be done.
The network name is visible
- In the Network and Sharing Center of the Control Panel.
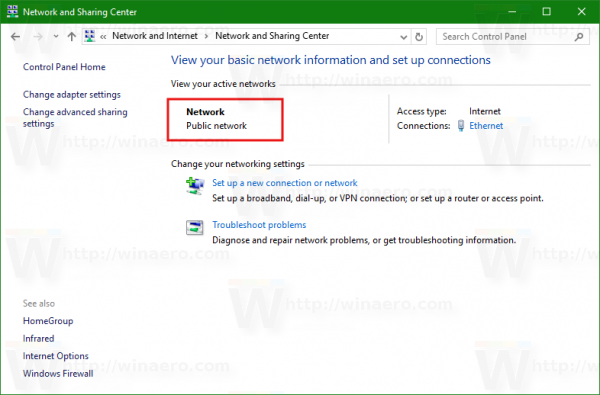
- In the Network flyout on the desktop.

- In the Settings app:
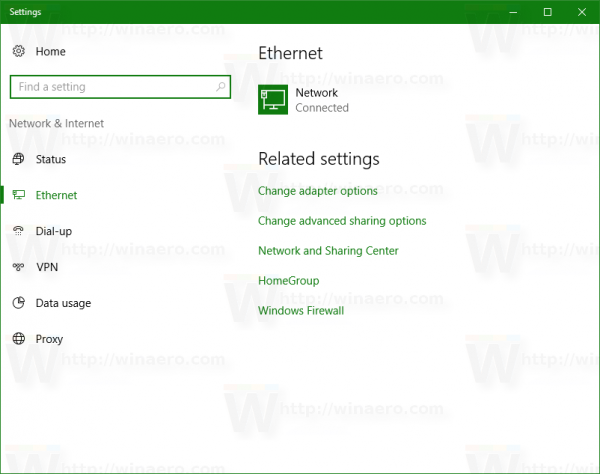
Unfortunately, there is no option to rename the network profile in the mentioned locations and tools. To do it, you need to apply a simple Registry tweak. Using the Registry Editor app, you can change the network profile name to anything you want. Here is how it can be done.
How to Rename Network Profile in Windows 10
- Open Registry Editor.
- Go to the following Registry key:
HKEY_LOCAL_MACHINE\SOFTWARE\Microsoft\Windows NT\CurrentVersion\NetworkList\Profiles
Tip: How to jump to the desired registry key with one click.
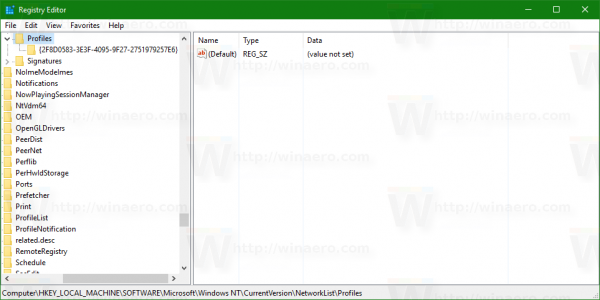
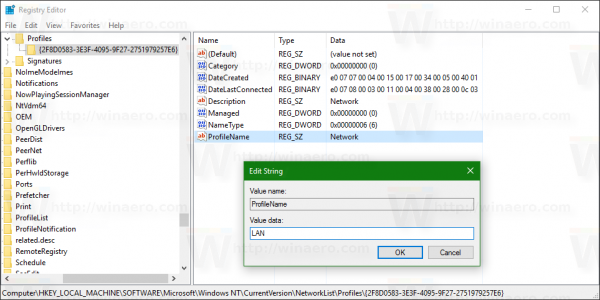
- Each network profile which exists on your PC is represented there as a GUID subkey. Click the GUID number subkey in the left pane, and look at the value of the ProfileName string value on the right. Repeat this step until you find the network profile you want to rename.
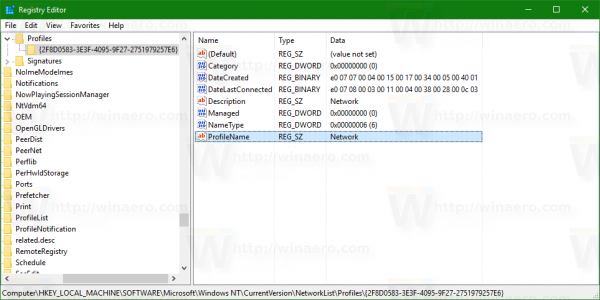
- Double click the ProfileName string value to edit it. Set it to the desired value and you are done:
That's it. Your network profile name will be changed everywhere.
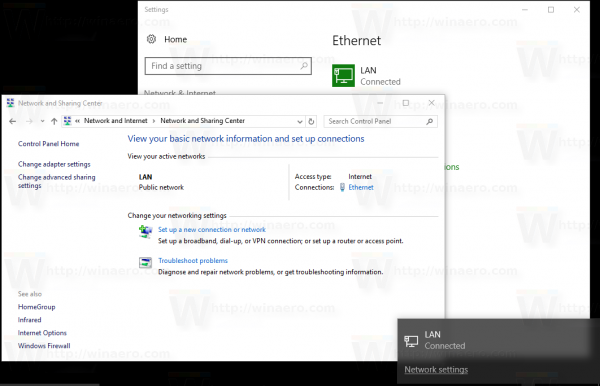 Note: the Settings app might not reflect the changes you make until you sign out and sign in to your Windows 10 account.
Support us
Winaero greatly relies on your support. You can help the site keep bringing you interesting and useful content and software by using these options:

Hi Sergey,
I just want to let you know that I finally found a root cause of this warning message in Windows Update regarding Insider Preview build and visiting Windows Insider program to fix it. Unfortunately it was caused by registry key AllowTelemetry set to 0. I have removed it and now I have no problem with visiting Windows Insider Program settings and after that Windows Update and no more warning message appear. Services Connected User Experiences and Telemetry + dmwappushsvc I have still disabled though.
So disabling telemetry do have some small side effects.
Thank you for this info!
Can you check if AllowTelemetry = 1 still causes the same issue?
I think it will give the same effect.
yes, seems to be the same effect
Thanks for this tips. Long time ago I wanted to rename that network profiles. Ugly names is very unpleasant for me. And here is the solution.
You are welcome.
Hello Sergey,
I successfully renamed “old” to “new” in hkey_local_machine\software\microsoft\windows nt\currentversion\networklist\profiles\{hex} and hkey…\networklist\signatures\unmanaged\hex, rebooted and verified above changes BUT still have “old” in settings\network & internet\wi-fi\manage known networks!
Tried renaming text from “old” to “new” in hkey_local_machine\software\microsoft\wcmsvc\cmpol\{hex} text BUT cmpol text reverts to “old” after reboot and still have “old” in settings\…\manage known networks!
Please help. Thank you.
Mike Yohe
North Carolina
Unsuccessful rename of a wireless profile using regedit was on a Windows 10 Home version 1607 system.
Mike Yohe