Some users wants to remove the "System requirements not met" watermark in Windows 11, as it doesn't add any value for the end user. If he managed to install Windows 11 on his device, he is already aware of the hardware incompatibility. Still Windows 11 shows such a notification in the Settings app and on the Desktop.
Advertisеment
Starting in build 22557, the operating system shows a message right on the desktop that includes the full build tag entitled with the "System requirements not met" line.
However, most users are already aware of their hardware specs. Installing Windows 11 on such an unsupported device is a tricky procedure. So it is unlikely that you will quickly forget that your device doesn't meet the minimum hardware requirements of the latest OS.
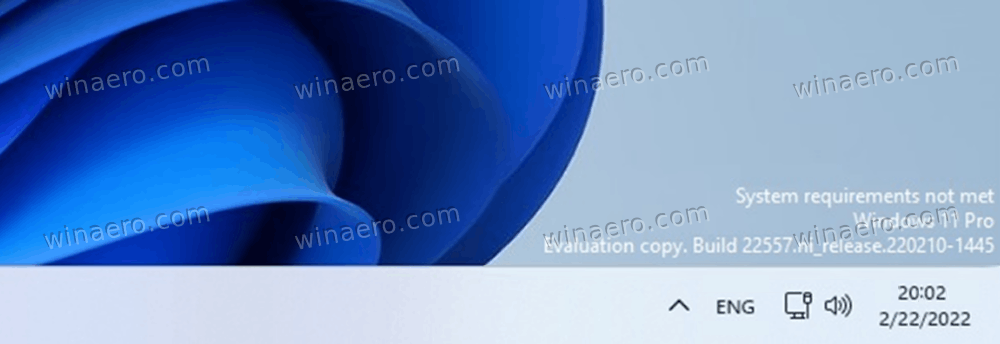
If you aren't happy to see such a reminder on your desktop, you can easily hide it with a simple Registry tweak.
Remove "System Requirements Not Met" Watermark
To remove the "System Requirements Not Met" desktop watermark in Windows 11, do the following.
- Press Win+R and type
regeditin the Run box to open the Registry editor. - Expand open the left tree view to the following key: HKEY_LOCAL_MACHINE\SOFTWARE\Microsoft\Windows\CurrentVersion\Policies\System.
- Right-click on the System folder on the left and select New > DWORD Value (32-bit) from the context menu.
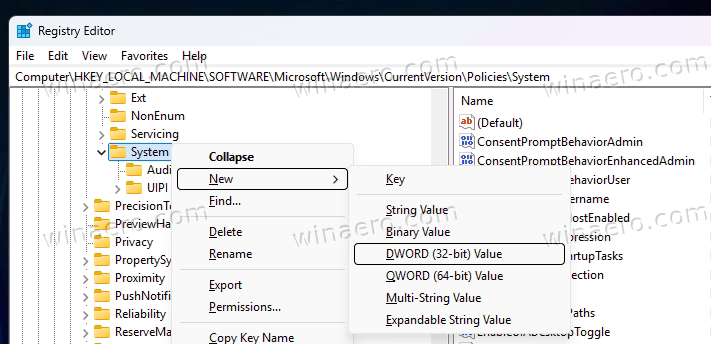
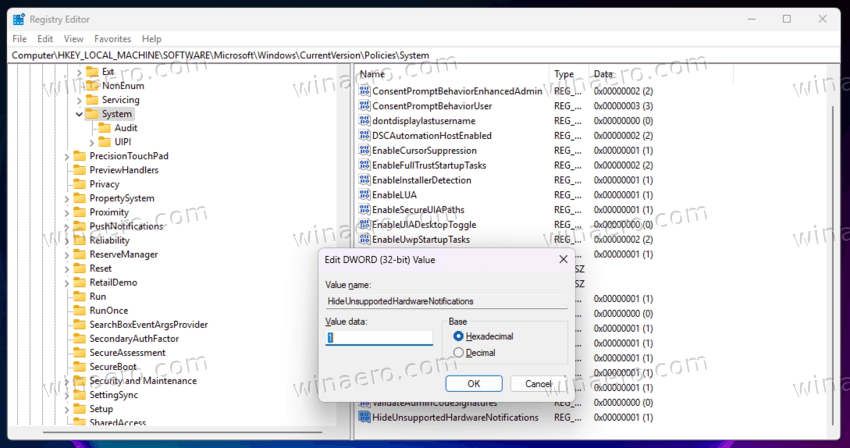
- Name the new value HideUnsupportedHardwareNotifications and set its value to 1.
- Right-click the Start button in the tasbkar and select Shut down or sign out > Restart to reboot Windows and apply the change.
You have successfully disabled the "System requirements not met" message on the desktop.
To save your time, you can use either a command prompt automation, or ready-made REG files. Both are convenient when you are building a semi-automated deployment, or just have multiple computers.
Using command prompt
Open Windows Terminal as Administrator, and type the following command in either PowerShell or Command Prompt tab.
reg add "HKLM\SOFTWARE\Microsoft\Windows\CurrentVersion\Policies\System" /v HideUnsupportedHardwareNotifications /t REG_DWORD /d 1 /f
Press Enter to execute the command and restart the computer to apply the change.
Obviously, you can execute the command right in the cmd.exe window, or directly in PowerShell if you find this more convenient. There are no explicit requirements for using the Terminal.
In addition, you can download REG files, as mentioned earlier.
Download Registry Files
Click this link to download the registry files in a ZIP archive. Extract it to any folder of your choice, say right on the desktop.
Then, double click the Disable System Requirements Not Met Message.reg file. Click Yes in the User Account Control prompt. After than, click Yes in the Registry editor confirmation.
The second file, Restore System Requirements Not Met Message.reg, is the undo option.
That's how you will get rid of the system requirements desktop notification with help of the REG files.
This method works in all editions of Windows 11. But if you use Windows 11 Pro and higher, you can alternatively use the gpedit app which offers you a nice GUI for that.
Group Policy to Disable the System Requirements Not Met Message
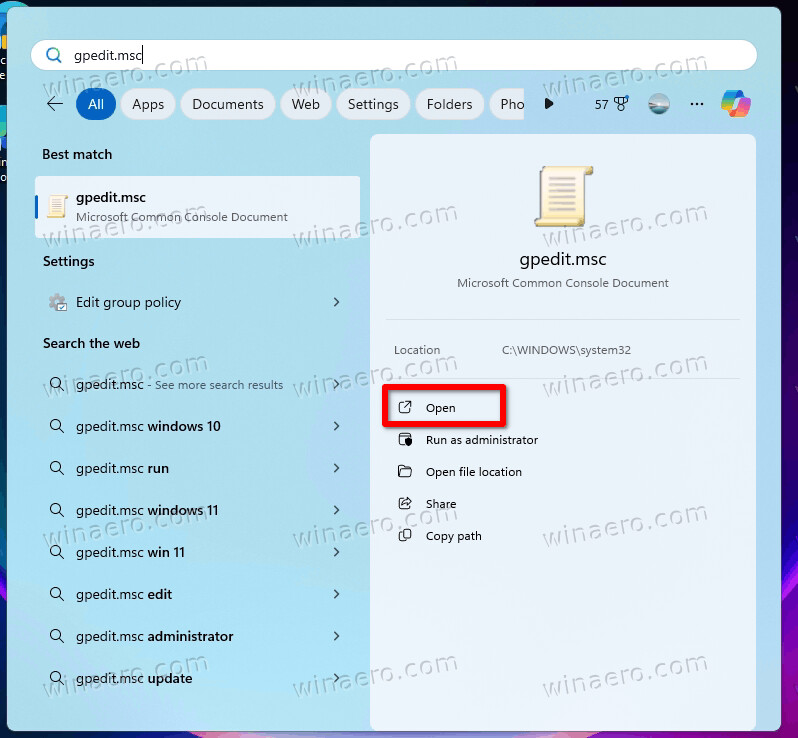
- Open the Local Group Policy Editor by typing the gpedit.msc command in right in the Start or in Search.
- Go to "Computer Configuration" > "Administrative Templates" > "System".
- On the right, find the policy "Hide messages when Windows system requirements are not met" and open its settings by double-clicking.
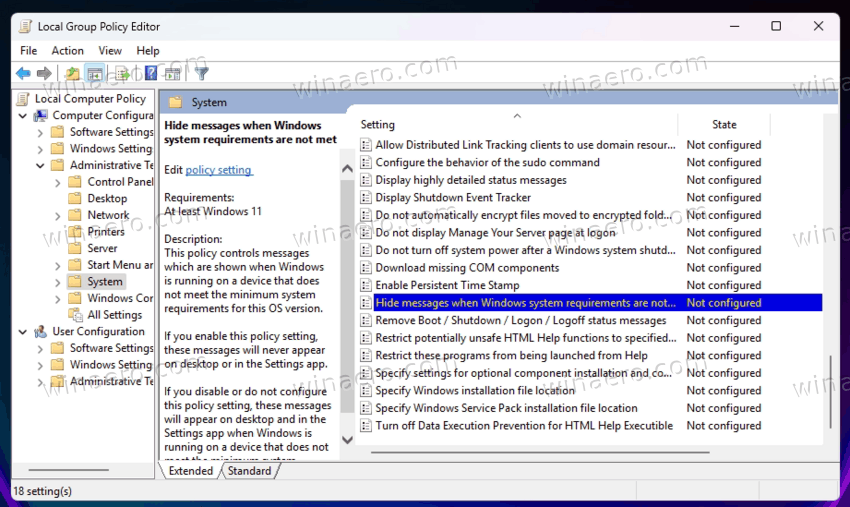
- Select Enabled, then click on Apply and OK. You are done.
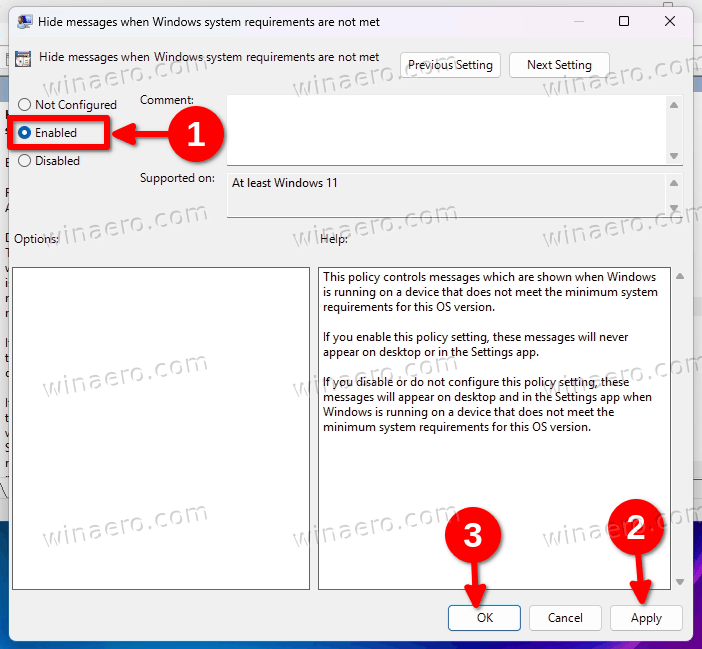
You are done.
Finally, there are methods for some Insider builds of Windows 11. If by a chance you are running such a build, or the methods exposes above aren't applicable to you computer, try the method 2 of this guide.
Method 2. Hide the requirement watermark from the desktop
- Press Win+R and type
regeditin the Run box to open the Registry editor. - Navigate to the following branch:
HKEY_CURRENT_USER\Control Panel\UnsupportedHardwareNotificationCache. IfUnsupportedHardwareNotificationCacheis missing, create it manually (see below). - In the right pane, change the
SV2dword value from 1 to 0. If you don't have such a value, right-click the UnsupportedHardwareNotificationCache folder and select New > DWORD value (32-bit). Name it SV2. - Now, create one more DWORD value (32-bit) and name it SV1.
- Restart Windows 11. The desktop watermark telling about hardware specs should disappear.
You are done.
Note: In case you don't have the UnsupportedHardwareNotificationCache key, create it manually. For that, right-click the HKEY_CURRENT_USER\Control Panel and select New > Key from the menu. Name the new key as UnsupportedHardwareNotificationCache and you are good to go to create the SV2 and SV1 options as described above.
Note #2: The SV1 DWORD value proven to work in Windows 11 Insider Beta and Release Preview channels (Build 22000.588 and above). The SV2 DWORD value works for Windows 11 Insider Dev channel (Build 22557 and above).
Once you complete the above instructions, Windows 11 won't display the notification any longer. The system requirements watermark will disappear from both Desktop and Settings app.
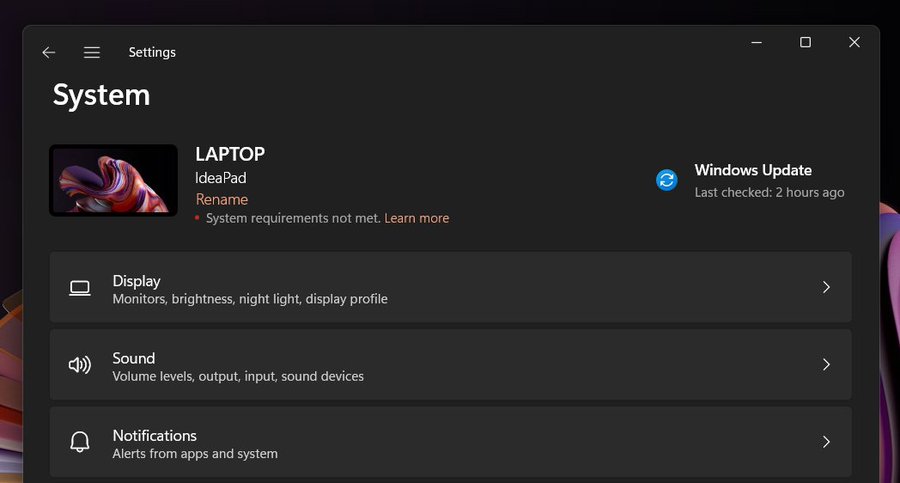
To save your time, you can download the following ready-to-use Registry files.
Download REG files
- Click here to download the ZIP archive with two REG files.
- Extract them to any location. You can simply put them to the Desktop.
- Double-click the file "Remove the System Requirements Not Met watermark.reg" file.
- Confirm the UAC prompt and restart your Computer.
The other file you have downloaded restores the watermark. For that, double-click the file "Add the System Requirements Not Met watermark.reg". Again, click Yes in the User Account Control dialog and restart Windows 11.
However, keep in mind that currently the watermark appears in Insider Preview builds. Any of the stable builds of Windows 11 to this time don't show such a notification. Perhaps, it will appear for stable version users this year with Windows 11 22H2, which Microsoft is set to release this year.
Support us
Winaero greatly relies on your support. You can help the site keep bringing you interesting and useful content and software by using these options:

I need this ;) Otherwise, I’m going to go crazy about it.
the watermark no longer appears with officially released KB5011563 build 22000.593 update on March 28. so this reg fix is no longer needed; only occurred with the beta/RP 22000.588 build and not with 22000.593
aww, the “system requirements not met” watermark has returned; this time for 22H2 users:
https://www.neowin.net/news/windows-11-system-requirements-not-met-watermark-apparently-begins-haunting-22h2-users-now/
Yeah, that’s a pointless terrible watermark.
in the registry add:
[HKEY_LOCAL_MACHINE\SOFTWARE\Microsoft\Windows\CurrentVersion\Policies\System]
“HideUnsupportedHardwareNotifications”=dword:00000001