There are several ways to enable Remote Desktop in Windows 11. In this post, we will review them. Like many older Windows versions, Windows 11 has built-in support for remote connections that allows you to control a computer from another device using an RDP (remote desktop protocol) client software. Windows 11 keeps remote access disabled by default, which means you need to change a few settings in Windows before attempting to access a computer from another device. This article will show you how to turn on Remote Desktop in Windows 11.
Advertisеment
It is worth mentioning that Remote Desktop Protocol is universal and works with older Windows versions. That means you can control a Windows 11 PC from Windows 7, Windows 8, Windows 10, and vice versa. Note, though, that your PC should run Windows 11 Professional, Educational, or Enterprise SKU if you want to access it using RDP. While Windows 11 Home can work as a "client" (a device that connects to a remote PC), you cannot access a computer with a Home SKU. Fortunately, there are plenty of third-party free alternatives for remote control, so that should not be a problem.
Tip: You can check your Windows SKU by opening Windows Settings > System > About > Windows Specifications.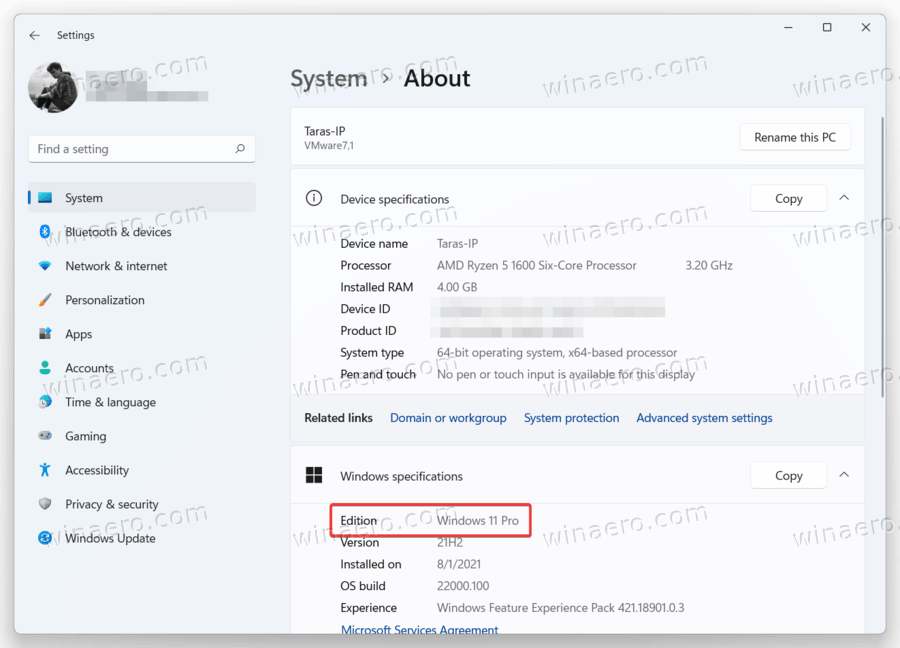
Enable Remote Desktop Protocol in Windows 11
Unlike Windows 10, where the classic Control Panel is the only way to enable remote connections, Windows 11 has two interfaces for managing RDP.
To enable Remote Desktop Protocol in Windows 11, do the following.
Enable RDP in Windows 11 in Settings
- Open Settings in Windows 11 by pressing Win + I.
- Go to System > Remote Desktop.
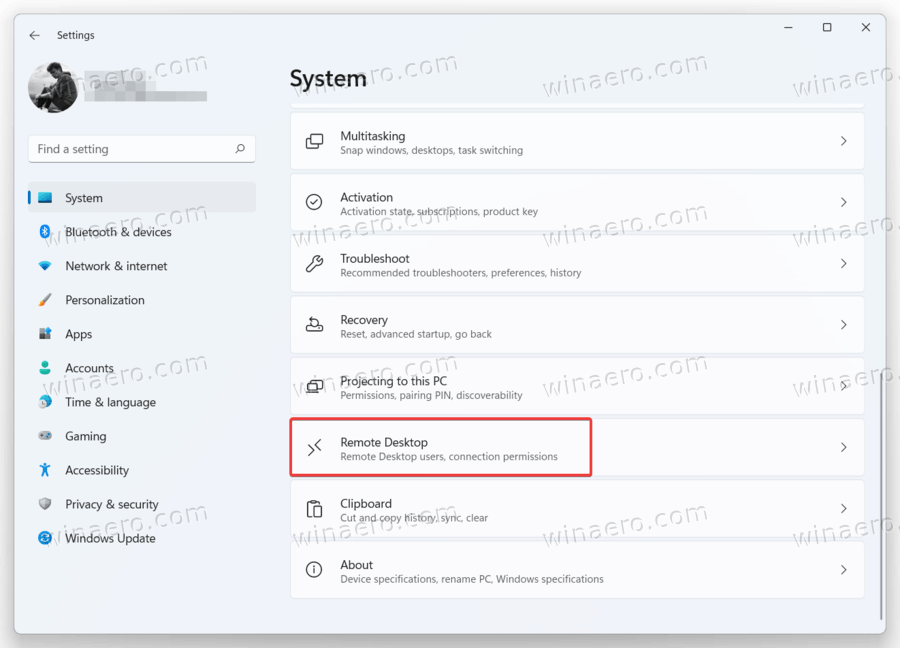
- Turn on the Remote Control toggle option.
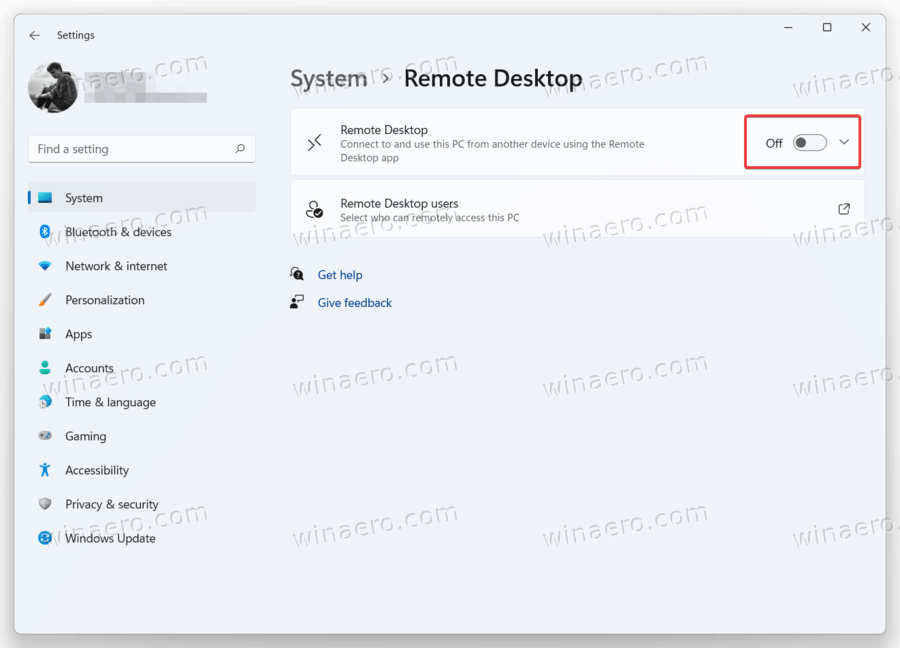
- Click Confirm.

Now your computer is ready for remote connections. Leave the rest of the settings default. If you plan to connect to a Windows 11 remotely from a computer with Windows XP or Vista, uncheck the "Require devices to use Network Level Authentication" checkbox.
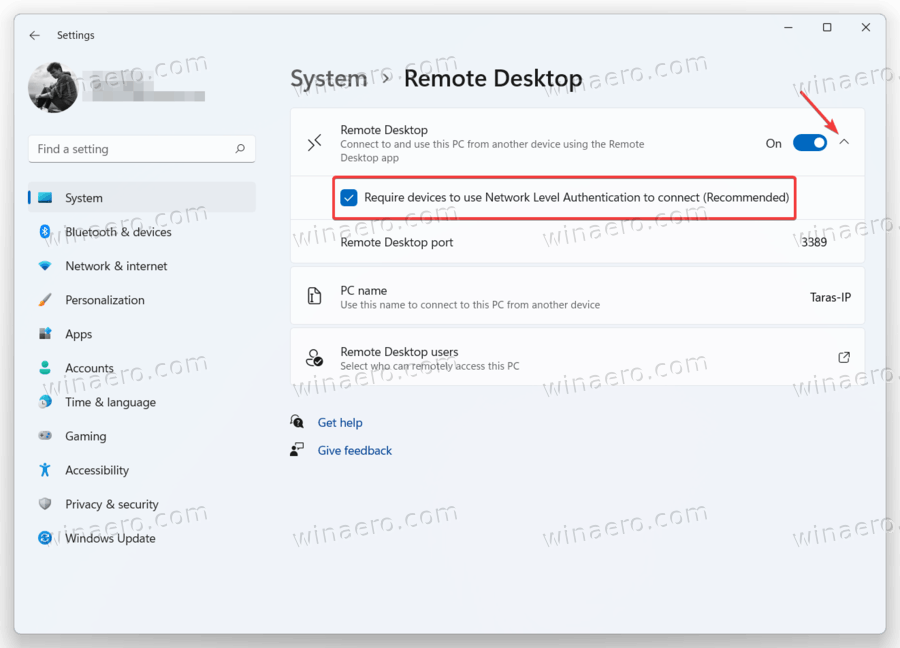
Otherwise, leave it on for better connection security.
Enable Remote Desktop in Windows 11 Control Panel
Here is a legacy method that also works on Windows 10, Windows 8, and Windows 7.
- Press Win + R and enter the
SystemPropertiesAdvancedcommand in the Run box. - You can also get to the same window in Windows Settings > System > About and click/tap any link in the Related Links section.
- Click the Remote tab and select Allow remote connections to this computer.
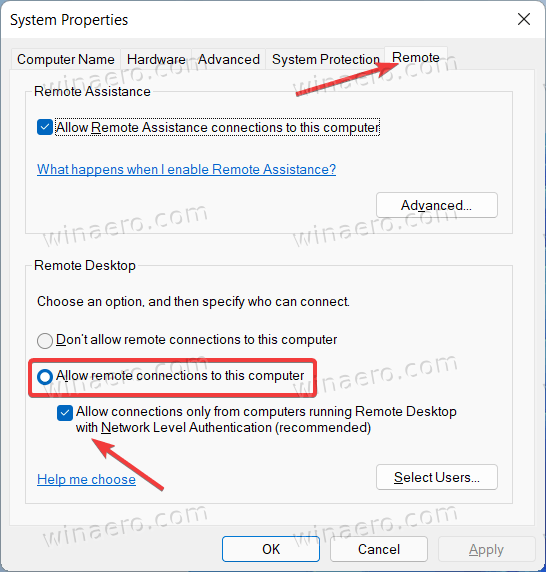
- Again, if you need to access your computer from Windows XP or Vista, uncheck the "Allow connections only from computers running Remote Desktop with Network Level Authentication" option.
Allow users to access Windows 11 via RDP
By default, Windows 11 allows remote access to all existing users with Administrator privileges. If you want to add another user, do the following:
- Go to Windows Settings > System > Remote Desktop.
- Click Remote Desktop Users.
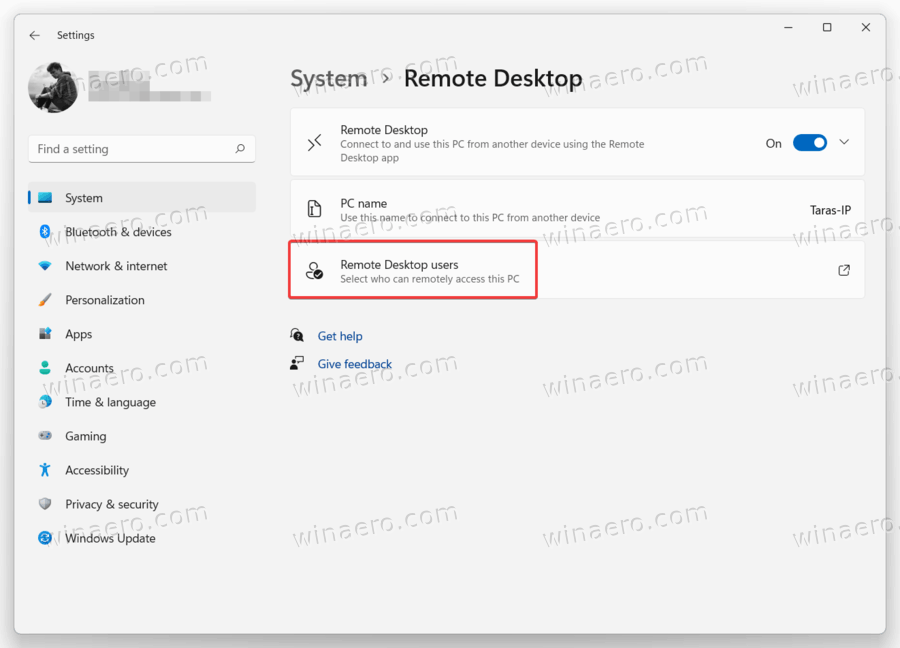
- In a new window, click Add.
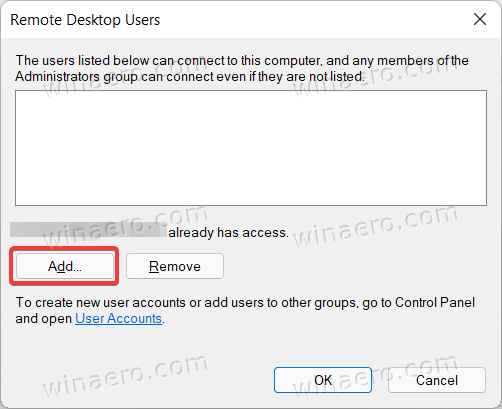
- Next, enter the user name, then click Check names. Note: If you want to add a user that logs in using a Microsoft Account, enter its email.
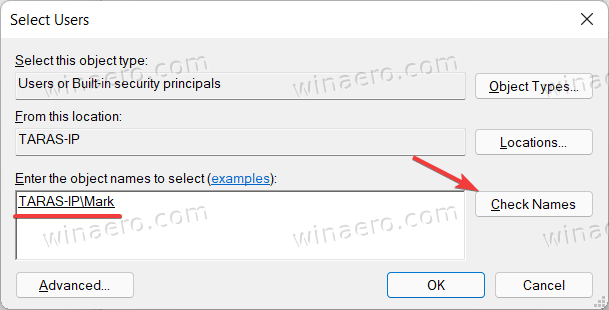
- Click OK to save changes.
Add RDP users with the classic Control Panel applet
Alternatively, you can specify user accounts that will be able to connect to your device over RDP using the classic Control Panel applet. There is a command to open it directly.
To add RDP users with the Control Panel, do the following.
- Press Win + R and type
SystemPropertiesRemote, then press Enter.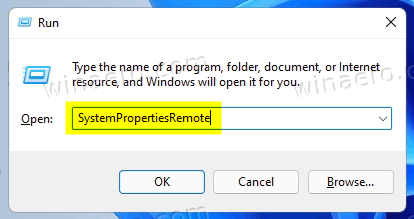
- Click on the Select users... button.
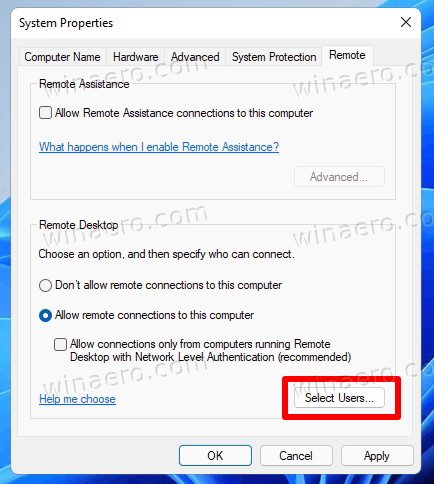
- In the next dialog, click on the Add button.
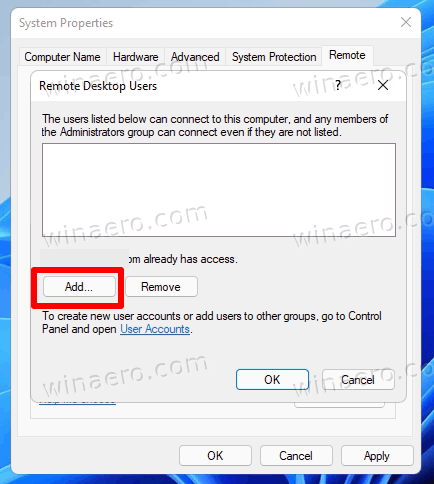
- Enter the user name, then click Check names.
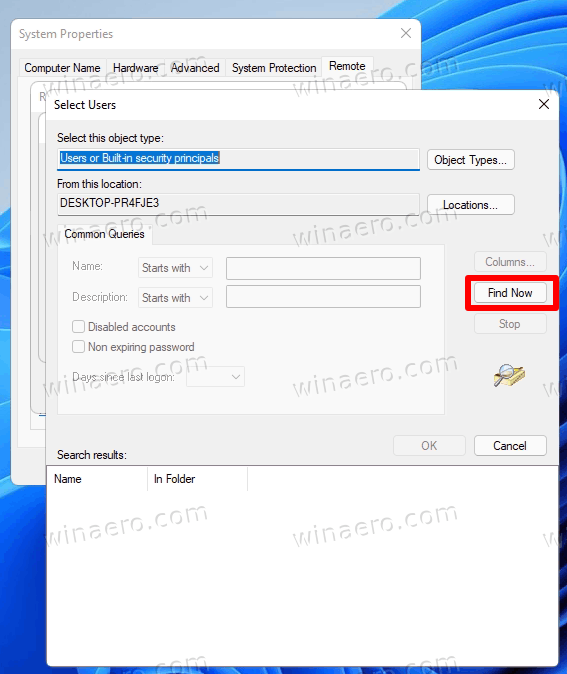
- If you don't remember the user name, click on the Advanced... button.
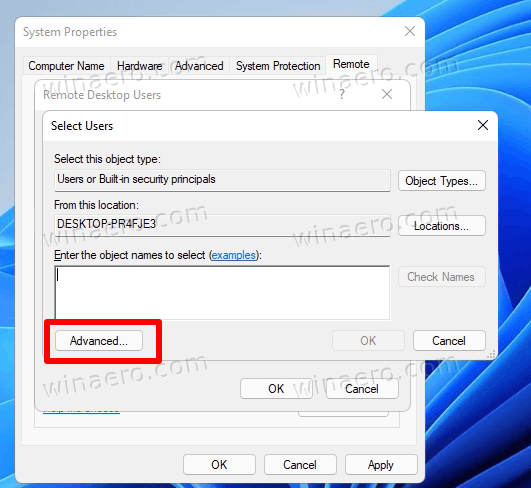
- In the Select users... dialog, click on Find now.
- Finally, select the user account for which you want to allow connection over RDP, and click OK.
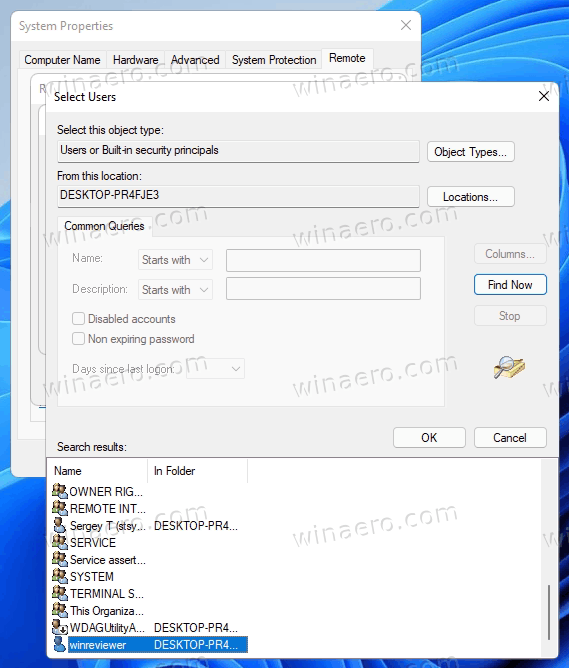
Now you can control a Windows 11 PC remotely using available accounts.
Support us
Winaero greatly relies on your support. You can help the site keep bringing you interesting and useful content and software by using these options:

Thanks for your instructions, and it is very detail, and I can set it up without any problem , but first of all, I need the Windows 11 Pro version, so I have to upgrade from home to Pro, it is all good now , I can access the PC in the lab from my dorm now