In this post, we will review a few methods of how to enable the Administrator Account in Windows 11. The built-in administrative account is still present in the newest operating system. Window 11 traditionally hides it, and you need to activate it manually.
Advertisеment
Since Windows Vista, Microsoft has changed how administrative accounts behave. Windows automatically creates the main account, Administrator, but hides it. Users with administrative accounts have to confirm their intention to change important settings. Standard users must know credentials for one of the administrative accounts to do any task that requires a User Account Control approval.
However, if you start Windows 11 in Safe Mode, it will enable the built-in Administrator account and activate it. Also, it is possible to unhide that account for regular working mode.
Before you continue, you may need to check what's the current state of the Administrator account.
Check the account status
Press Win + X or right-click the Start button, and select Windows Terminal. Alternatively, you can right-click the Start button to open the same menu.
Now, type net user administrator and hit Enter. In the output, find the line Account active.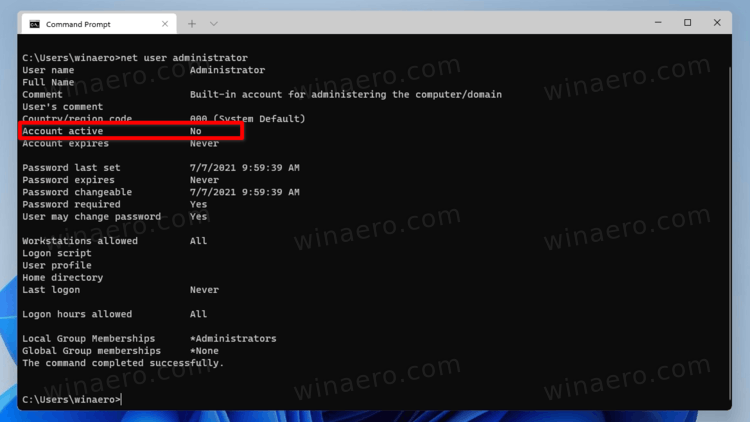
If it says No, the account is disabled. If it says Yes, then it is enabled.
Enable Administrator Account in Windows 11
- Right-click the Start button and select Windows Terminal (Admin).
- Click Yes to confirm the User Account Control request.
- Finally, type
net user administrator /active:yesand press the Enter key.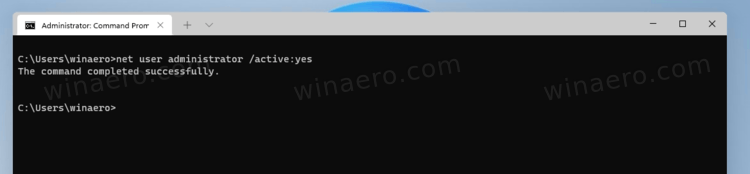
- You will see The command completed successfully. This means that you have enabled the Administrator account.
That's an easy and quick method to get it enabled. However, I don't recommend you to use it instead of your regular user account. Once you finish your troubleshooting or configuration tasks, disable it. Here's how.
Disable the account again
- Open the Windows Terminal as admin from the Win+X menu.
- Type
net user administrator /active:noand hit Enter.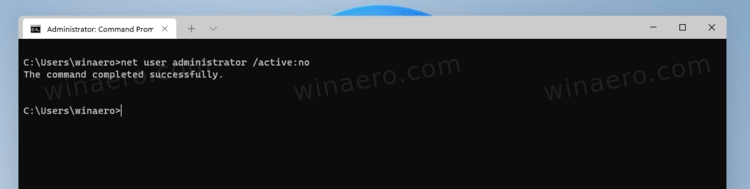
- You have just disabled the account. If you
run net user administrator, you will see the Account Active: NO line.
Done.
The alternative method is to use the "Local users and groups" tool (lusrmgr.msc). It is also a classic app that is available in many Windows versions, including Windows 11.
Using Local users and groups
- Press Win + R on the keyboard and type
lusrmgr.mscinto the Run dialog. Press Enter. - In the Local users and groups app, open the Users folder.
- Find the Administrator account and double-click it.
- In the Administrator Properties dialog, uncheck the option Account is disabled.
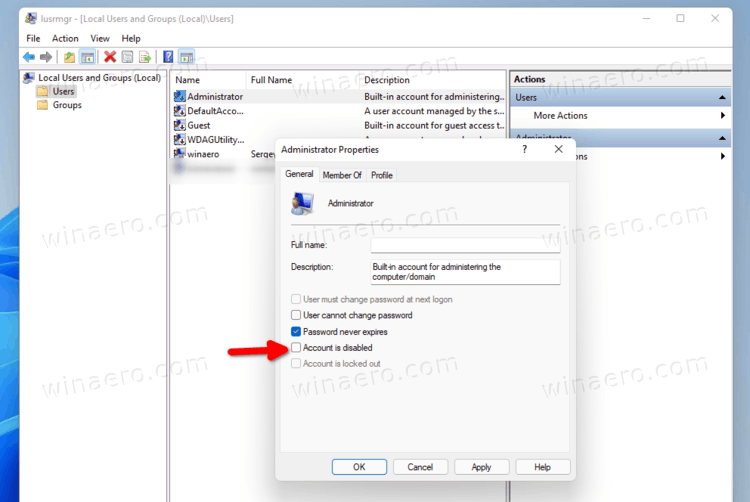
- Click Apply and OK.
Done! If you change your mind, you can turn on the above mentioned checkbox at any moment later by following the same steps.
Yet another alternative is the built-in Local Security Policy app (secpol.msc). By default, it comes with a policy that instructs Windows 11 to keep the Administrator account disabled, but you can change that.
With Local Security Policy app (secpol.msc)
- Right-click the Start button and select Run from the context menu, or press Win + R.
- Type
secpol.mscinto the Run box and press Enter to launch the app. - Expand open the left area to Security Settings > Local Policies > Security Options.
- In the right pane, find the policy named Accounts: Administrator account.
- Double click it and change from Disabled to Enabled.
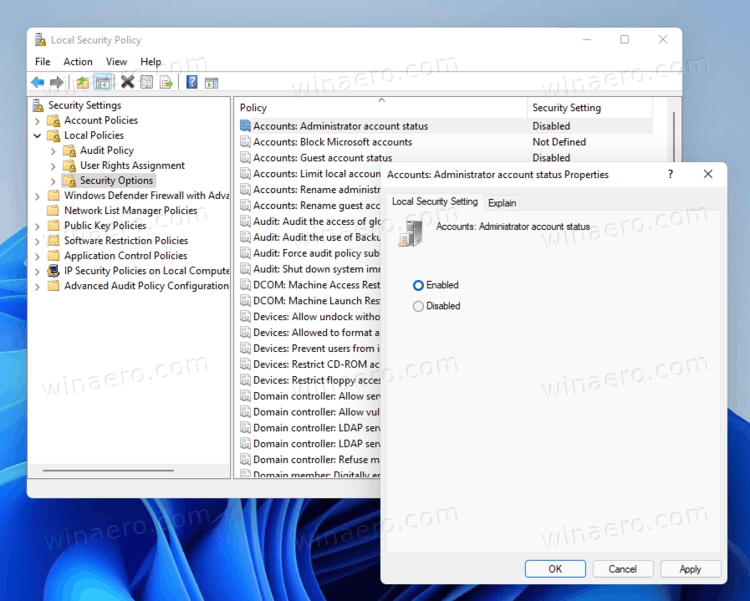
- Click Apply, then click OK.
Done!
Similar to the above, you can revert the change by setting the policy back to Disabled.
The last method is Winaero Tweaker.
Enable Administrator account with Winaero Tweaker
Download Winaero Tweaker, install it, and run. Navigate to User accounts \ Built-in Administrator.
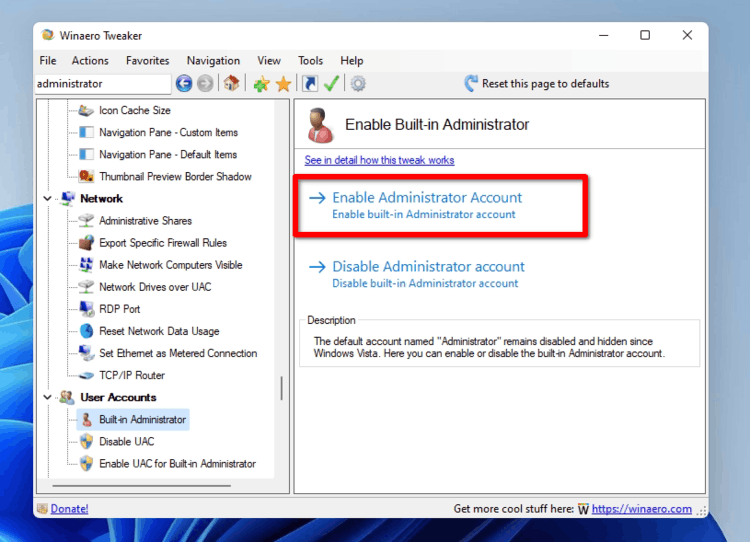
There, click on the Enable button. The account will be instantly enabled. The Disable button disables it.
That's it.
Support us
Winaero greatly relies on your support. You can help the site keep bringing you interesting and useful content and software by using these options:

None of these “fixes” worked on my computer.
It works here even in 23h2.
What is your Windows version?