Today, we will review an easy way to disable Modern Standby in Windows 11 and Windows 10. Modern Standby is a modern power mode that has certain advantages and disadvantages.
Advertisеment
If you are not familiar with Modern Standby, its the most recent power saving mode available in modern laptops and tablets. It replacedthe classic S3 low power mode that simply puts hardware into the sleeping state. Modern Standby adds efficient power management of individual devices, along with the 'Instant ON' feature. The latter allows to instantly turn on a Windows device like your smartphone does, and even allows keeping an alive Internet connection in sleep.
The built powercfg console tool in Windows allows finding if your device supports Modern Standby. If for some reason you need to turn off Modern Standby in favor of the classic Sleep mode, follow the instructions below.
Disable Modern Standby
To disable Modern Standby in Windows 11 and Windows 10, do the following.
- Right-click the Start button, select Run, and type
regeditto the Run box. Hit Enter to lauch the Registry Editor. - Navigate to the
HKEY_LOCAL_MACHINE\SYSTEM\CurrentControlSet\Control\Powerkey. For that, copy and paste this path to the address bar of the Registry editor. - Right-click the empty space in the right pane and select New > DWORD Value (32-bit).
- Name the new value as PlatformAoAcOverride and left its value data as 0 (zero).

- Restart Windows to apply the change.
You just successfully disabled Modern Standby.
To save your time, I have prepared ready-to-use Registry files. As an alternative to them, you can use a couple of commands. Here we go.
Ready-to-use Registry Files
- Click here to download two REG files in the ZIP archive.
- Extract them to any folder of your choice.
- Double-click the
Disable_Modern_Standby.regfile and confirm the UAC prompt. - Restart the computer.
- The undo tweak is the
Enable_Modern_Standby.regfile, which is also included to the archive.
Done!
Alternatively, you can Run special commands to made the appropriate Registry modifications.
Commands to Disable Modern Standby
The fastest way to disable Modern Standby in Windows 11 and Windows 10 is to run the following reg commands.
First of all, press Win + X and select Windows Terminal (Admin) from the menu.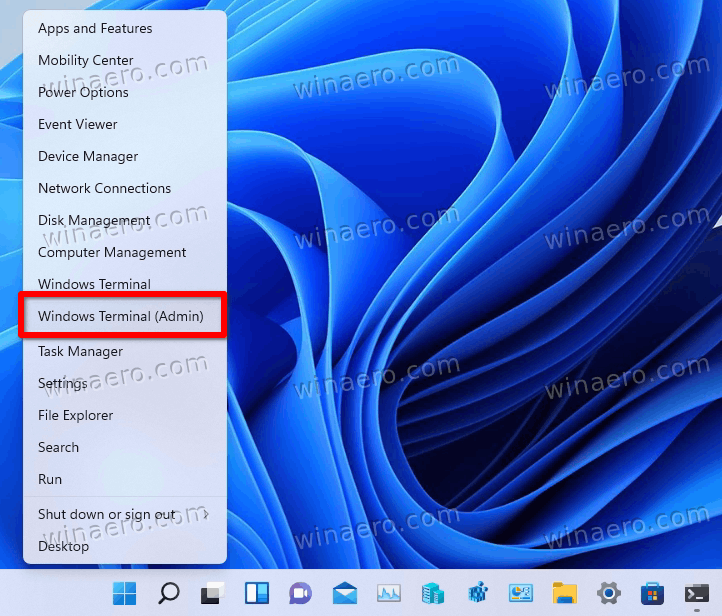
Next, switch it to the Command Prompt by pressing Ctrl + Shift + 2, or from the down-arrow menu (see the screenshot).

Finally, run one of the following commands:
- To turn off the Modern Standby feature:
reg add HKLM\System\CurrentControlSet\Control\Power /v PlatformAoAcOverride /t REG_DWORD /d 0.
- To re-enable it (undo the disablement):
reg delete "HKLM\System\CurrentControlSet\Control\Power" /v PlatformAoAcOverride /f.
That's pretty easy. The above commands were tested by me on my devices with Intel CPUs and they work like a charm. If disabling Modern Standby has any negative impact on your laptop and its power management, don't hesitate to share your device model and its specs.
Support us
Winaero greatly relies on your support. You can help the site keep bringing you interesting and useful content and software by using these options:

I did this on my new ASUS Scar and it kept the laptop asleep — too well. It wouldn’t wake. I had to hold down the power button for 10 seconds to get it to shutdown. Even then, pressing the power button didn’t turn the laptop on! I had to hold the power button down for 40 seconds to do a hardware reset, then it booted. “powercfg -a” at least said that S3 was enabled and S0 was disabled but obviously the computer behaved even worse. I deleted that DWORD (and rebooted) and it returned to its previous behavior.
thanks about this article so nice
lmfao this just disabled sleep entirely on my machine.
It has broken our production change :(