For privacy and safety reasons some Windows 11 users may want to clear clipboard data and clipboard history. The clipboard is a special place in computer's memory that stores everything you copy. Regardless of the content type, like text, image, or file - the copied information remains available for pasting. It will be there until you shutdown your PC or copy something that replaces the current data.
Advertisеment
Starting in Windows 10, the operating system supports History for the Clipboard. It is literally a journal of everything you have copied. The Clipboard History in Windows 11 is powered by the cloud and can sync its entries across your devices.
For example, you can copy some text on your current PC, then start your laptop, and that text will be available in the clipboard history on the laptop. This convenient feature relies on Microsoft Account, so you have to use one to sign to the OS.
Another interesting feature of the Clipboard History is the ability to pin specific items. Pinned items will persist in the history until you unpin them, and will never be replaced by new entries.
Clipboard history item size is limited to 4 MB per item. Also, it can contain maximum 25 entries.
You may want to clear your clipboard to stop exposing something sensitive to other users and apps. In Windows 11, you need to clear the clipboard contents, and remove the last entry from the Clipboard History. Also, you may be interested in disabling the latter to stop the OS from collecting what you copy.
Clear Clipboard in Windows 11
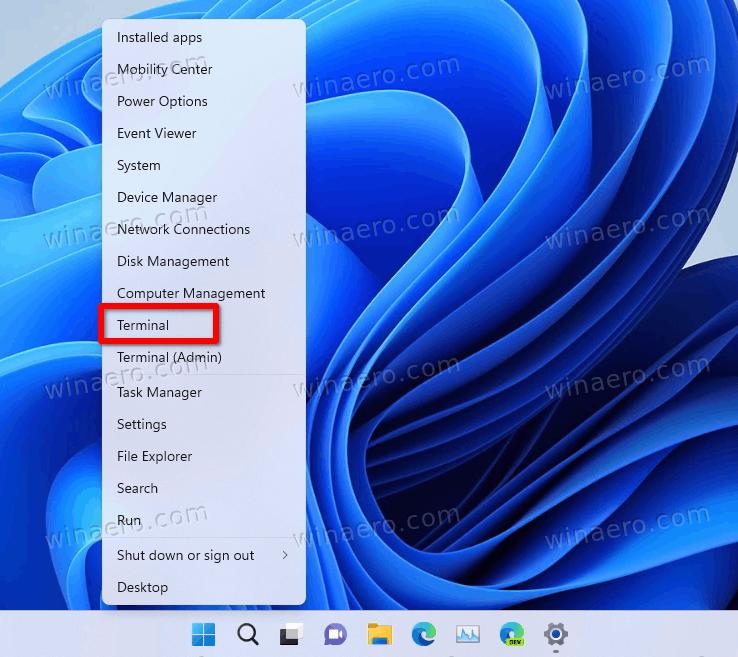
- Right-click the Start button and select Terminal from the menu.
- In the Command Prompt tab (Ctrl + Shift +2), copy-paste the following command:
echo.|clip.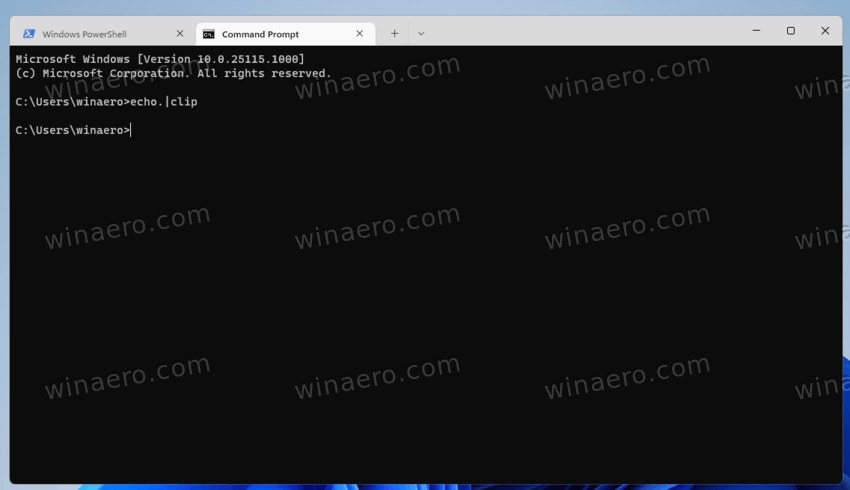
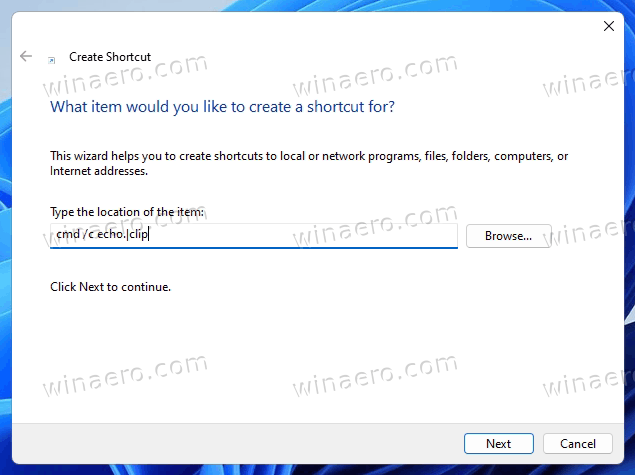
- You can also omit Windows Terminal; press Win + R to open the Run box and copy-paste this command:
cmd /c echo.|clip.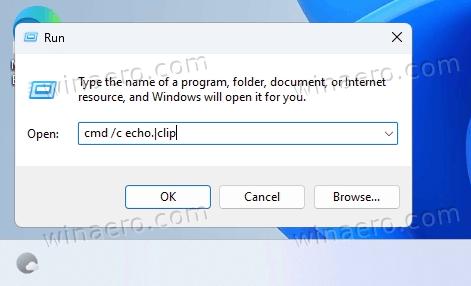
Done! This will replace the contents of the clipboard with an empty text.
However, it is obvious that running the command every time you need to clear the clipboard is not convenient. To save your time, you can create a special shortcut to do it with one click.
Create a shortcut to clear clipboard data
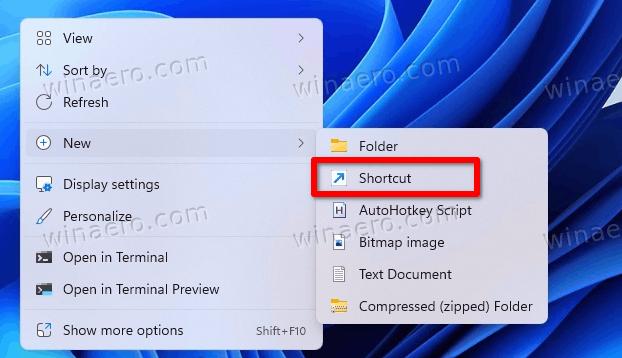
To create a clear clipboard shortcut, right-click the desktop and select New > Shortcut from the menu.
In the shortcut target field, type the familiar command cmd /c echo.|clip.
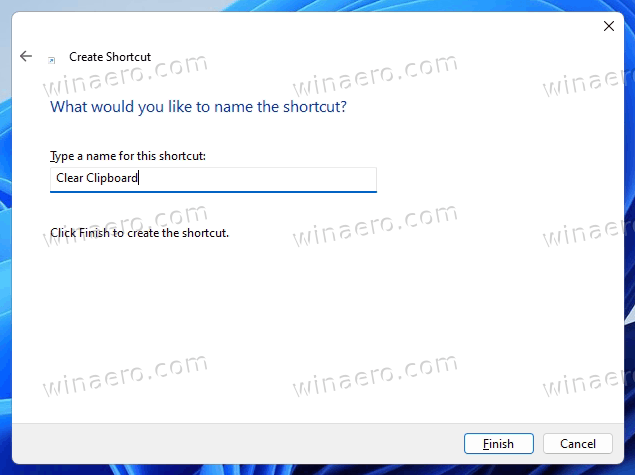
Finally, name your shortcut as "Clear Clipboard" and click "Finish".
I suggest you to change its icon from the command prompt to something different. You can pick a nice suitable icon from the c:\windows\system32\imageres.dll file. See the following screenshot.
You are done.
Finally, you can also assign a keyboard shortcut to the above shortcut. If you place it to the Start menu, the keyboard shortcut will be available in any app at any moment of time.
Clear clipboard with a keyboard shortcut
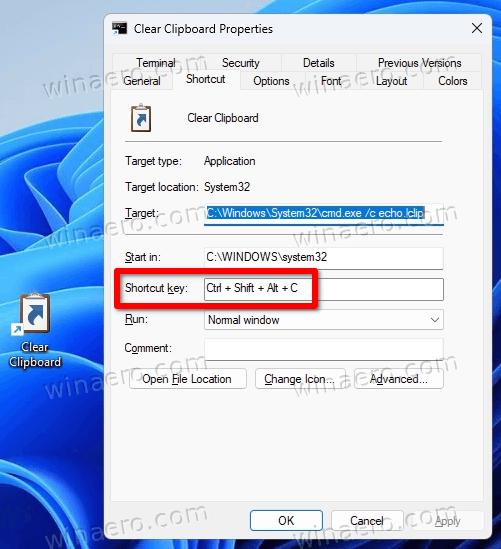
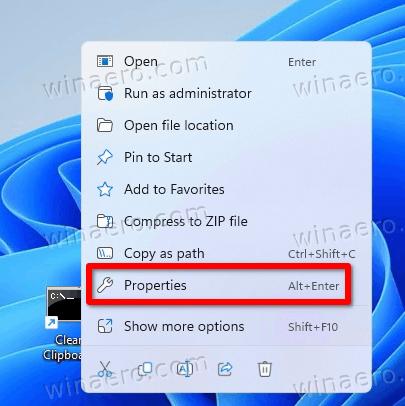
- Right-click your 'Clear Clipboard' shortcut and select Properties from the menu.
- On the Shortcut tab, click in the Shortcut key text box and press the desired sequence to assign it to the shortcut, e.g. Ctrl + Shift + Alt + C.

- Click Apply and OK to save the changes.
- Now, press Win + R and type
shell:Start menucommand in the Run dialog. This shell command will open the Start menu folder in File Explorer.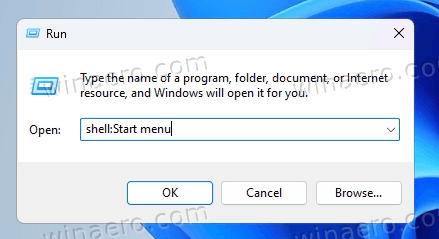
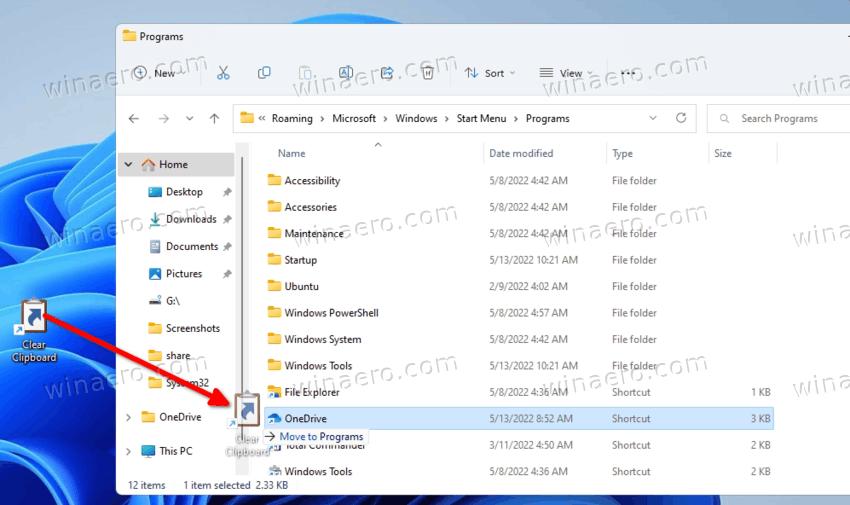
- Double-click the Programs folder and move your 'Clear Clipboard' shortcut inside it.
From now, you can press your hotkey, which is Ctrl + Shift + Alt + C in my case, and your clipboard data will be instantly removed!
The reviewed command is indeed helpful, but it won't prevent Windows from logging you copies if Clipboard History is enabled. It will contain everything you recently copied, even if the current clipboard data is empty.
Windows 11 will automatically remove the Clipboard history every time you restart your device. However, it will keep pinned items. Instead of restarting the OS, you may want to clear the clipboard history manually, or at least remove some of its items.
Clear Clipboard History in Windows 11
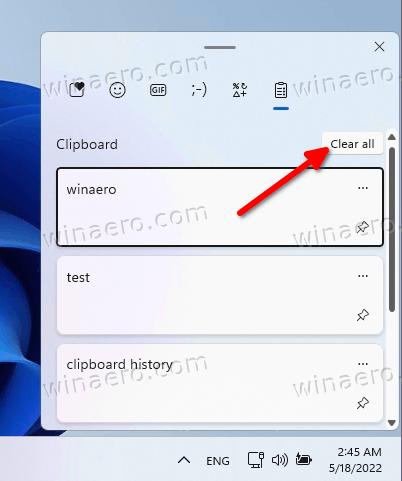
- Press Win + V to open the Clipboard History flyout.
- Click the Clear all button to remove all items excluding the pinned ones.
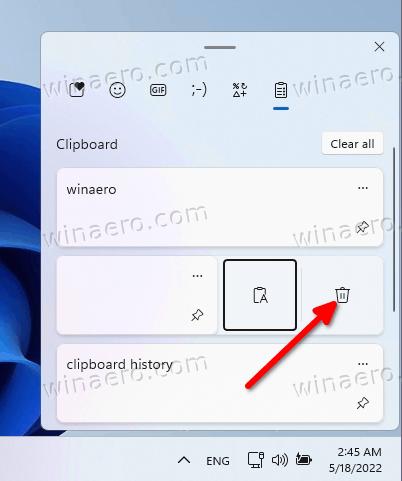
- To remove a specific item, click the "See more" three dot button next to the entry to open its menu.
- Click on the Recycle bin icon to remove it.
Done!
So, with this operation the pinned items will not be removed until you remove them manually. Here's how you can pin any item to make it permanently visible in the Clipboard History pane.
Pin Clipboard History items
- Open the Clipboard History (Win + V).
- Click on the Pin icon in the bottom right corner of the entry.
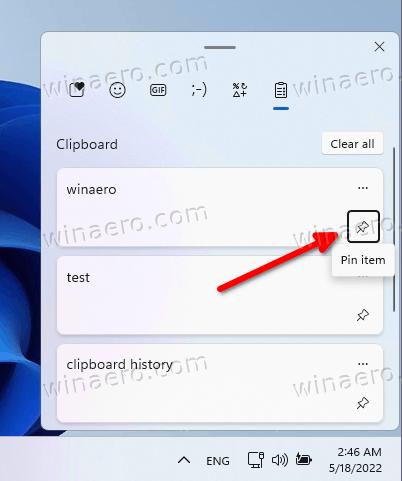
- Clicking the same icon one more time will unpin the item.
If you don't use the Clipboard History feature, you may want to disable it completely. Disabling it will also clear all pinned items.
Disable Clipboard History
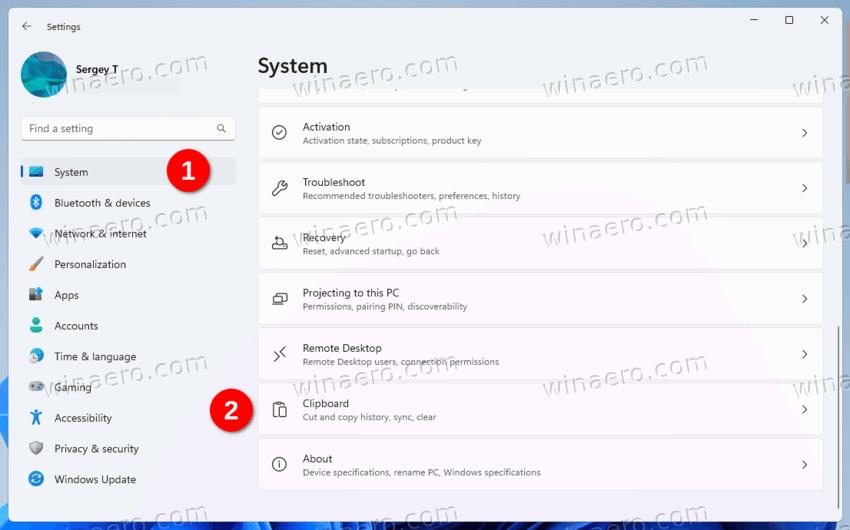
- Open the Settings app using the Win + I keyboard shortcut.
- Click the System tab on the right, and then click the Clipboard button on the right.
- On the next page, turn off the Clipboard history on the right side to disable it. This will also remove your history contents, including pinned items.

Done! You can no longer care about Windows 11 tracking your copies/cuts. However, if you disabled Clipboard history just to clear items (both regular and pinned), don't forget to turn it on at some point later (or immediately).
Finally, you can use the Settings app to clear the clipboard history in Windows 11. There is a special option for that purpose.
Clear the clipboard history using Settings
- Open the Settings app using any method, e.g. by clicking its shortcut in the Start menu.
- Go to the System > Clipboard.
- Now, click the Clear button in the Clear clipboard data section on the next page.
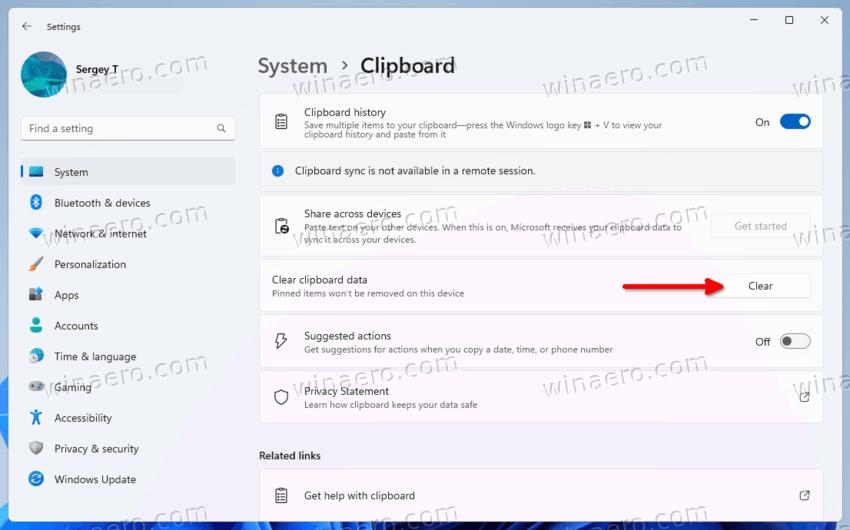
- If the Clear button is disabled (grayed out), then it means your clipboard history data is not present or already removed.
That's it!
Support us
Winaero greatly relies on your support. You can help the site keep bringing you interesting and useful content and software by using these options:
