As you may remember, there was a Windows feature called "InPrivate Desktop" which was a work-in-progress. Now it is officially revealed under the name "Windows Sandbox". Let's see what it does and how to enable it.
Advertisеment
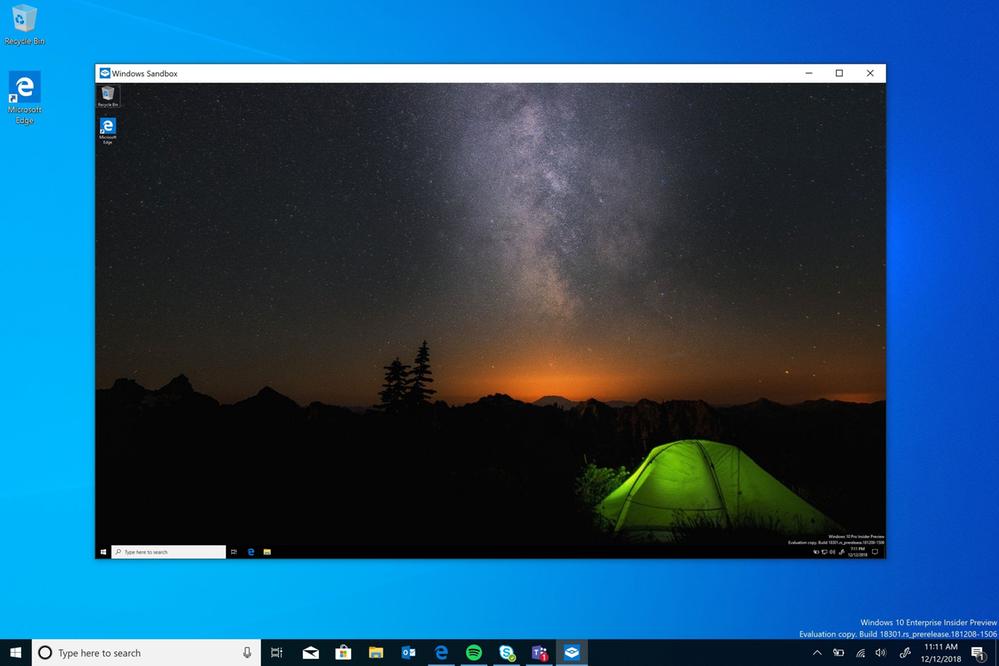
Windows Sandbox an isolated, temporary, desktop environment where you can run untrusted software without the fear of lasting impact to your PC. Any software installed in Windows Sandbox stays only in the sandbox and cannot affect your host. Once Windows Sandbox is closed, all the software with all its files and state are permanently deleted.
Windows Sandbox has the following properties:
- Part of Windows – everything required for this feature ships with Windows 10 Pro and Enterprise. No need to download a VHD!
- Pristine – every time Windows Sandbox runs, it’s as clean as a brand-new installation of Windows
- Disposable – nothing persists on the device; everything is discarded after you close the application
- Secure – uses hardware-based virtualization for kernel isolation, which relies on the Microsoft’s hypervisor to run a separate kernel which isolates Windows Sandbox from the host
- Efficient – uses integrated kernel scheduler, smart memory management, and virtual GPU
In the official blog post, Microsoft has announced following pre-requisites for using the Windows Sandbox feature:
- Windows 10 Pro or Enterprise build 18305 or later
- AMD64 architecture
- Virtualization capabilities enabled in BIOS
- At least 4GB of RAM (8GB recommended)
- At least 1 GB of free disk space (SSD recommended)
- At least 2 CPU cores (4 cores with hyperthreading recommended)
How to enable Windows Sandbox in Windows 10
If you device meets the mentioned requirements, you can enable Windows Sandbox by opening the Windows Features dialog. Before proceeding, you need to enable virtualization, as follows.
- If you are using a physical machine, ensure virtualization capabilities are enabled in the BIOS.
- If you are using a virtual machine, enable nested virtualization with this PowerShell cmdlet:
- Set-VMProcessor -VMName <VMName> -ExposeVirtualizationExtensions $true
Now, you can enable Windows Sandbox.
To enable Windows Sandbox in Windows 10, do the following.
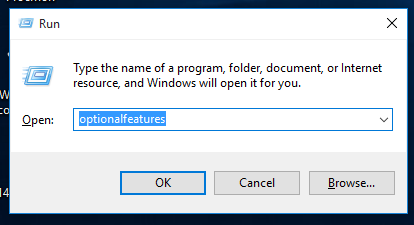
- Press the Win + R keys to open Run and type
optionalfeatures.exeinto the Run box.
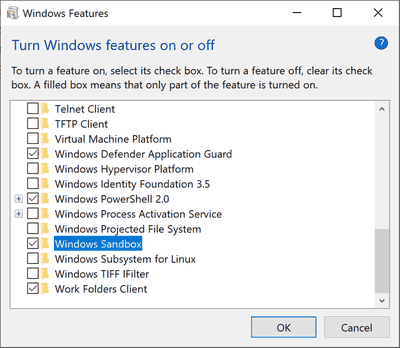
- In the Optional Features applet, scroll to and turn on (check) the box Windows Sandbox.

- Restart Windows 10.
The feature is ready to go.
How to use Windows Sandbox
- Using the Start menu, find Windows Sandbox, run it and allow the elevation
- Copy an executable file from the host
- Paste the executable file in the window of Windows Sandbox (on the Windows desktop)
- Run the executable in the Windows Sandbox; if it is an installer go ahead and install it
- Run the application and use it as you normally do
- When you’re done experimenting, you can simply close the Windows Sandbox application. All sandbox content will be discarded and permanently deleted
- Confirm that the host does not have any of the modifications that you made in Windows Sandbox.

You can read more about Windows Sandbox on the official blog.
Support us
Winaero greatly relies on your support. You can help the site keep bringing you interesting and useful content and software by using these options:

Never knew about this or optionalservices. Thanks
Finally got Windows Sandbox to work by uninstalling this update KB4483214
Casey
Hi Sergey, Thanks a lot for great collection of information and tools here, tremendously helpful.
My question is in regards to enabling Sandbox on Vm. I got my test OS installed and running in VmWare Workstation running over Windows 10. Does nested virtualization still needs to be enabled? As it is right now Sandbox option is grayed out with a note that CPU type is non-compliant.
Thank You and Appreciate your help.
Cheers
AMD64 architecture
Virtualization capabilities enabled in BIOS
At least 2 CPU cores