Here's how to enable or disable Wake on LAN in Windows 10 (WOL)
Wake-on-LAN (WOL) is a cool feature that allows you to wake your PC from sleep or shutdown over the local network or the Internet. It works like a remote power button. If your hardware supports WOL, you can turn on your computer remotely.
Advertisеment
The Wake on LAN (WOL) feature wakes the computer from a low power state when the network adapter detects a WOL event, such as a magic packet. Usually, this event is a specially crafted Ethernet packet. After you enabled the Wake on LAN feature, your device will able to detect such magic packets containing its MAC address and turn on. This means that you can wake up your computer by sending it a magic packet from another device on the network.
Wake-on-LAN behavior
The default behavior in response to WOL events has been changed from Windows 7 to Windows 10.
In Windows 7, the default shutdown operation puts the system into a classic shutdown state (S5). Only certain motherboards were able to power the network adapters enough to wake up the device from S5 mode.
In Windows 10, the default shutdown behavior puts the system into a hybrid shutdown (also known as fast startup) (S4) state. And all devices are put in D3. In this case, WOL from S4 or S5 is not supported. Network adapters are not explicitly enabled for WOL in these cases because users expect zero power consumption and low battery power in a shutdown state. So WOL is disabled by default. You need to configure the OS to make WOL work.
How to Enable Wake on LAN in Windows 10 (WOL)
- Open your BIOS or UEFI shell. Depending on your hardware, you may need to press Esc, Del, F1, or F2, etc to enter the BIOS during boot.
- Enable or disable the Power On By PCI-E or WOL (Wake-on-LAN) option in power management settings.
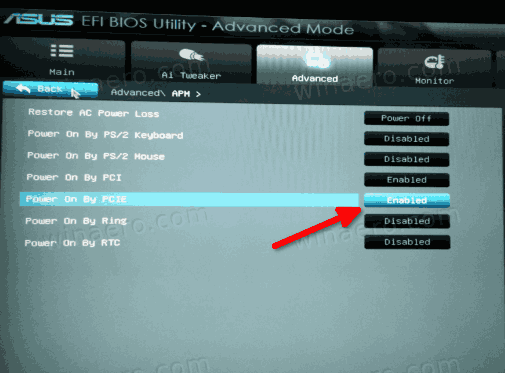
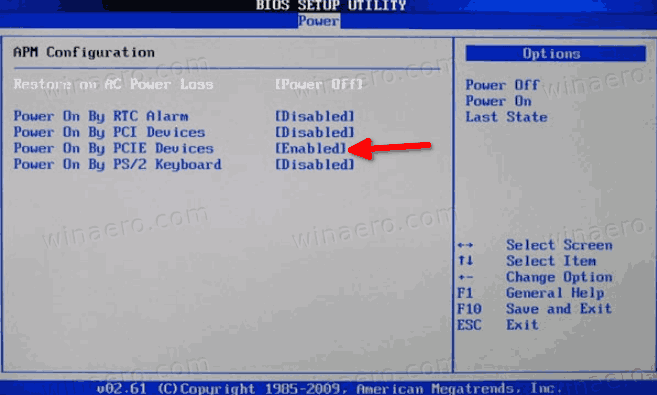
- Now, Start Windows 10.
- Open the Device Manager.
- Expand the Network adapters entry on the left, and double click on your network adapter.
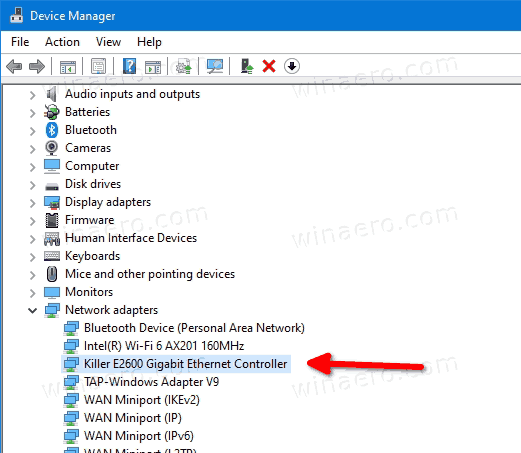
- Click on the Advanced tab in the Properties window, and select the Wake on Magic Packet option in the Property pane on the left.
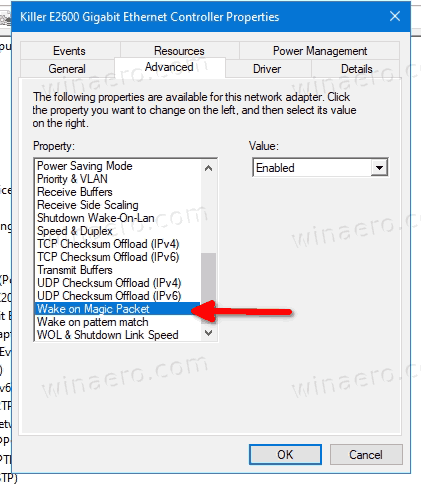
- Select Enabled in the Value drop down list.
You have enabled the WOL feature in Windows 10. Now, it is a good idea to learn how to use it. Follow this link:
How to use wake on LAN on Windows 10
Similarly you can disable the Wake-on-Lan option using the dialog reviewed above. It is worth mentioning that you can open it from the Network Connections folder for a specific adapter.
Disable Wake on LAN (WOL) in Windows 10
- Open the Control Panel.
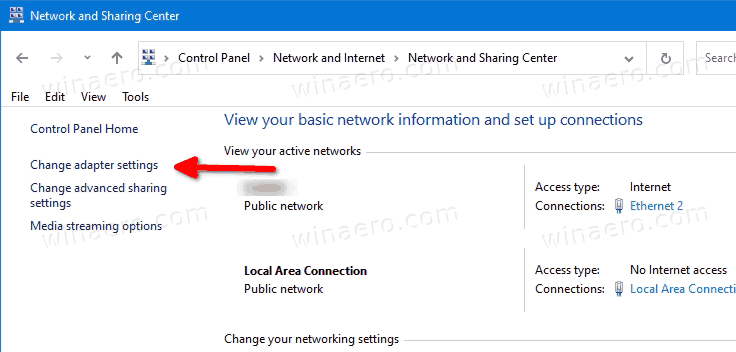
- Go to Control Panel\Network and Internet\Network and Sharing Center.
- On the right, click on the Change adapter settings link.
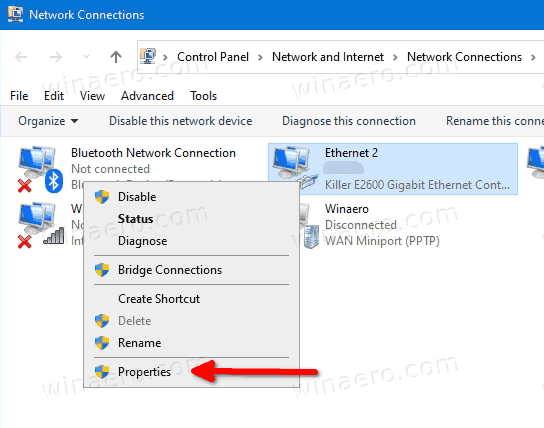
- Right click the network adapter you want to disable the WOL feature for, and select Properties from the menu.
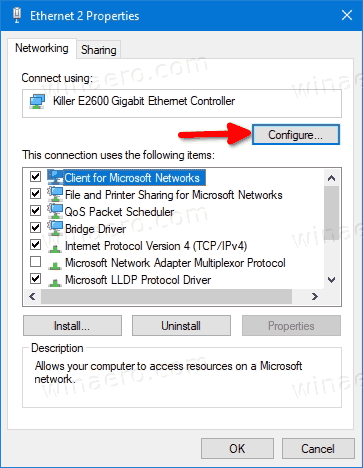
- Click on the Configure button on the Networking tab of the Properties dialog,
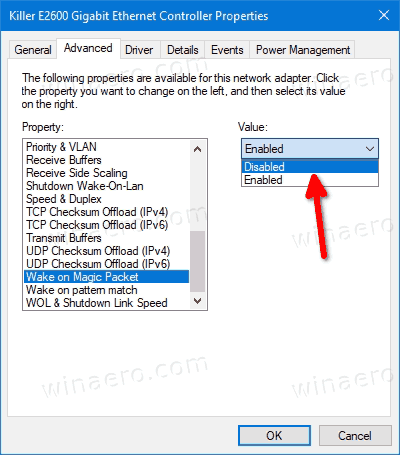
- Click on the Advanced tab in the Properties window, and select the Wake on Magic Packet option in the Property pane on the left.
- Select Disabled in the Value drop down list.
You are done!
You can also set the Power On By PCI-E/WOL (Wake-on-LAN) option in BIOS or UEFI to turn off the hardware support for WOL.
Support us
Winaero greatly relies on your support. You can help the site keep bringing you interesting and useful content and software by using these options:

“Win7 shut down”” turns ethernet off (LAN indicator on the router: off);
“Win10 shut down” does not turn ethernet off (LAN indicator on the router: still on).
PC is the same! Network Adapter Advanced settings are completely the same!
Does “Power Management” tab — “Allow this device to wake the computer” checkbox not working?
try to disable fast startup.
Excellent! Thank you.
Default “Enabled” for this intrusion is another perversity of Windows 10.