You can enable or disable Sync for a profile in Microsoft Edge and change its individual options. Microsoft Edge allow you to sync its settings and browsing data, that including favorites, preferences, extensions, addresses, history, and much more. This implemented via a Microsoft Account that stores your data in the cloud and transfers it across your devices.
Advertisеment
When you use Edge with a Microsoft account, you can sync your browsing settings and data across multiple devices where you have signed in with the same account. It allows you to sync favorites, preferences, saved passwords, auto-fill data, extensions, and more.
However, It is up to the user to have the sync option enabled or disabled. It is enabled by default, but you can exclude individual data categories or turn it off completely. Additionally, Microsoft may also collect the name of your device, model, and device vendor to identify your devices in order to sync the data between them. Microsoft claims that Edge will encrypt all the data and transfer it over HTTPS. The exclusion here is InPrivate and Guest mode browsing that doesn't store browsing data and does not transmit anything to your Microsoft account.
This post will show you how to enable or disable Sync for a profile in Microsoft Edge and change individual sync options.
To Enable or Disable Sync for Profile in Microsoft Edge
- Open the Edge browser.
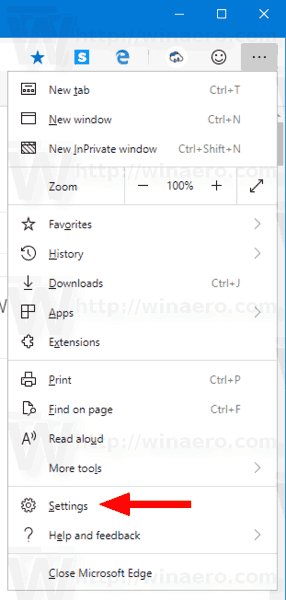
- Click on the Settings button (Alt + F) and select Settings from the menu.
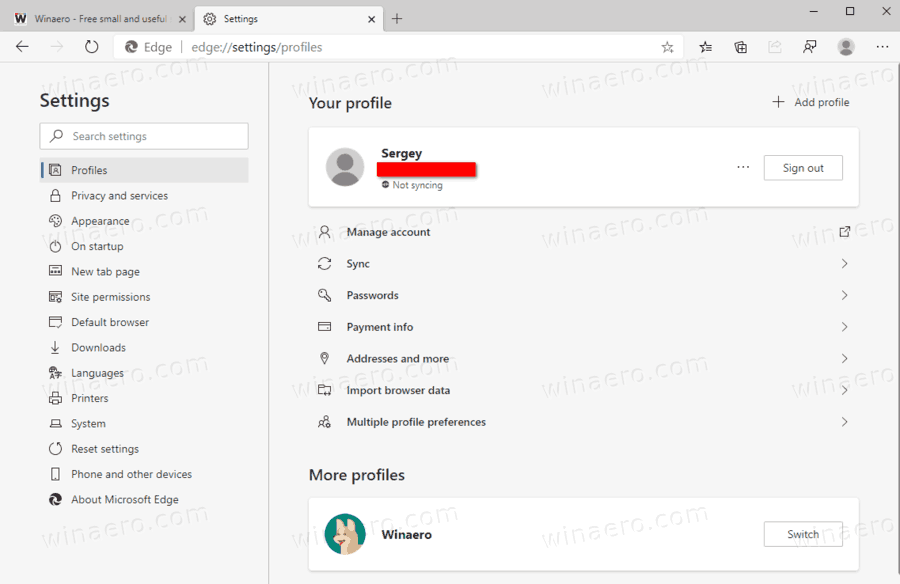
- On the left, click on Profiles.
- In right side area, click on Switch for the profile for which you want to enable or disable sync (if you have multiple profiles).
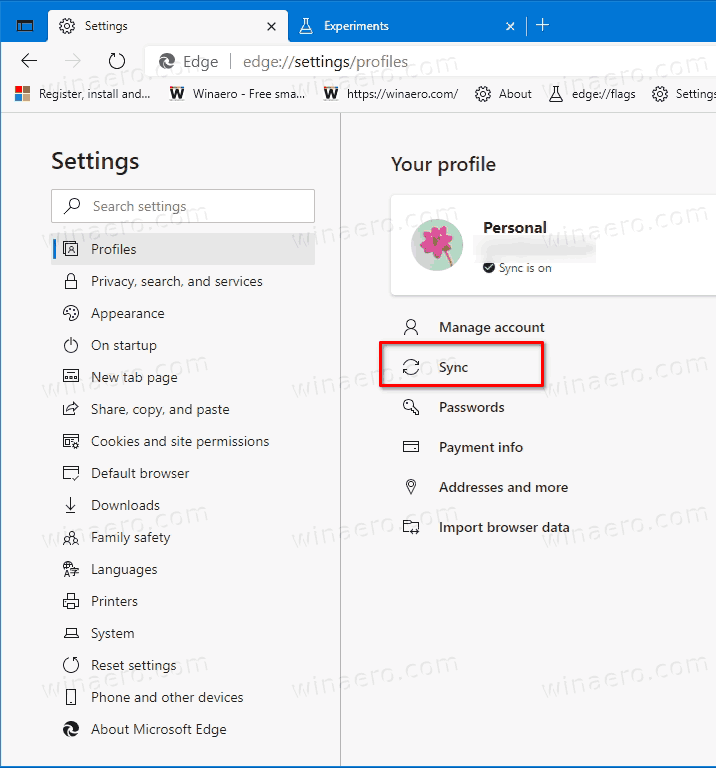
- Click on the Sync item below your profile name.
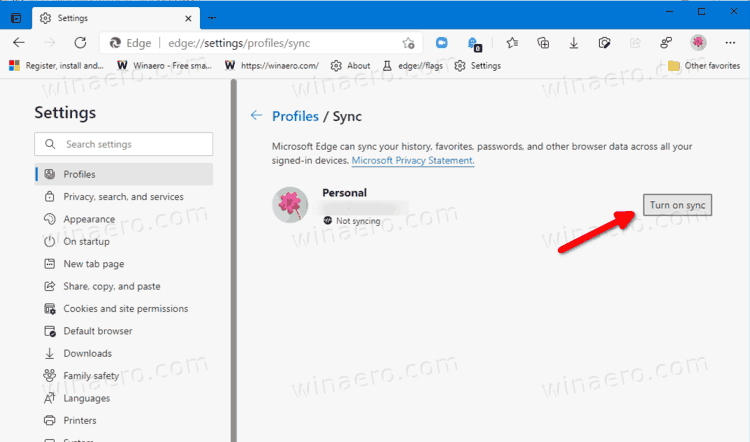
- Click on the Turn on button to enable the Sync feature.
- Click on the Turn off sync button to disable the enabled option.
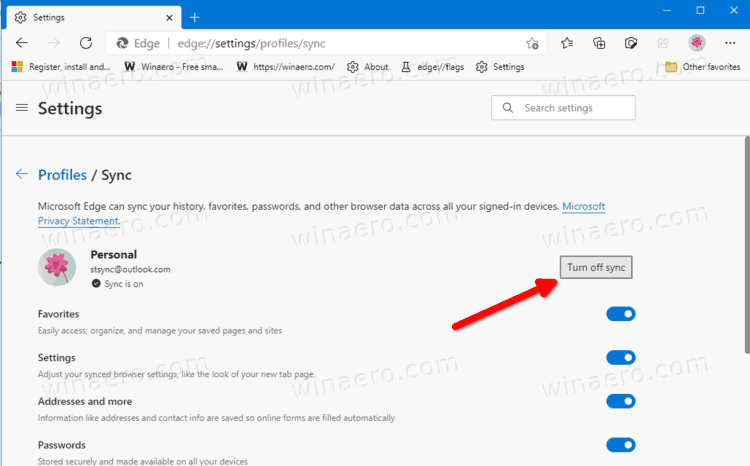
You are done!
Also, there are options that you can change to add or exclude individual items from sync.
Change Individual Sync Options for a Profile in Microsoft Edge
- Open Edge.
- Select Settings from its main menu (Alt+F).
- In Settings, select Profiles on the left.
- On the right, switch to the required profile if you have more than one profile.
- Click on the Sync entry below the profile name.

- Enable or disable the individual sync options you have available for this profile.
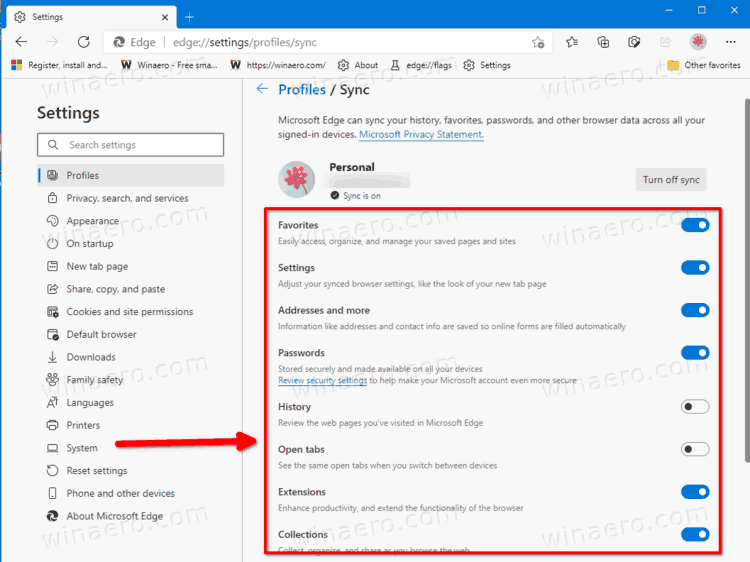
You are done.
By enabling or disabling individual sync settings you will be able to exclude specific data from being sent to the cloud. For example, you can exclude settings, so Edge can be individually configured on your Desktop and laptop, and the options won't get messed up.
Finally, you can enable or disable the data synchronization for all users in the Registry. While the above methods work for your current user account, the option we are going to review involves Edge Group Policy and affects all user accounts in Windows 10. You can get it done with the help of a Registry tweak.
Turn off Sync in Edge for All Users in Registry
- Close the Microsoft Edge browser.
- Open the Registry editor.
- Open the following key:
HKEY_LOCAL_MACHINE\SOFTWARE\Policies\Microsoft\Edge. If you don't have this key, then just create it manually. See how to open this key directly. - On the right, create a new 32-bit DWORD value named
SyncDisabled. Note: Even if you are running 64-bit Windows you must still create a 32-bit DWORD value.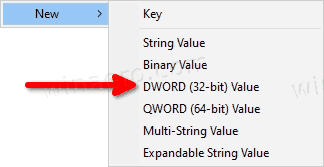
- Set its value data to
1to permanently disable the Edge Sync feature for all users.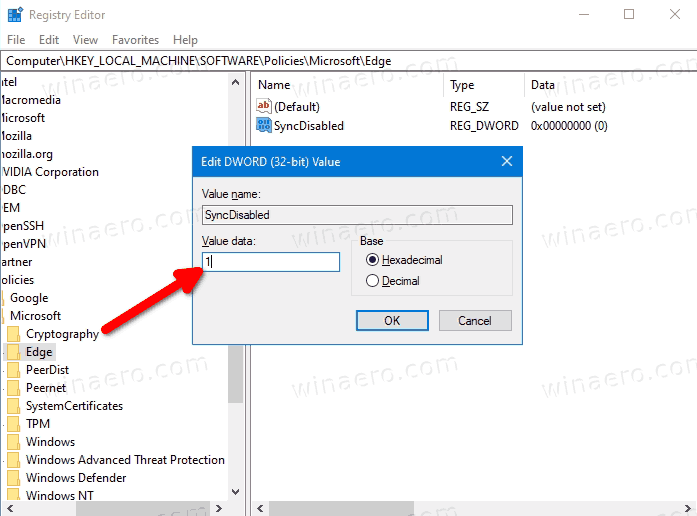
You are done.
Note: To undo the above change, just delete the SyncDisabled value you have created.
Also, to save your time, you can
Download the ready-to-use Registry files
I have prepared two Registry files that you can use if you want to avoid the manual Registry editing. They are available in the ZIP archive here:
The ZIP archive includes the following files.
-
Disable Sync In Microsoft Edge.reg- use this file to turn off the sync feature for all users. -
Enable Sync In Microsoft Edge.reg- this file will undone the restriction.
That's it.
Support us
Winaero greatly relies on your support. You can help the site keep bringing you interesting and useful content and software by using these options:

thx, BUT microschot now disabled the option to turn it off again. U misleaded me to try it out. Now I can’t get rid of it again :/