How to Enable or Disable Personal Vault in OneDrive in Windows 10
As you may remember, in June 2019 Microsoft updated OneDrive with the new 'Personal Vault' feature that allows you to secure files in the cloud. It was initially available in Australia, New Zealand, and Canada. Microsoft has made it available worldwide in October 2019.
Advertisеment
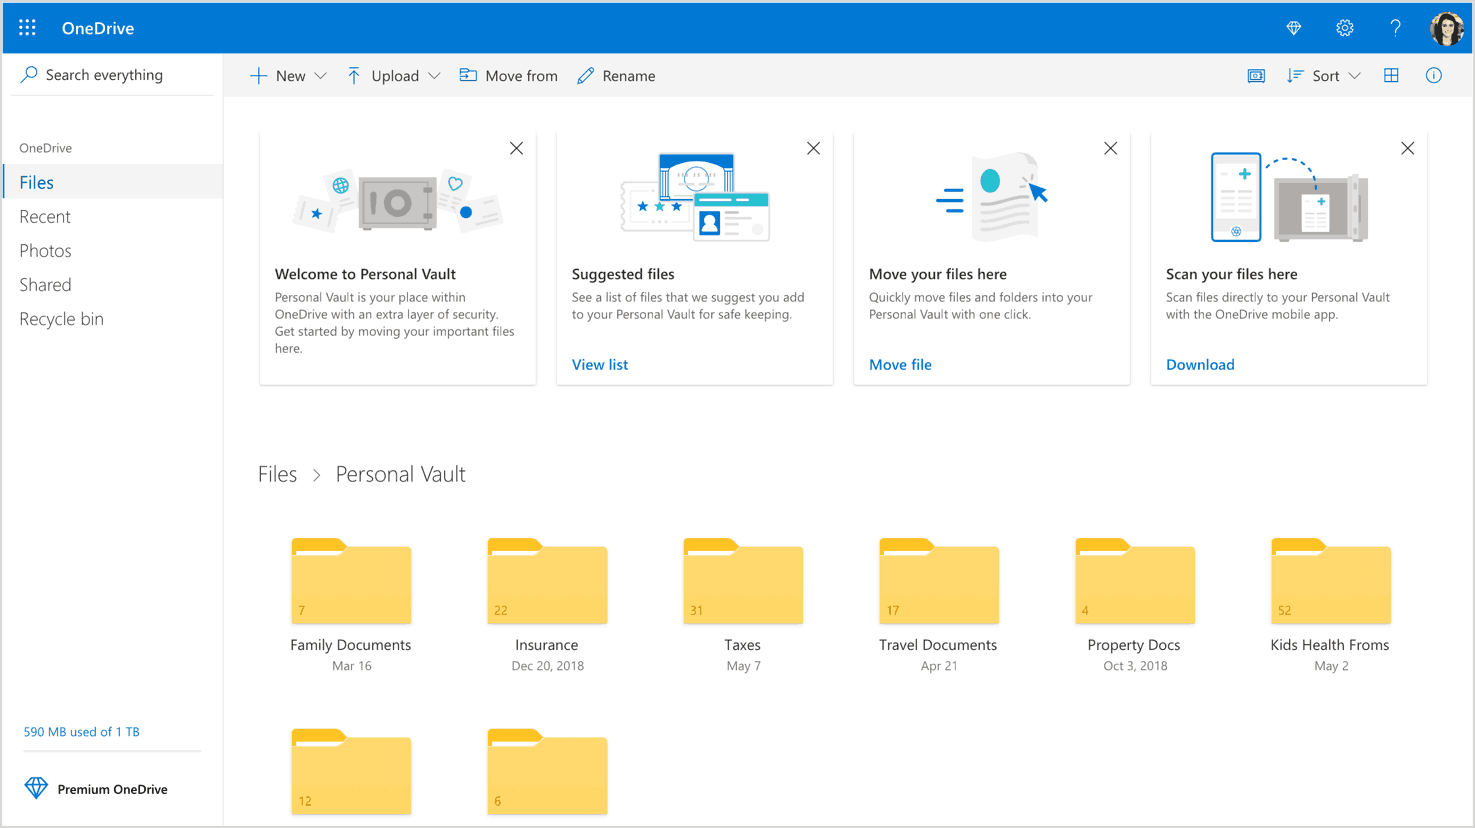
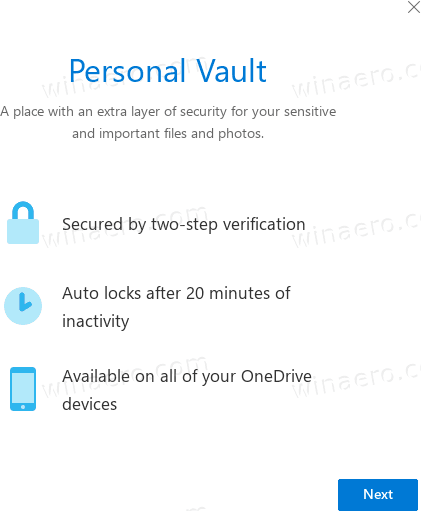
Personal Vault is a protected area in OneDrive that you can only access with a strong authentication method or a second step of identity verification, such as your fingerprint, face, PIN, or a code sent to you via email or SMS. Your locked files in Personal Vault have an extra layer of security, keeping them more secured in the event that someone gains access to your account or your device.
Personal Vault appears like a special folder in your account.
On devices running Windows 10, Microsoft is utilizing BitLocker to encrypt your files stored in Personal Vault. Your Personal Vault contents will be encrypted during transit and at-rest on the Microsoft servers.
Personal Vault is a free feature with no limitations for Office 365 subscribers. OneDrive users without the subscription will be able to store up to three files in this protected folder. This restriction definitely makes the feature unusable for most OneDrive users who are not subscribed to Office 365.
Tip: If you don't have an Office 365 Home or Personal subscription, you can put more than 3 files into a ZIP archive and upload them to Personal Vault in order to bypass the limitation.
OneDrive's Personal Vault is enabled by default. If you don't plan to use it and would like to get rid of it, you can disable it as follows.
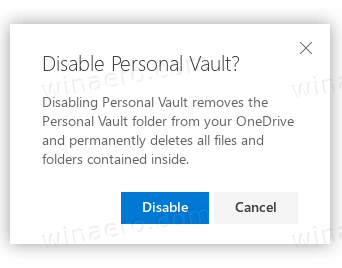
Note: Disabling Personal Vault wipes all the files that you have stored in the Personal Vault folder without the ability to recover them. Please be careful.
To Disable OneDrive Personal Vault,
- Open the OneDrive web site and sign in to the service with your account.
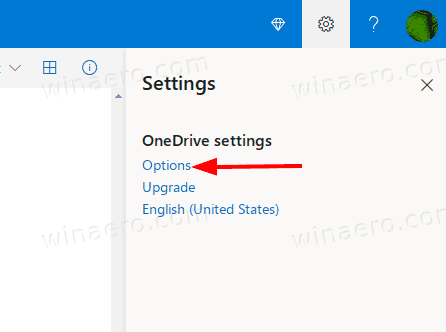
- Click on the Settings gear icon to open the settings pane.
- Click on the Options link in the Settings flyout.
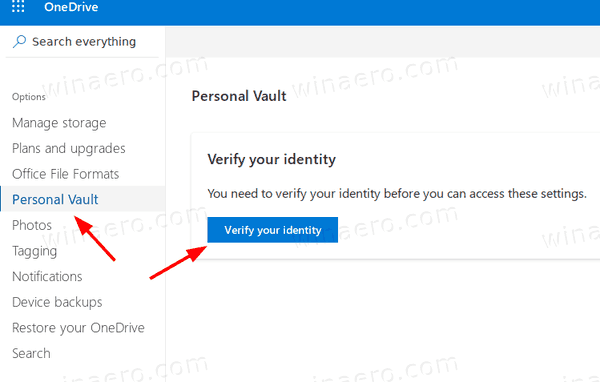
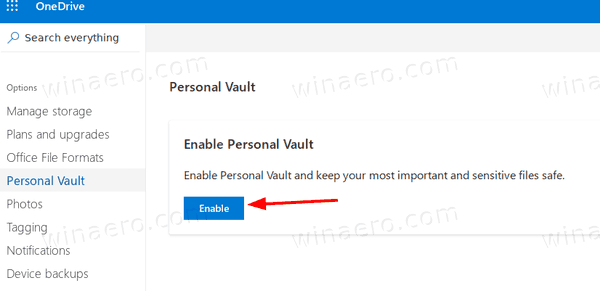
- In Options, click on the Personal Vault tab on the left.
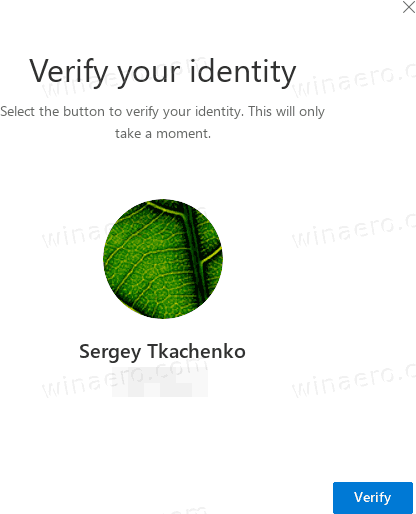
- Click on Verify your identity on the right.
- Verify you account with one of the available methods.
- Finally, click on the Disable link next to the Disable Personal Vault.

- Confirm the operation and you are done.
The Personal Vault feature is now disabled. You can re-enable it at any moment later.
Here's how to re-enable it.
To Enable OneDrive Personal Vault,
- Open the OneDrive web site and sign in to the service with your account.
- Click on the Settings gear icon to open the settings pane.
- Click on the Options link in the Settings flyout.
- In Options, click on the Personal Vault tab on the left.
- On the right, click on Enable.
You are done. The Personal Vault is now enabled.
That's it.
Articles of interest:
- Turn On or Off Pause OneDrive Sync on Metered Network
- How to disable OneDrive in Windows 10
- An Official Way to Uninstall OneDrive in Windows 10
- How To Reset OneDrive Sync In Windows 10
- Enable Folder Protection with OneDrive in Windows 10
- Remove OneDrive Context Menu in Windows 10
- Disable OneDrive Integration in Windows 10
- Sign Out of OneDrive in Windows 10 (Unlink PC)
- Disable OneDrive Cloud Icons in Navigation Pane in Windows 10
- Free Up Space from Locally Available OneDrive Files
- Automatically Make OneDrive Files On-Demand Online-Only in Windows 10
- Auto Save Documents, Pictures, and Desktop to OneDrive in Windows 10
- Change OneDrive Folder Location in Windows 10
- And more!
Support us
Winaero greatly relies on your support. You can help the site keep bringing you interesting and useful content and software by using these options:

24-10-04
There is no such setting in OneDrive Options.
Is there a registry or Group Policy to disable “Personal Vault”?
OS Name Microsoft Windows 11 Pro
Version 10.0.22631 Build 22631