In Windows 7, Microsoft implemented a new feature called Desktop Slideshow. When enabled, it changes the desktop background image automatically after a period of time. The user can set which images it should cycle through as the background and the frequency of showing the next wallpaper. In Windows 10, Microsoft put all settings related to Desktop Slideshow in the Settings app. This can be confusing for those who are new to Windows 10. In this article, we will see how to manage Desktop Slideshow using the Settings app, and how to access it via the good old Personalization window which is still available in Windows 10 as of this writing.
Advertisеment
To enable Desktop Slideshow in Windows 10 using Settings, you need to follow the instructions below.
- Open Settings.
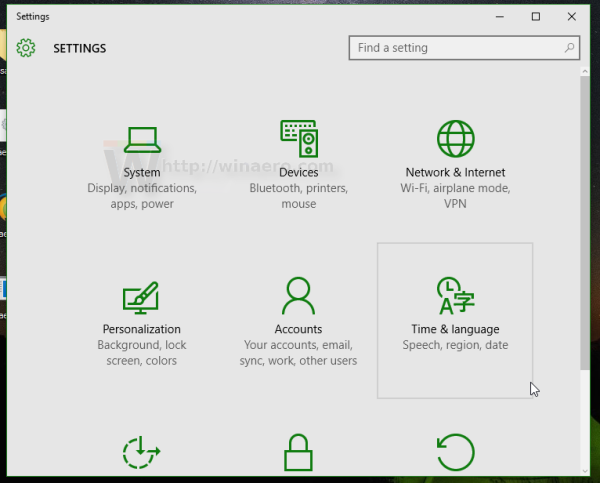
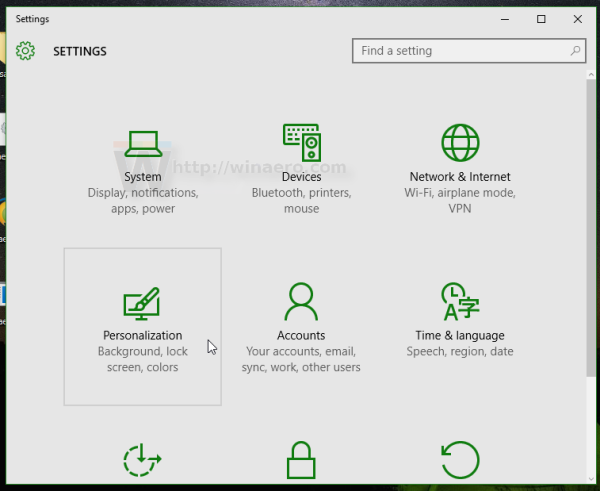
- Go to Personalization -> Background.
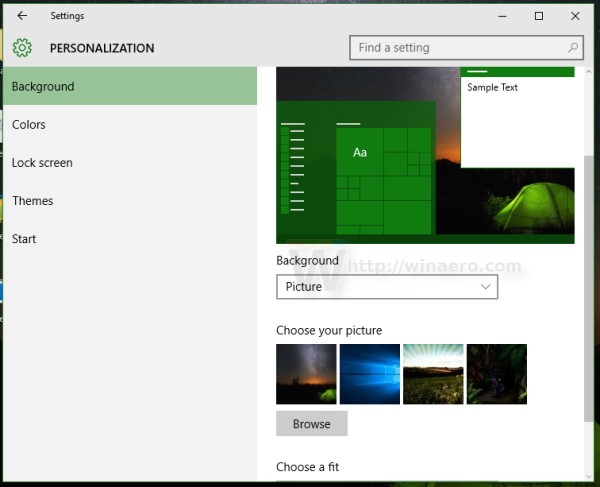
- There, locate the "Background" drop down list on the right. By default the value Picture is selected in the list.
- You will be able to select one of these options in that list:
- Picture
- Solid Color
- Slideshow.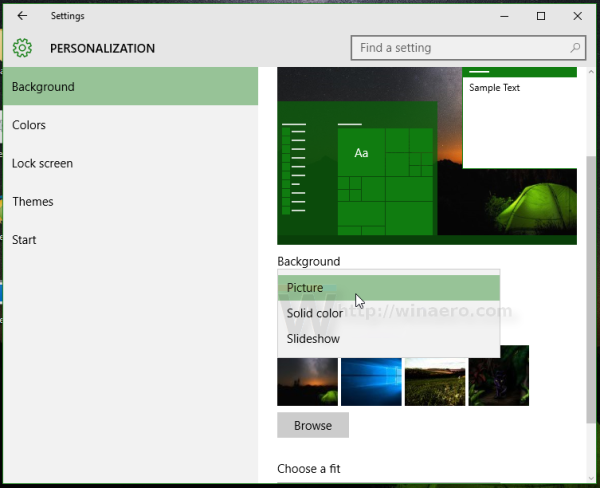
Select the Slideshow option in the list.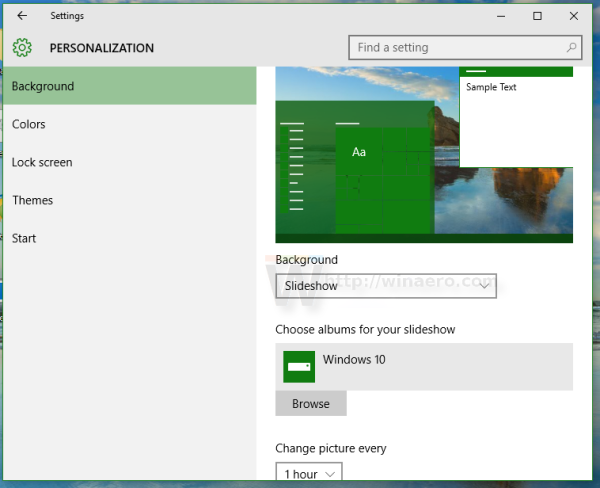
- A new option called "Choose albums for your slideshow" will appear on the screen. It allows you to select a folder which will be used to cycle wallpapers from. In this case, it is set to "Windows 10" by default and will show images from the default Windows wallpapers as the desktop background:

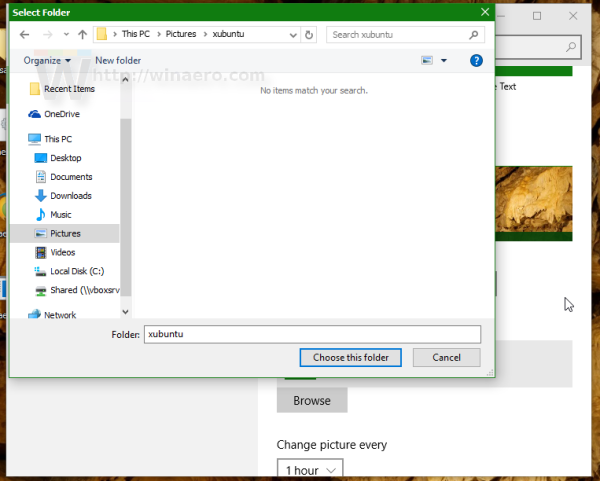
- Click the Browse folder to change the source folder for your wallpapers. In the next example, I set the source folder to images from the excellent Xubuntu 2016 theme:
- Next, you can adjust the slideshow interval under the option "Change picture every". I set it to 1 hour:
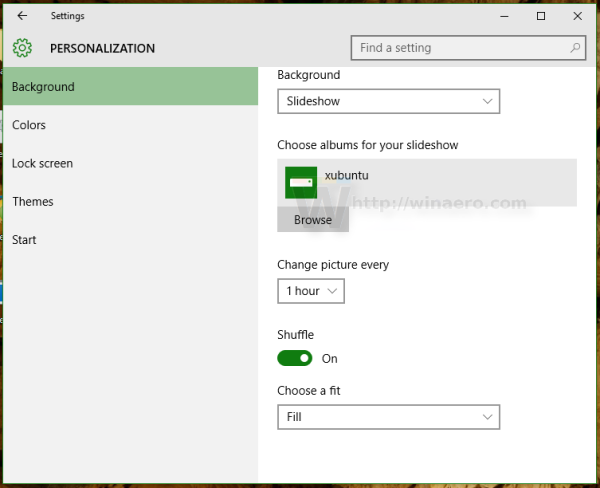
- There you can also enable image shuffle and the position of the image on the Desktop.
You are done. The Desktop Slideshow is now enabled in your Windows 10.
If you prefer the classic user interface to manage Desktop Slideshow, it is still possible to use it. It has the advantage of being able to set the Pictures Library on your PC as the wallpaper slideshow. The Settings app UI only allows folders but the classic UI allows Pictures Library too so any folders included in your Pictures Library will be included in the slideshow.
Enable Desktop Slideshow in Windows 10 using classic Personalization UI.
As of this writing, Windows 10 (the actual build is Windows 10 build 10586) still contains all personalization options which were available in previous Windows versions like Windows 8 and Windows 7. To access the Desktop Slideshow feature, do the following.
- Press Win + R shortcut keys together on the keyboard to open the Run dialog.
- Type the following command in the Run box:
control.exe /NAME Microsoft.Personalization /PAGE pageWallpaper
- Press Enter.
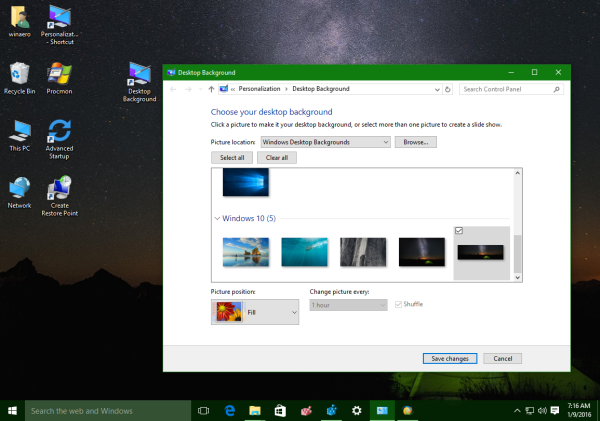
This will bring up the familiar Desktop Background page. There you can set the Desktop Slideshow like you are used to.
You might be interested in adding the classic Personalization applets to the Desktop context menu. To get it working, refer to the following article: Add classic personalization Desktop menu in Windows 10. Also, see the old article Add classic personalization menu in Windows 10 build 10074 for the full command reference.
Also, take a look at my freeware app, Personalization Panel for Windows 10: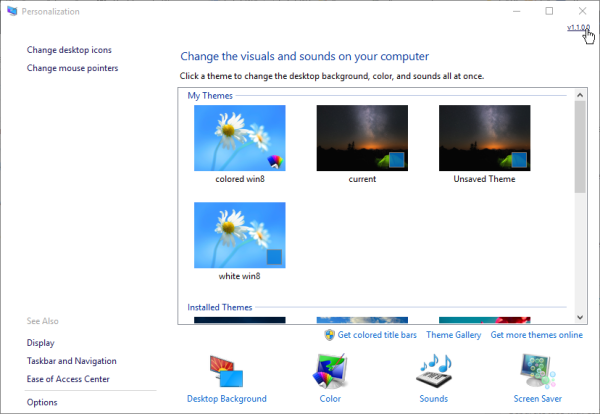
It adds the classic Personalization window to Windows 10 with classic options and features. It also supports integration with the Desktop context menu, so you will get a classic, native look.
That's it. Now you know all possible ways to access the Desktop Slideshow feature in Windows 10.
Support us
Winaero greatly relies on your support. You can help the site keep bringing you interesting and useful content and software by using these options:

Doesn’t work as of 4/3/18. Still get the message about choosing a folder, not a library.