Wi-Fi is a technology which allows a user to connect to a wireless local area network (WLAN). It is a communications standard that describes how high-frequency radio waves can be used to provide wireless high-speed Internet and network connections. If your Windows 10 device comes with a wireless network adapter, you might want to disable Wi-Fi when you are not using it in order to save your device's battery. Here is how it can be done.
Advertisеment
Wi-Fi hardware can be embedded in your device's motherboard or it can be installed as an internal module inside the device. Wireless network adapters exist as an external device which can be connected to a USB port. When enabled, having Wi-Fi on all the time can affect your battery life. Having Wi-Fi on is not a problem when your Windows device is plugged in, but you might want to disable it when on battery. Here is how.
Windows 10 allows to you to disable Wi-Fi natively using the Settings app. The Settings app is getting more and more options previously available only in the classic Control panel. The ability to manage wireless connections has been moved to Settings almost completely in Windows 10 "Creators Update".
To disable Wi-Fi in Windows 10, you can do the following.
Open Settings and go to Network & Internet, then open Wi-Fi. Use the "Wi-Fi" option on the right to disable or enable Wi-Fi.
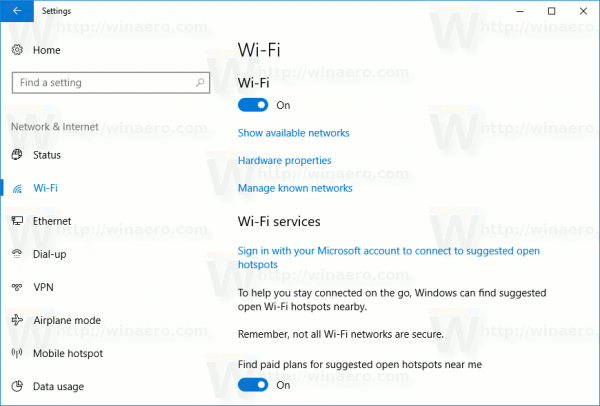
Tip: you create the Wi-Fi Settings shortcut to open this page directly.
Alternatively, there is a Quick Action button in the Action Center. You can use it to toggle the Wi-Fi function with one click or tap.
Click the action center icon at the end of the taskbar:
![]()
Expand the buttons if you have no Wi-Fi button visible:

Disable or enable the Wi-Fi function.
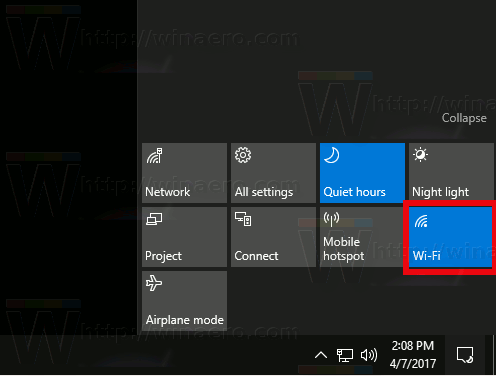
Tip: See how to customize the Action Center buttons in Windows 10.
It is worth mentioning that Airplane mode settings in Windows 10 can override the state of Wi-Fi.
Check if Airplane mode is configured to turn Wi-Fi on or off by visiting Settings - Network & Internet - Airplane mode. See the Wi-Fi option there.
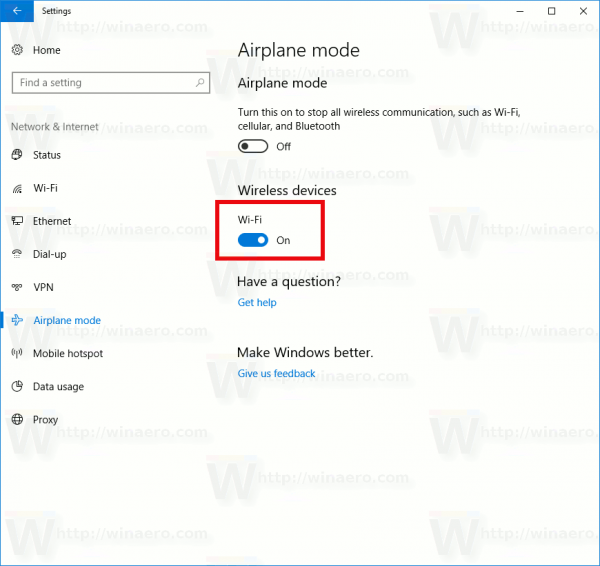
Lastly, there is another way to disable your wireless network adapter in Windows 10. Open Device Manager and find your Wi-Fi adapter under the "Network adapters" group.
- Press Win + X keys together on the keyboard and click Device Manager.
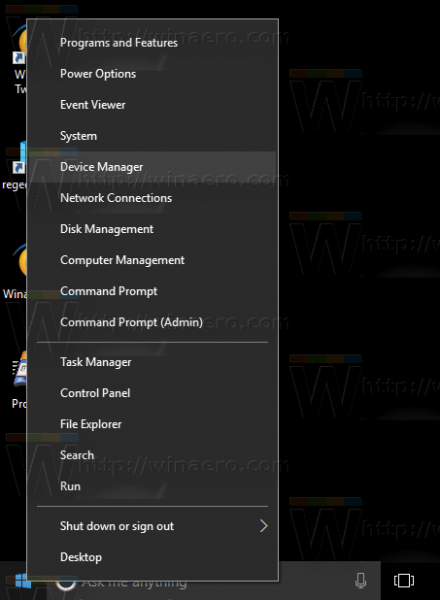
Tip: you can customize the Win + X menu of Windows 10. - Expand the "Network adapters" node and find your adapter:
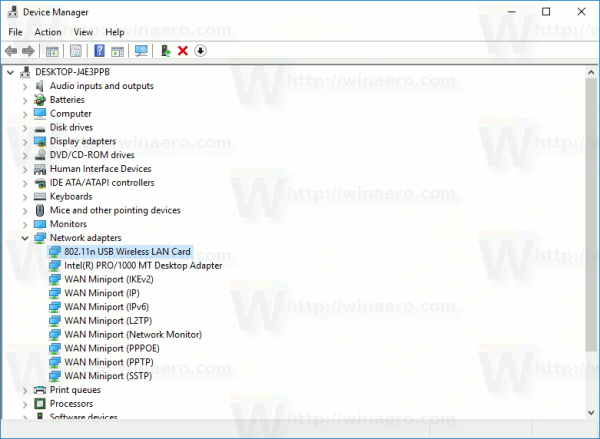
- Right click the adapter in the list and select "Disable" in the context menu.
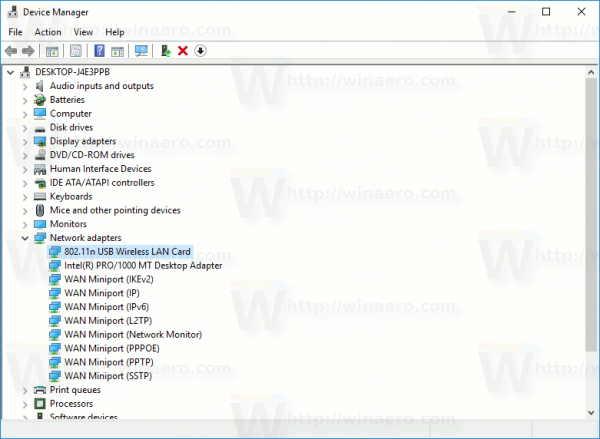
Later, you can open Device Manager again and re-enable the adapter when needed.
Now you know everything to disable Wi-Fi hardware using the options provided by Windows 10.
Support us
Winaero greatly relies on your support. You can help the site keep bringing you interesting and useful content and software by using these options:

This article “How to disable Wi-Fi in Windows 10” Ignores the fact that this option is not available in some releases of Windows 10. Please state for which releases you offer this information.
Actually it’s best to use Windows 7 or 8.1 and avoid Windows 10 if you have a problem-free experience. Windows 10 is so shit and buggy that even we tech geeks have trouble with it.
Is there _really_ no way to turn the WiFi adapter on/off from the keyboard, without opening the Action Center, Device Manager (LOL), etc.? Unfortunately, Airplane Mode turns off Bluetooth accessories, too. I just want to be able to toggle my WiFi on/off. Thanks!
Sorry, I probably should’ve been more specific. I’d like to create shortcuts that execute commands that turn WiFi on/off, to which I could assign keyboard shortcuts… Does that make sense? Or do we have to stop and point and click each time?
I realize this is a first-world-type problem, too, so obviously it’s not tremendously important in the grand scheme of things. :?)