You may want to disable security questions for a local account when you create a new one. If you find no use for this security measure, e.g. you use your PC alone home, the requirement becomes annoying. Here's a solution.
Advertisеment
By default, when you create a local account with a password through Settings, you must also choose and answer security questions. Windows traditionally requires you to add three security questions and answers, which can then be used to restore access to the system if you forgot your password.
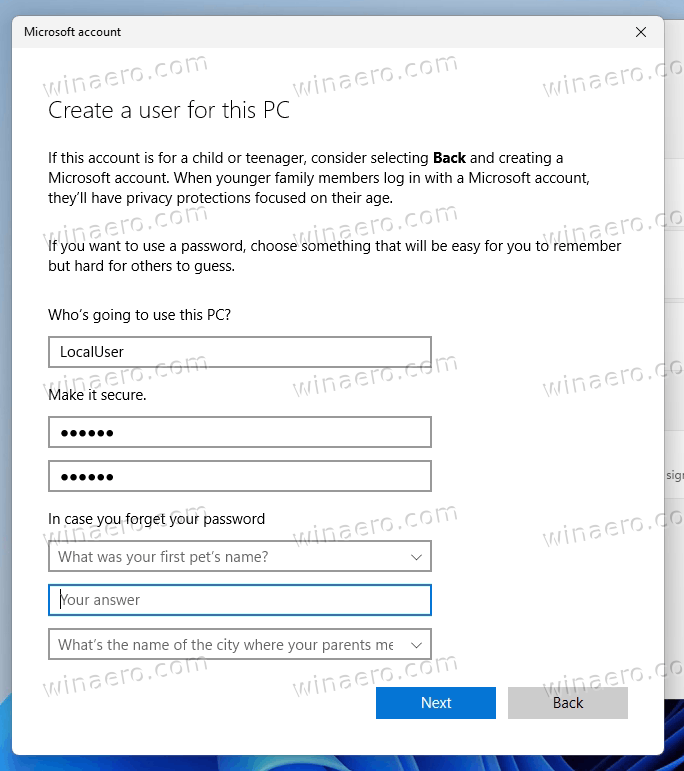
These questions are a supplementary security measure for your local account in case you cannot remember your password. They serve to confirm your identity so that you can reset your local account password from the sign-in screen if necessary.
If this additional feature does not play a significant role for you, so you may want to disable it. It can be in handy if you need to create accounts more often than usual.
To turn off security question requirement for new accounts, do the following.
Disable Security Questions for Local Account
- Open the registry editor with the
regeditcommand. - Expand the left area tree to the following key:
HKEY_LOCAL_MACHINE\SOFTWARE\Policies\Microsoft\Windows\System. - Right-click the System key on the left and select new DWORD 32-bit value from the menu.
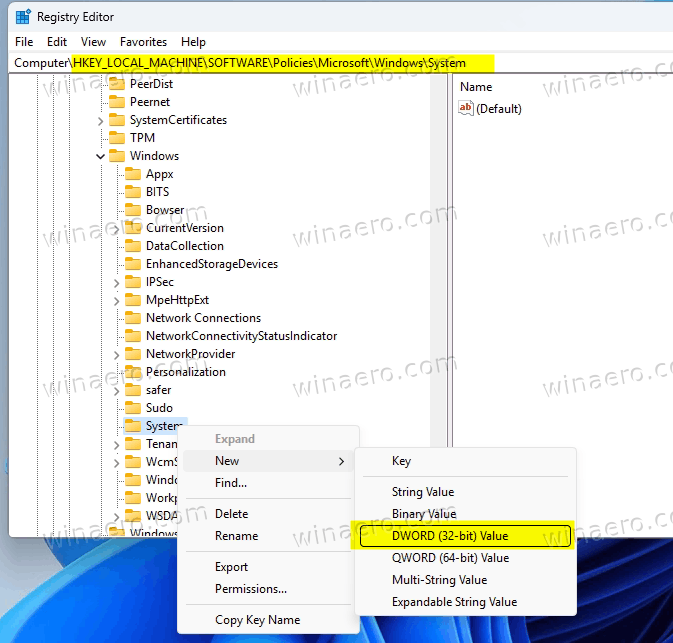
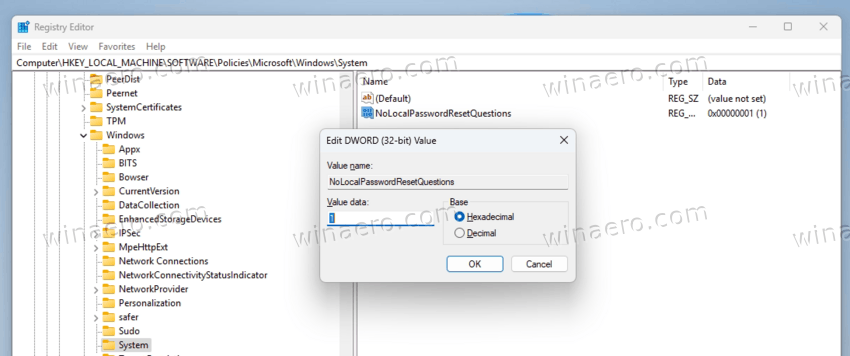
- Name the new value NoLocalPasswordResetQuestions and double-click it to edit it.
- In the value editing window set its value data to 1.
- Restart the operating system.
You are done. This will disable the requirement to create security questions.
ℹ️ To restore default settings, delete the NoLocalPasswordResetQuestions parameter or change its value to 0.
Save your time with Registry files
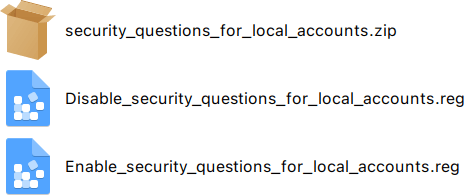
To save your time and avoid editing the Registry keys, I have created the following two REG files.
Extract the linked ZIP archive to any folder of your choice. Now, double click on them.
-
Disable_security_questions_for_local_accounts.reg- this file disables the questions for local accounts. -
Enable_security_questions_for_local_accounts.reg- this file is the undo tweak.
Double-click the required file, confirm the User Account Prompt request by clicking on Yes, and finally click Yes one more time to add information from the REG file to the Registry. I recommend that you restart Windows for the changes to take effect faster.
There is an alternative method that involves the Local Group Policy editor app (gpedit.msc). While the reviewed Registry tweak works in all editions of Windows, Gpedit is only available in the Windows 10/11 Pro, Enterprise, and Education editions.
Disable Local Account Security Questions in Group Policy
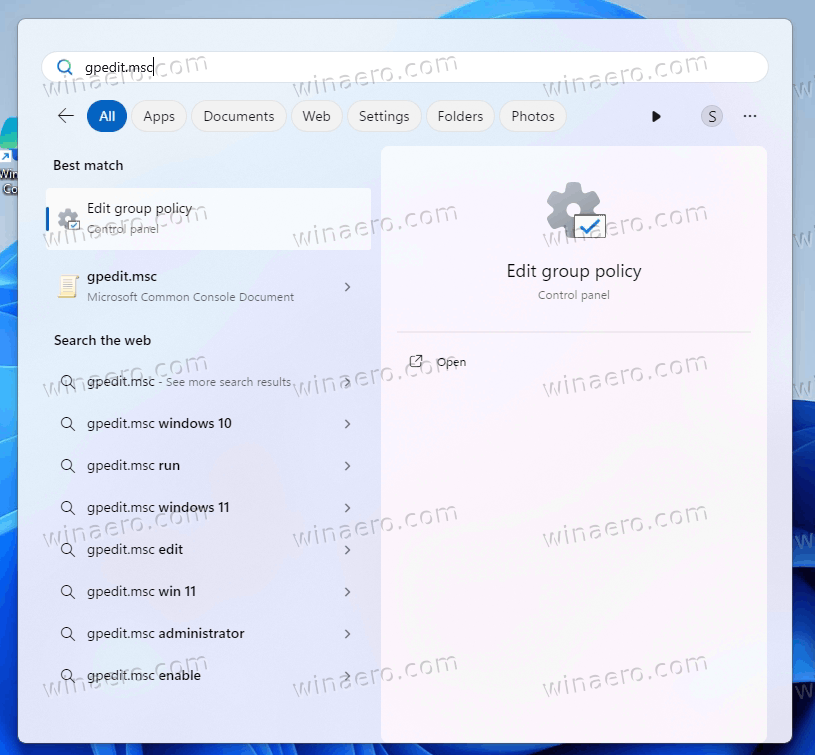
- Open the Local Group Policy editor with the command gpedit.msc. Type it in search or in the Run dialog (Win + R).
- In the left part of the gpedit window, navigate to Computer Configuration > Administrative Templates > Windows Components > Credential User Interface.
- On the right, double click the Prevent the use of security questions for local accounts policy to edit it.
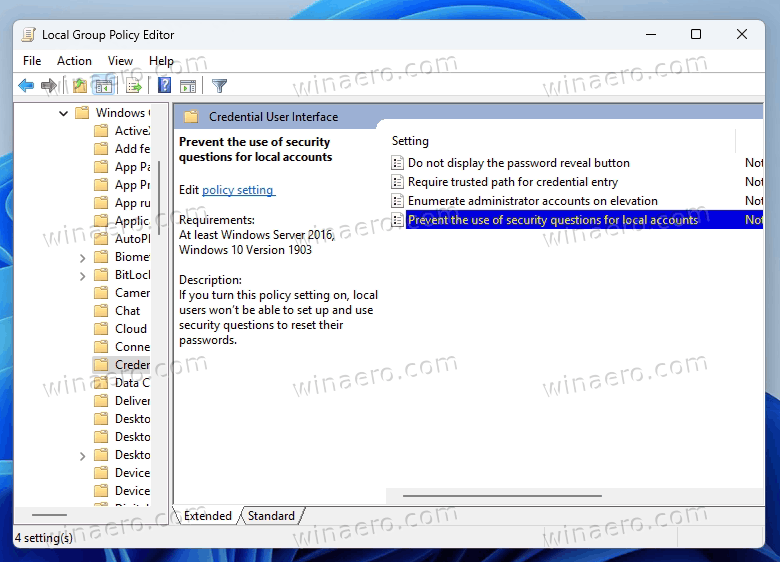
- In the next window, select Enabled, then click Apply and OK.
You are done! From now on, the security questions for local accounts are no longer a mandatory thing.
To undo the group policy, set the Prevent the use of security questions for local accounts option to Not configured.
The last option I would like to review here is a third-party PowerShell script that some of you may find useful.
Update-AllUsersQA PowerShell Script
Update-AllUsersQA is a third-party PowerShell script that can quickly change answers or disable the security questions for local user accounts on Windows 11/10. Specially, the script can set the same value for all three answers. It is not officially supported or maintained by Microsoft.
To disable the requirement for security questions, you need to go to the folder with the script in PowerShell running as administrator and run the .\Update-AllUsersQA command.
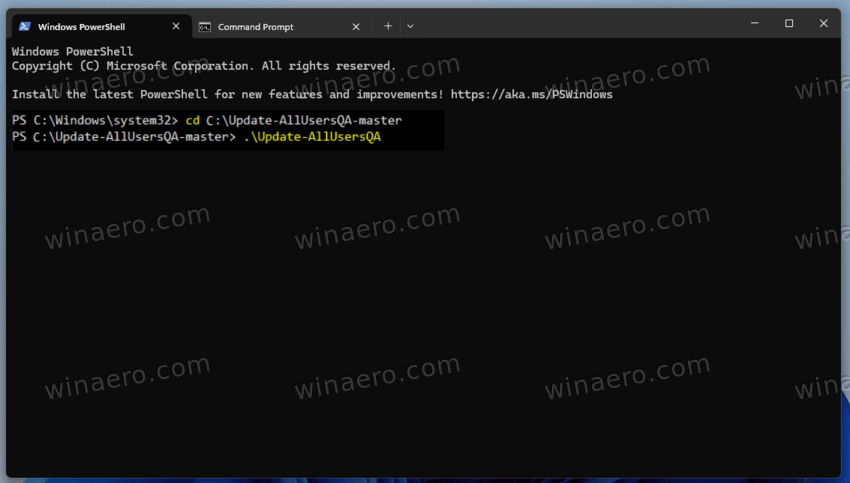
Note that you may need to change the script execution policy with the following command: Set-ExecutionPolicy Unrestricted.
To set all answers to the same value, run Update-AllUsersQA -answer MyAnswer , where MyAnswer is your common answer for each of the questions. It is worth noting that in this case Windows will incorrectly report that security questions are disabled. In fact, they will remain enabled.
You need to run script in an evelated PowerShell. So to execute it, you must open Terminal as Administrator. For that, press Win + X and select Terminal (Admin) from the menu that opens, or use any other method you like.
Support us
Winaero greatly relies on your support. You can help the site keep bringing you interesting and useful content and software by using these options:
