How to Delete a Boot Menu Entry in Windows 10
With Windows 8, Microsoft made changes to the boot experience. The simple text-based boot loader is now disabled by default and in its place, there is a touch-friendly graphical user interface with icons and text. Windows 10 has this as well. Users can manage the modern boot loader using the built-in console bcedit tool. Today, we'll see how to use it to delete an entry from the boot menu.
Advertisеment
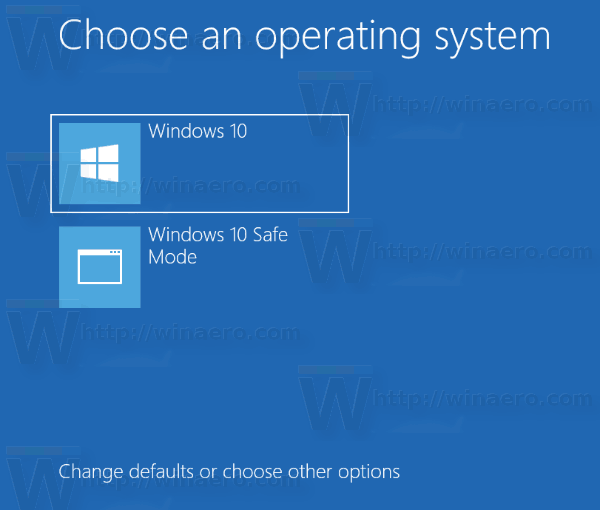
Windows re-arranges the boot entries, placing the last OS installed at the first place in the boot menu. You can change the boot loader entry order according to your preferences.
In order to delete a boot entry in Windows 10, you must be signed in as administrator. Here's how it can be done.
Warning: Do not delete the entry which is your default boot entry! Change the default OS for the boot menu before deleting it.
To Delete Boot Menu Entry in Windows 10,
- Open an elevated command prompt.
- Type or copy-paste the following command, and hit the Enter key:
bcdedit. - In the output, find the identifier line for the entry you want to delete. The currently loaded Windows has the {current} identifier.
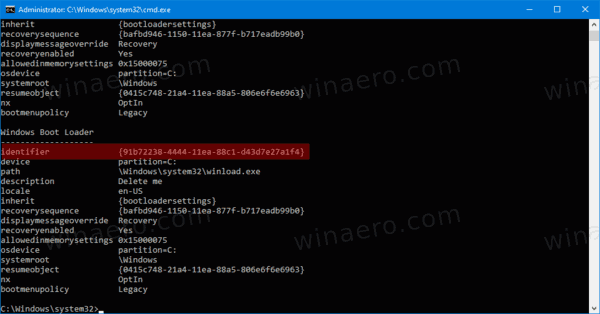
- Issue the following command to delete it:
bcdedit /delete {identifier}. For example,bcdedit /delete {5cb10d44-20ee-11ea-85c6-e6e1f64324aa}.
You are done.
Alternatively, you can use System Configuration (msconfig.exe) to delete a boot entry in Windows 10 boot menu.
Delete Windows 10 Boot Menu Entry with msconfig.exe
- Press Win+R on the keyboard and type
msconfiginto the Run box.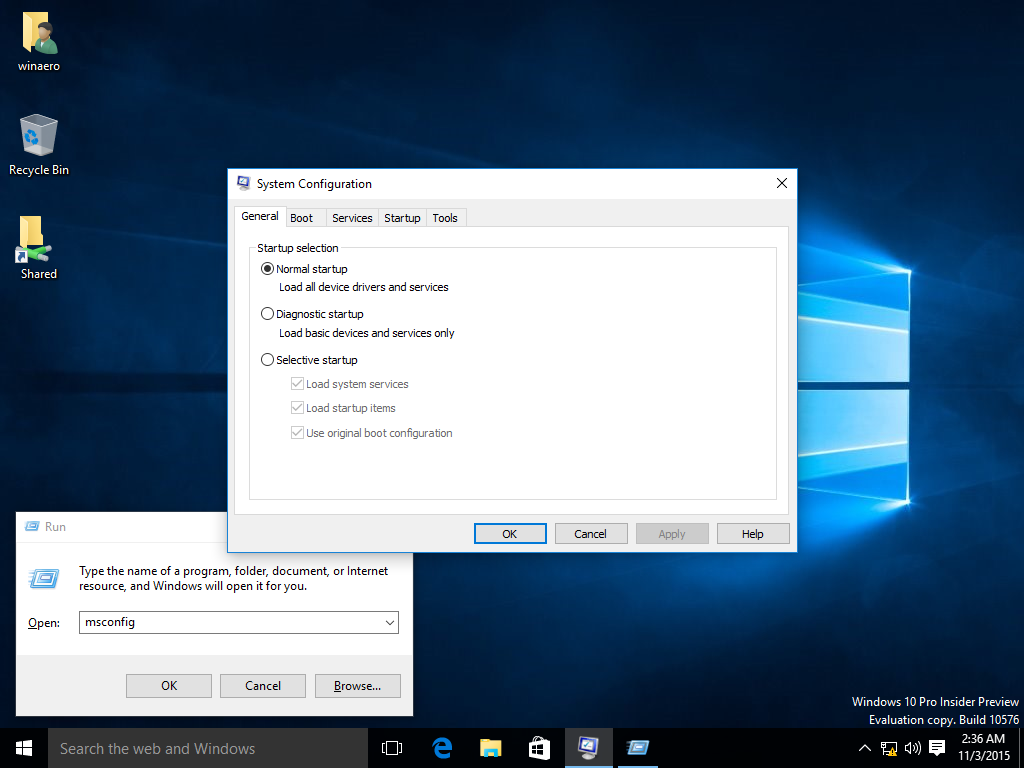
- In System Configuration, switch to the Boot tab.

- Select an entry you want to delete in the list.
- Click on the Delete button.
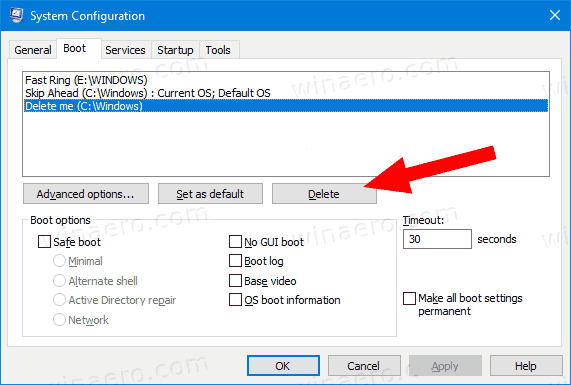
- Click Apply and OK.
- Now you can close the System Configuration app.
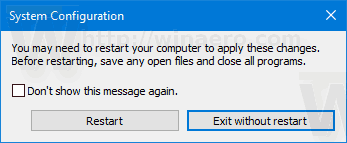
- If prompted to Restart, you can restart the OS to check out the boot menu changes you made. Otherwise, click Exit without restart.
You are done.
Support us
Winaero greatly relies on your support. You can help the site keep bringing you interesting and useful content and software by using these options:

Thank you brother very much.
Love from India.
Thank you. bcdedit /delete does not work on my win10 64 bit, msconfig works.