If you use the System Restore function in Windows 10 to revert your operating system to the last known stable point when it was working correctly, you might be interested in creating a new restore point with PowerShell. This can be useful with various automation scenarios. You add a special context menu item, "Create Restore Point ", to the Desktop in order to access this feature faster.

System Restore isn't a new feature of Windows 10. This technology was introduced in 2000 with Windows Millenium Edition. It allows you to roll back the installed operating system to the previous state. System Restore creates restore points which keep a complete state of Registry settings, drivers and various system files. The user can roll back the operating system to one of the restore points if Windows 10 becomes unstable or unbootable.
Advertisеment
Ensure that your user account has administrative privileges. Enable System Restore if it is disabled.
Before proceeding, you need to increase the system restore point frequency. This can be done with a simple Registry tweak which is described here:
Increase System Restore Point Frequency in Windows 10
To create Restore Point context Menu in Windows 10, follow the instructions below.
- Open the Registry Editor app.
- Go to the following Registry key.
HKEY_CLASSES_ROOT\DesktopBackground\Shell
See how to go to a Registry key with one click.
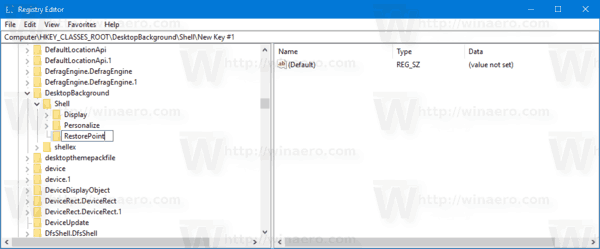
- Here, create a new subkey called "RestorePoint".
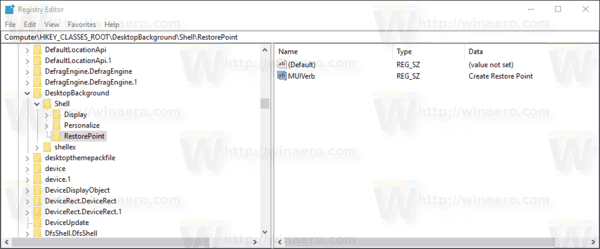
- On the right, create a new string (REG_SZ) called MUIVerb and set it to the line "Create Restore Point".
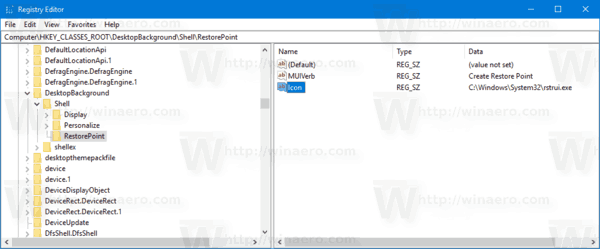
- Create a new string value "Icon" and set it to the following value:
C:\Windows\System32\rstrui.exe
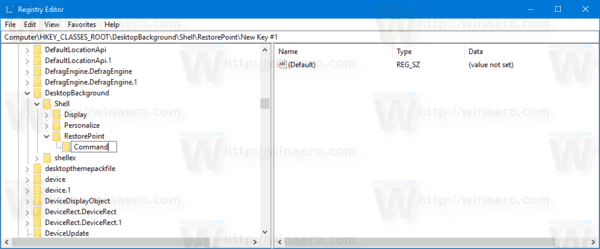
- Under the RestorePoint key you created, create a new subkey named "Command".
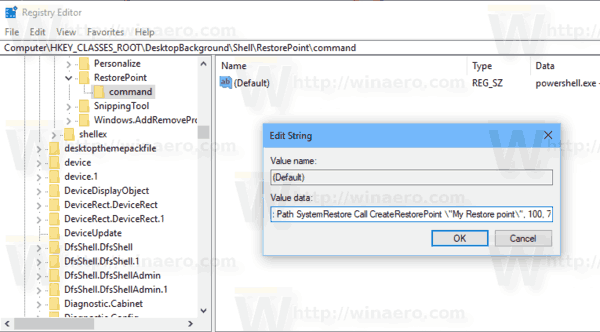
- On the right, modify the default (unnamed) parameter and set it to the following value.
powershell.exe -c start -verb runas cmd '/k wmic.exe /Namespace:\\root\default Path SystemRestore Call CreateRestorePoint \"My Restore point\", 100, 7'
Now, right-click on the empty space on your Desktop. You new command will be available there.
To save your time, you can download the following ready-to-use Registry files.
That's it.
Support us
Winaero greatly relies on your support. You can help the site keep bringing you interesting and useful content and software by using these options:

Hi Sergei!
I added the file to the registration database, but unfortunately I don’t have a system restore point. It seems like the Windows Explorer restart and that’s all. Can you help me?
Best regards, Gyula Vadnay from Hungary!
First of all, can you tell me which build you are running?
1703 build15063.608
Hello Sergey!
Don’t you care or have no solution? The silence is huge! I found another solution, but it would have been yours if you wrote this article.
Sorry, but I am ill. Reached my computer just now.
Yep, confirmed the issue. Resolving.
Fixed. The issue is related to the %DATE% portion, which makes the Explorer app crashing. If you replace it with something like “My Restore point”, it will work. Updating the article.