It is possible to create a custom power plan in Windows 10. By default, Windows 10 includes power plans like High Performance, Balanced, Power Saver, etc. These plans are designed to quickly let you switch power consumption of various hardware in your PC and system power settings (like display, sleep timings, etc). You can define your own power plan with your personal preferences, without changing options of the default power plans.
Advertisеment
As you may already know, a power plan in Windows is a set of hardware and system options that defines how your device uses and preserves power. As mentioned above, there are three built-in power plans in the OS. Your PC can have additional power plans defined by its vendor. You can create a custom power plan that will include your personal preferences.
Windows 10 comes with a new UI again to change the operating system's power related options. The classic Control Panel is losing its features and probably will be replaced by the Settings app. The Settings app has already got many settings which were exclusively available in the Control Panel. For example, the battery notification area icon in the Windows 10 system tray was also replaced with a new Modern UI. However, the Settings app doesn't include the ability to create a new power plan as of this writing. You still need to use the classic Control Panel.
To create a power plan in Windows 10, do the following.
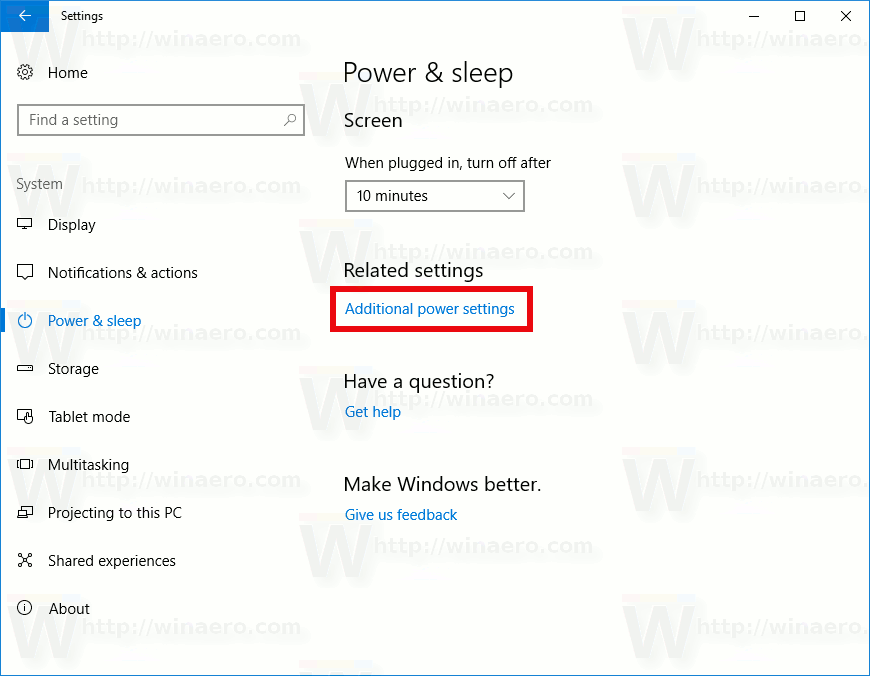
- Open Settings.
- Go to System - Power & sleep.
- Click on the link Advanced Power Settings.
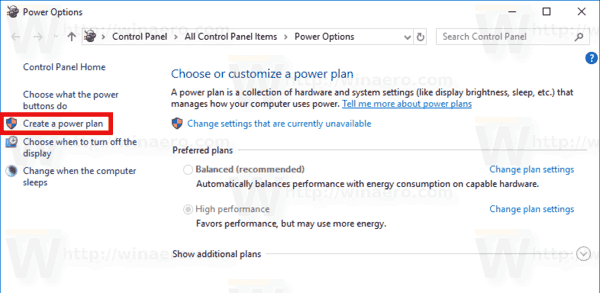
- In the next window, click on the link Create a power plan on the left.
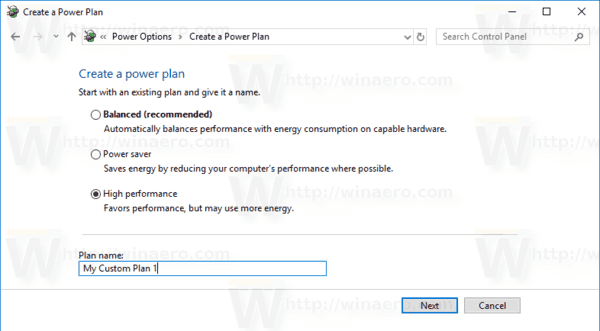
- Select an existing power plan which should be used as the base for your custom plan, fill in the Plan name text box and click Next.
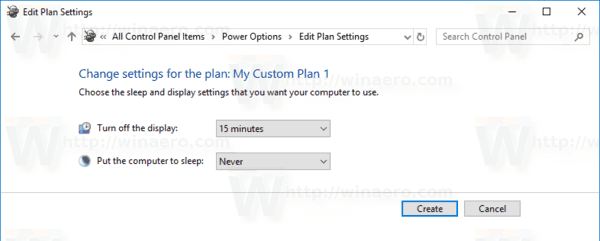
- Change the sleep and display settings if needed and click on the Create button.
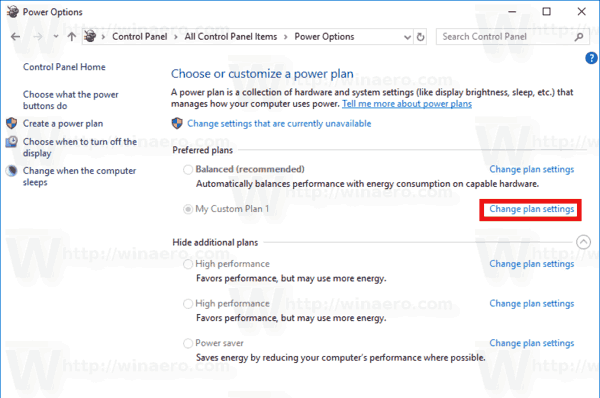
The new custom power plan is now activated. You need to customize its settings. Click on the link Change plan settings next to the plan name to make any changes you want.
Tip: It is possible to create a new power plan using the console powercfg.exe tool. Let's review this method.
Create a new power plan with powercfg.exe
- Open an elevated command prompt.
- Type the following command:
powercfg.exe /L. This will list every power scheme in the OS with its own GUID. Note of the GUID of the power plan you want to export.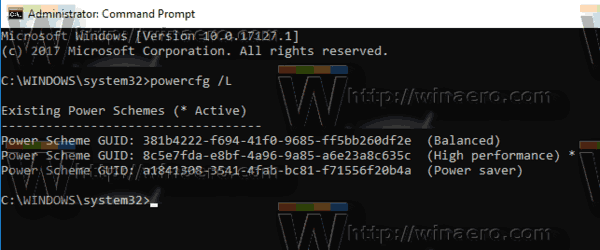
- Note the GUID of the power plan you want to use as the base for your new power plan. For example, 8c5e7fda-e8bf-4a96-9a85-a6e23a8c635c for the High Performance power plan.
- Execute the command:
powercfg -duplicatescheme 8c5e7fda-e8bf-4a96-9a85-a6e23a8c635c. This will create a copy of the High Performance power plan.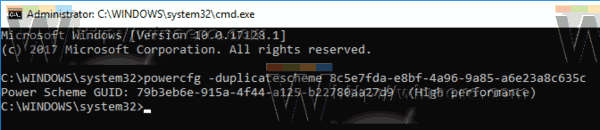
- Note the GUID of the new power plan.
- Run the command
powercfg -changename GUID "new plan". Substitute the GUID with the correct value for your new power plan.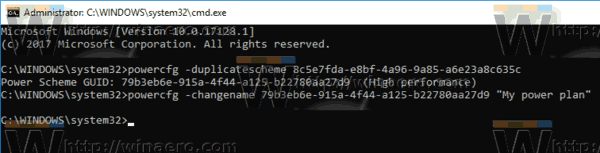
- To activate your new power plan, run the command
powercfg -setactive GUID.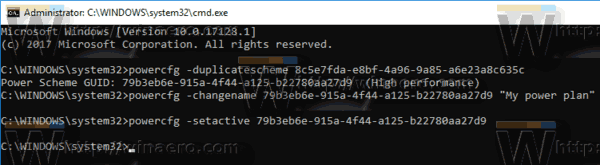
Related articles:
- Add Switch Power Plan context menu to Desktop in Windows 10
- Add Power Options Context Menu in Windows 10
- Add Energy Saver to Power Options in Windows 10
- How to Export and Import a Power Plan in Windows 10
- How to Restore Power Plan Default Settings in Windows 10
- How to open advanced settings of a power plan directly in Windows 10
Support us
Winaero greatly relies on your support. You can help the site keep bringing you interesting and useful content and software by using these options:

Hello!
How did you generate GUID for a new plan on step 6?
it will appear in the output, given automatically by powercfg.exe