To fix various problems with the OS, Windows 10 comes with a number of built-in troubleshooters. Sometimes they are really useful and can resolve the issue quickly. Once you run a troubleshooter, a history of its details is kept, so you will be able to view it at any moment later. Today, we will see how to clear the troubleshooting history for all or specific troubleshooters in Windows 10.
Advertisеment
In Windows 10, Microsoft has added all the available troubleshooters to the Settings app. The link from the classic Control Panel also opens the new Settings page.
Troubleshooters in Windows 10
To run a troubleshooter in Windows 10, you can use a new page in the Settings app. You will find them under Settings \ Update & security \ Troubleshoot.
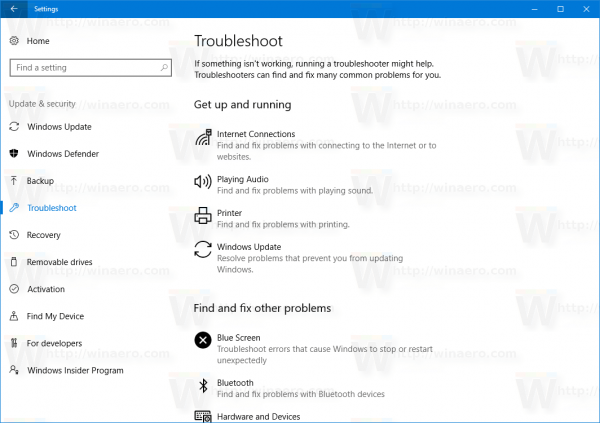
The following troubleshooters are available.
- Internet connections
- Playing Audio
- Printer
- Windows Update
- Blue Screen
- Bluetooth
- Hardware and Devices
- HomeGroup
- Incoming Connections
- Keyboard
- Network Adapter
- Power
- Program Compatibility Troubleshooter
- Recording Audio
- Search and Indexing
- Shared Folders
- Speech
- Video Playback
- Windows Store Apps
While troubleshooters where moved to Settings, the ability to manage your troubleshooting history and details for the actions you performed remains the classic Control Panel exclusive feature. So, you need to use the classic Control Panel applet to clear your troubleshooting history in Windows 10.
Clear Troubleshooting History in Windows 10
You can remove either a specific troubleshooting even from the history, or remove all events at once. Let's see how it can be done.
To clear troubleshooting history in Windows 10, do the following.
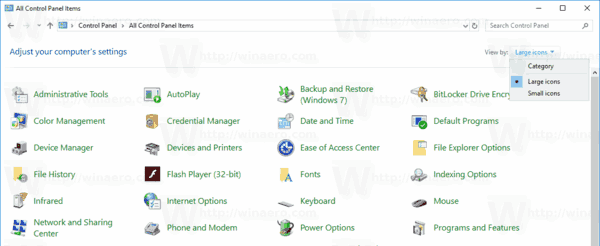
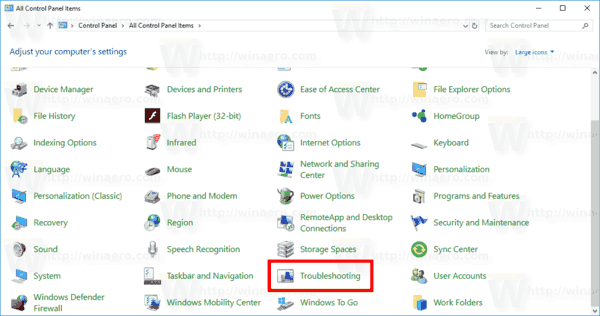
- Open the Control Panel.
- Switch to the Large icons view.
- Click on the Troubleshooting icon.
- On the left, click on the link View history.
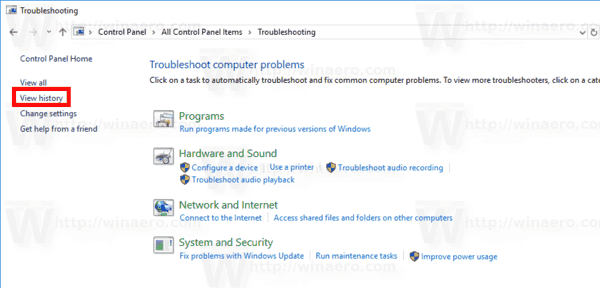
- If you are signed in as an administrator, click on the link Include troubleshooters that were run as an administrator.

- In the list, you'll see the stored troubleshooting history for your computer. Select the desired even and click on the Detele button, or simply right-click on the row and select the same command in the context menu.
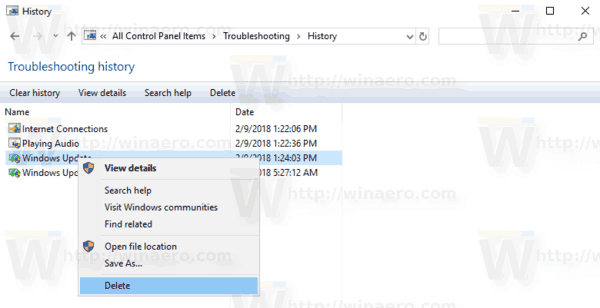
You are done. The select event will be removed from the history.
Remove all your Troubleshooting events
- Open the classic Troubleshoot applet.
- On the right, click on the link View history.
- If you are signed in as an administrator, click on the link Include troubleshooters that were run as an administrator.
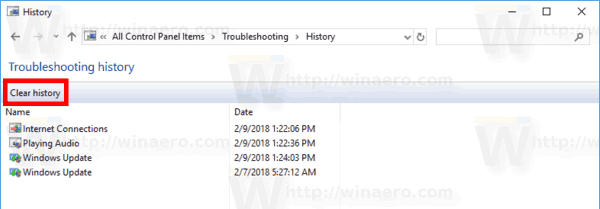
- Click on the button Clear history on the toolbar.
That's it.
Support us
Winaero greatly relies on your support. You can help the site keep bringing you interesting and useful content and software by using these options:
