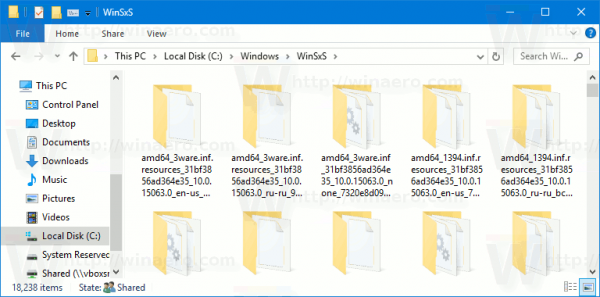
The WinSxS folder is the Component Store located in your C:\Windows directory where core Windows files reside including the bits needed to turn on and off any Windows features you enable from the Control Panel. Not only are these files critical to the operation of Windows 10 but when updates to Windows are installed, these files get updated. Every time you receive updates for the OS, the WinSxS folder dramatically grows in size. A commonly asked question by many people is "Why is the WinSxS folder so big?" Here is how you can clean up the WinSxS folder and reduce its size in Windows 10.

Cleaning up the Component Store (WinSxS) can be done using the Disk Cleanup built-in tool and with a console app Dism. We already reviewed the Disk Cleanup method in one of the previous articles. If you are interested in reading it, see How to clean up WinSxS folder in Windows 10.
Advertisеment
Today, we'll see how the same can be done with Dism.
To clean up the WinSxS Folder in Windows 10 with Dism, follow the instructions below.
- Open an elevated command prompt.
- Type or copy-paste the following command:
Dism.exe /online /Cleanup-Image /StartComponentCleanup
Hit the Enter key to execute it. - The command will produce the following output:

The argument /StartComponentCleanup parameter of Dism.exe will remove all previous versions of the updated system components and save your disk space.
You can combine it with another command line argument, /ResetBase.
When specified, it will make Dism remove all superseded versions of system components in the component store.
The full command looks as follows:
Dism.exe /online /Cleanup-Image /StartComponentCleanup /ResetBase
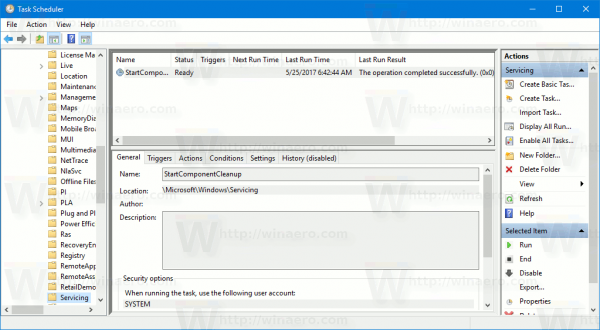
It is worth mentioning that Windows 10 can do the component store cleanup (WinSxS) automatically. There is a special task in Task Scheduler which removes all previous versions of updated components 30 days after an updated component has been installed. You can find it in the folder Task Scheduler Library\Microsoft\Windows\Servicing. It is named StartComponentCleanup. See the following screenshot.

Note: It is not required to launch it manually. The task will be started automatically once the operating system enters the idle state.
Support us
Winaero greatly relies on your support. You can help the site keep bringing you interesting and useful content and software by using these options:

does it work in windows 7 or latest operating system?
If I not mistaken, this won’t work in Windows 7, but works in Windows 8+.
oh ok thank you
So, this is the same as running Cleanmgr, selecting “Clean up system files” and then selecting “Windows Update Cleanup”.
Hi Sergey,
I have Win 10 Pro (x64). I checked out the Task in Scheduler but although it it there it shows
StartComponentCleanup – Ready – Last Run 30/11/1999 – Last run result (0x41303
I checked out the various Tabs which were set as follows
Trigger: is totally empty (IS THIS CORRECT)
Action: has “Custom Handler”
Conditions (all greyed out): has the (2) power options ticked
Setting (all greyed out): has ticked “All task to be run on demand”, Stop the task if it runs longer than 3 days”
and “If the running task does not end when requested, force it to stop” (all other entries are unticked)
History (disabled): has number of event 0 and is empty except column titles.
Please can you confirm if this is all correct and IF NOT what I should change/add and what/where.
I have started the Task with Run and it has been running now for around 20 minutes so far. No Idea if working properly.
Even if it finishes I have no idea whether it will ever run automatically via Scheduler, as to be honest, I expected to see an entry in (at least) the “Trigger” tab.
Many thanks Sergey.
UPDATE.
My Manual start of the task completed successfully (Last run result being (0x0), however there is NO date shown in the “Next Run Time” column . Is this correct?
Can anybody help advise me if Sergey is too busy or just missed my enquiry.
As stated according to MY StartComponentCleanup task in Task Schedule appears to have NEVER run automatically since I clean installed Window 10 Pro (x64) when it first came out (August 2015)
As advised in my last post (DKO) my MANUALLY triggered task ran successfully, but I still have no idea if in future the task will run automatically 30 days after a component has been updated. As it never has so far I have not reason to bel3ive it will in future. Sergey said it is not required to run the task manually, therefore I am asking anybody who is willing to have a look at their StartComponentCleanup Task in Task scheduler whether your settings match the ones on my PC which I advised in my original Post (DKO)
Many thanks all,
DKO