The user agent of a web browser is a string value which identifies that browser and provides certain system details to servers hosting the websites you visit. Changing the user agent string can be useful in certain scenarios when some web site's functionality is locked down to the specific platform and you need to bypass the restriction. It's not required to mention that changing the user agent can be useful for web developers. Let's see how it can be done in the popular web browser Google Chrome.
Advertisеment
Traditionally, the user agent string is used by web developers to optimize their web apps for different devices. This allows developers to differentiate various device classes like tablets, phones, Desktop PCs and laptops, and more. The user agent string can provide web servers some details about the user's operating system, and the browser version.
Google Chrome is the most popular web browser which exists for all major platforms like Windows, Android and Linux. It comes with a powerful rendering engine which supports all modern web standards.
To change User Agent in Google Chrome, do the following.
- Open Google Chrome.
- Press the Ctrl + Shift + I keys to open its Developer Tools.
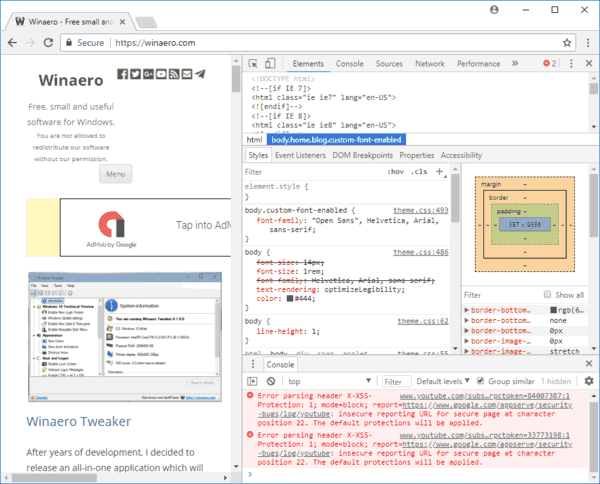
- In Developer Tools, click on the menu button with three vertical dots.
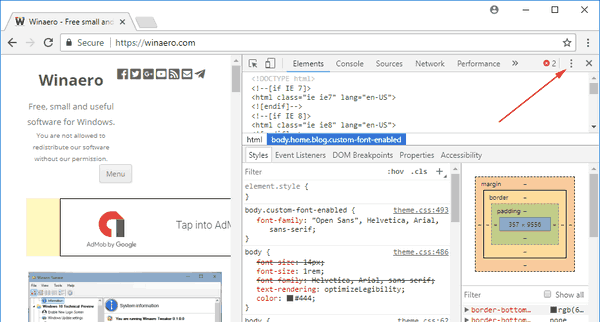
- In the menu, choose More tools - Network conditions.
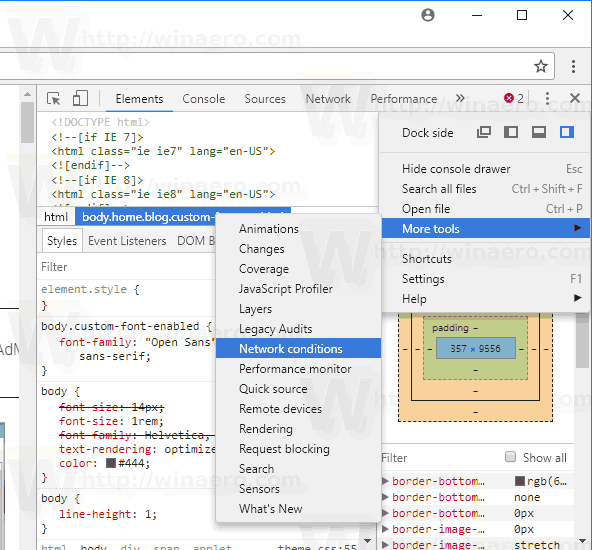
- Go to the Network conditions tab and disable the option Select automatically.
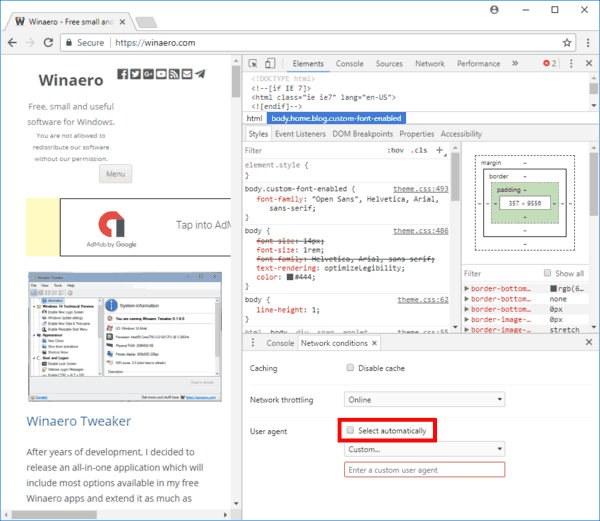
- Click on the Custom list and choose the desired browser to emulate. Alternatively, you can enter a custom user agent value using the text box below the list.
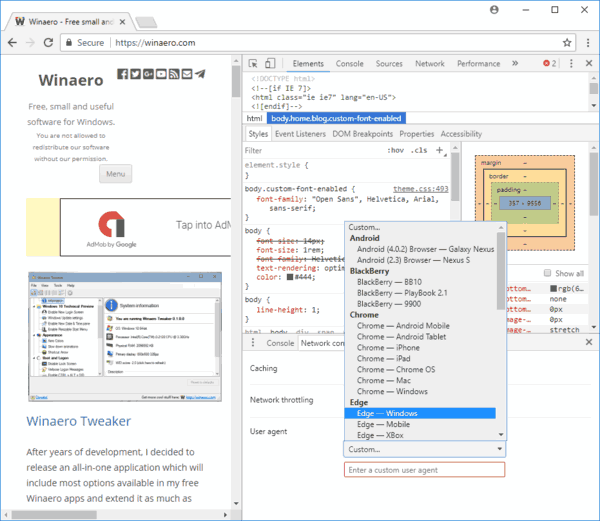
The list includes various versions of Internet Explorer, Edge, Opera, Safari, Firefox, and Chrome. Also, you can choose between Desktop and Mobile versions of the browsers.
Tip: If you are switching the user agent in Google Chrome frequently, you can save a lot of time and use the following extension:
User-Agent Switcher for Google Chrome
It will allow you to switch the user agent string with a couple of clicks.
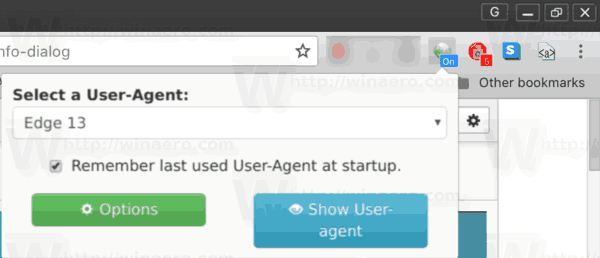
Using the built-in Developer Tools option, you can change the user agent in Google Chrome any time.
Related articles:
Support us
Winaero greatly relies on your support. You can help the site keep bringing you interesting and useful content and software by using these options:

For Windows link (cmd/bat file)
–“user-agent=Mozilla/5.0 (compatible; MSIE 9.0; Windows NT 6.1; Win64; x64; Trident/5.0”
Random
Extension “Random User-Agent”
Thanks, very useful!
Awesome instructions, thanks! Perhaps pls add whether this new string persists until Chrome is restarted, through restarts, or just relevant for that one page.
Great site!
M.