In Windows 10, you can change the number of lines the active document will scroll for each movement of your mouse wheel. Also, you can make it scroll one screen of text at a time. Here is how it can be done.
Advertisеment
You can use either the classic Mouse Properties applet, the modern Settings app, or a Registry tweak to configure the number of lines for the mouse wheel scrolling feature in Windows 10. Let's review all these methods.
To change the mouse scroll speed in Windows 10, do the following.
- Open the Settings app.
- Go to Devices -> Mouse.
- On the right, select Multiple lines at a time under Roll the mouse wheel to scroll.
- Adjust the slider position to specify the number of lines between 1 to 100 lines at a time. By default, it is set to 3.

- To configure the mouse wheel to scroll one screen at a time, select One screen at a time from the Roll the mouse wheel to scroll drop down list.

You are done. You can close the Settings app.
Change Mouse Scroll Speed using Mouse Properties
- Open the classic Control Panel.
- Go to Control Panel\Hardware and Sound.
- Click on the Mouse link.

- In the next dialog, open the Wheel tab.
- Configure the Vertical Scrolling options. Set the desired number of lines to scroll at a time, or enable the One screen at a time option.
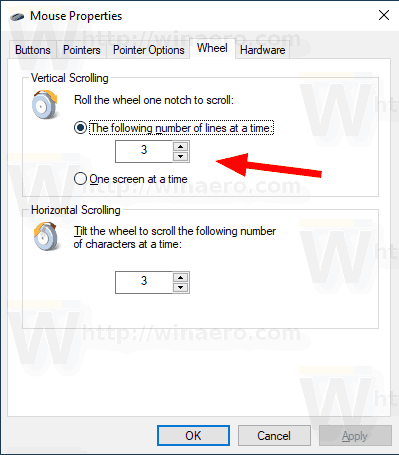
You are done.
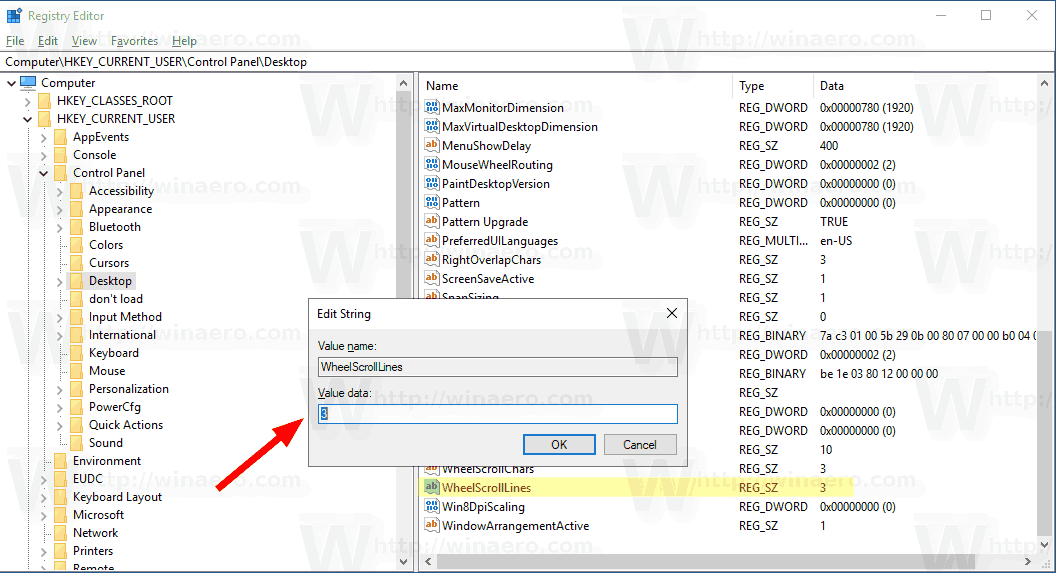
Change Mouse Scroll Speed with a Registry Tweak
- Open the Registry Editor app.
- Go to the following Registry key.
HKEY_CURRENT_USER\Control Panel\Mouse
See how to go to a Registry key with one click.
- On the right, modify the string (REG_SZ) value named WheelScrollLines.
- Set its value data to a number between 1 to 100 for the number of lines to scroll at a time.
- To to enable the option One screen at a time, set WheelScrollLines to -1.
- To make the changes done by the Registry tweak take effect, you need to sign out and sign in to your user account.
That's it.
Support us
Winaero greatly relies on your support. You can help the site keep bringing you interesting and useful content and software by using these options:

This was not useful in figuring out how to stop the scrolling when I stop rolling.
The scroll has momentum which is a pain.
It’s confusing when your damn instructions are conflicting.
You say open the reg editor to: HKEY_CURRENT_USER\Control Panel\Mouse
Then in your screen shot you’re actually at: HKEY_CURRENT_USER\Control Panel\Desktop