A mouse pointer, also known as the cursor is a graphical icon which represents your pointing device's movements on your display. It allows the user to manipulate objects on the screen with a mouse, a touchpad or any other pointing device. In this article, we will see how to change the appearance of the mouse pointer in Windows 10.
Advertisеment
In Windows 10, mouse cursors support themes, so you can change the appearance of all your cursors with one click. Windows comes with a few themes bundled. Some third-party themes come with a set of cursors. The user can change individual cursors manually using Settings, the classic Mouse Properties window, and also the Registry.
Change Mouse Pointer in Windows 10 using Settings
To change mouse pointers in windows 10, do the following.
- Open Settings.
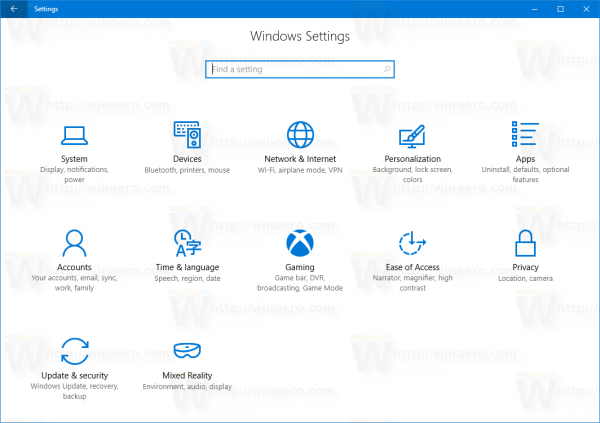
- Go to Ease of Access - Mouse.
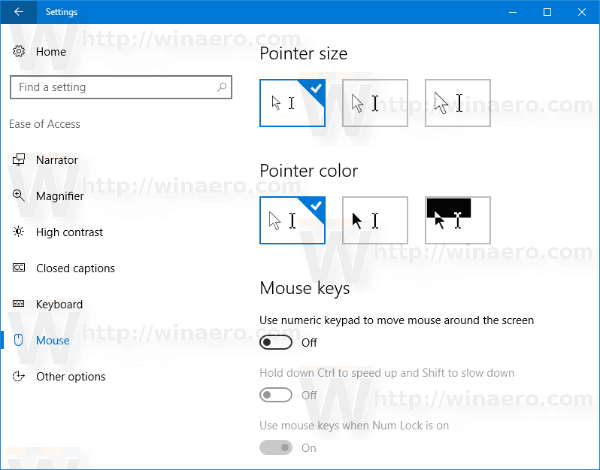
- On the right, select the size of the cursor - standard, large, extra large - using thumbnail buttons under Mouse pointers.
- Under the Pointer color, you can choose between the white and black mouse pointer color.
The Settings app has limited abilities to change the mouse pointers as of this writing, so most of the settings are still located in the classic Control Panel applet called "Mouse Properties".
Change Mouse Pointers in Windows 10 using Mouse Properties
To change the mouse pointer appearance using the classic Control Panel, do the following.
- Open Control Panel.
- Go to Control Panel\Hardware and Sound.
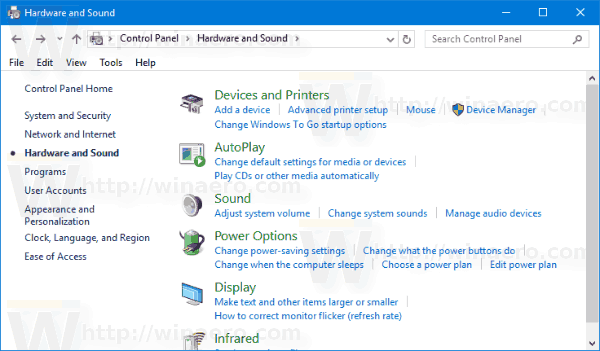
- Under Devices and Printers, click the Mouse link.
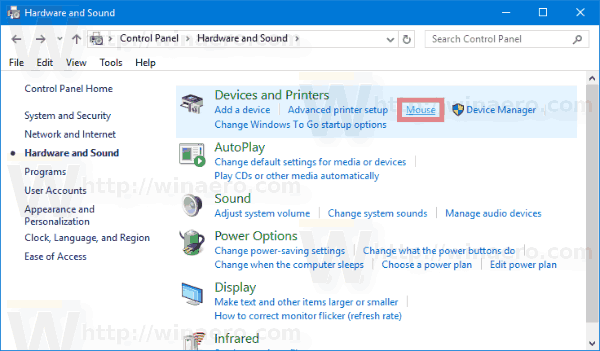
The following window will open: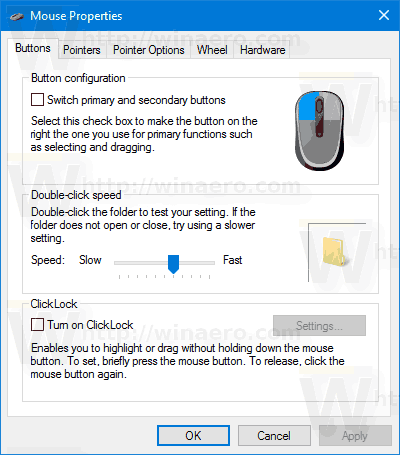
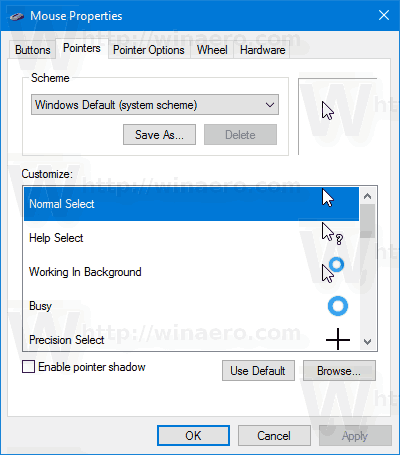
- There, switch to the Pointers tab. Here is how it looks.
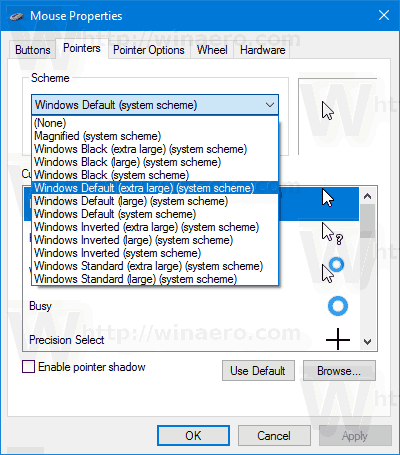
- Under Scheme, you can pick one of the installed cursor themes. See the screenshot below.
- Under Customize, you can change individual cursors for the selected scheme. Select the desired cursor in the list, and click the Browse... button to pick an alternative cursor file.
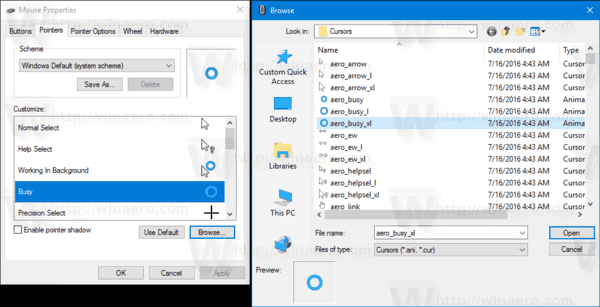 You can choose a static cursor image (*.cur file) or an animated cursor (*.ani file).
 - Tip: Once you have finished customizing your cursors, you can click the button Save As under Scheme to save your changes as a new pointer scheme.
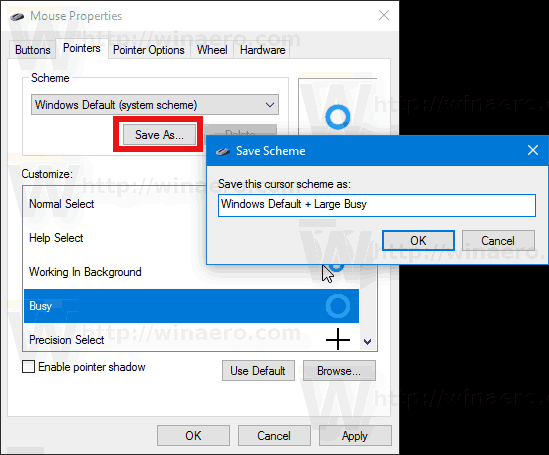
- To reset the customized cursor and use the default one from the current theme, click the button Use Default.
Change Mouse Pointers in Registry
Using the built-in Registry Editor app, you can customize the cursors. Windows stores the path to each cursor file under the following Registry key:
HKEY_CURRENT_USER\Control Panel\Cursors
Here is how you can edit them.
- Open Registry Editor.
- Navigate to the following Registry key:
HKEY_CURRENT_USER\Control Panel\Cursors
Tip: You can access the desired Registry key with one click.
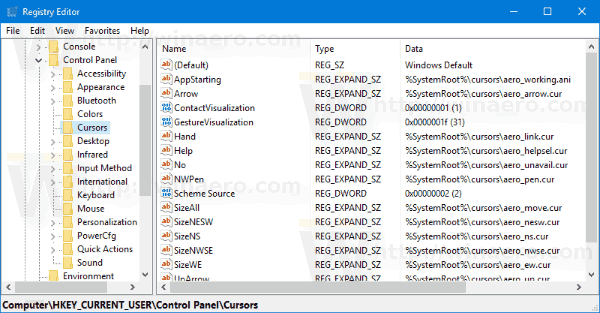
- On the right, modify the (Default) string value and set it to one of the following values to apply any of the default cursor schemes:
blank - this will set the default scheme named "None".
Magnified
Windows Black (extra large)
Windows Black (large)
Windows Black
Windows Default (extra large)
Windows Default (large)
Windows Default
Windows Inverted (extra large)
Windows Inverted (large)
Windows Inverted
Windows Standard (extra large)
Windows Standard (large)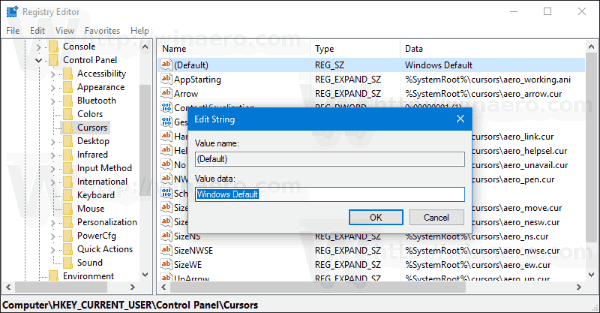
- To customize individual pointers, modify the following string values:
Arrow - the pointer for "Normal Select".
Help - the pointer for "Help Select".
AppStarting - the pointer for "Working in Background".
Wait - the pointer for "Busy".
Crosshair - the pointer for "Precision Select".
IBeam - the pointer for "Text Select".
NWPen - the pointer for "Handwriting".
No - the pointer for "Unavailable".
SizeNS - the pointer for "Vertical Resize".
SizeWE - the pointer for "Horizontal Resize".
SizeNWSE - the pointer for "Diagonal Resize 1".
SizeNESW - the pointer for "Diagonal Resize 2".
SizeAll - the pointer for "Move".
UpArrow - the pointer for "Alternate Select".
Hand - the pointer for "Link Select".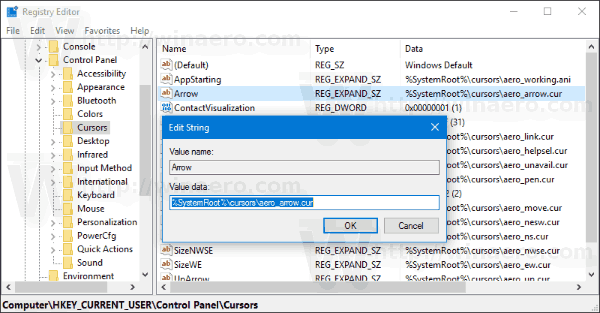
Get new cursor schemes with Cursor Commander
Some time ago, I released a freeware app, Cursor Commander, which can help you manage cursors in Windows 10. The main idea of the Cursor Commander app is that you can install and apply multiple new cursors with a single click. It uses a special file extension, .CursorPack. It is actually a ZIP archive which contains a set of cursors and a special text file with instructions for the app to apply them.
- Download Cursor Commander from HERE. You can also read a detailed description of the app HERE.
- Unpack the file named Cursor Commander-1.0-Win8.exe. It works in Windows 10 without issues.
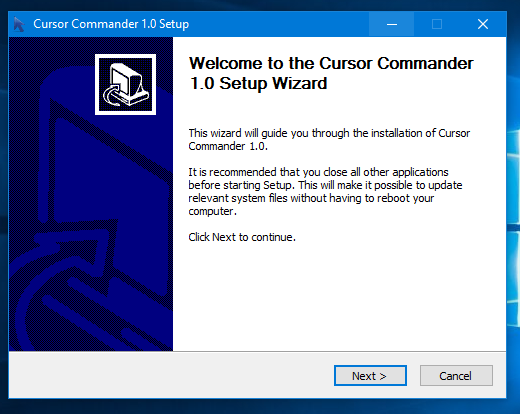
- Run the installer and follow the setup instructions.
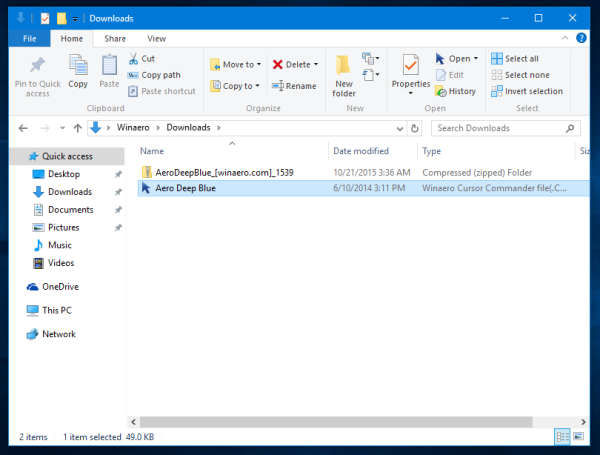
- Now, pick a set of cursors you like from HERE. I will use the one named "Aero Deep Blue", which goes well with the default theme in Windows 10:

- Double click the CursorPack file you downloaded:
 It will be installed and appear in Cursor Commander's themes. From there, you can apply it with one click:
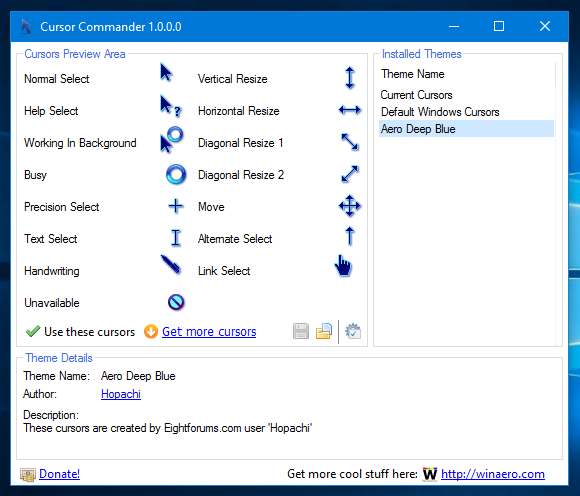
- You can switch between cursor themes easily. When you get bored with the current theme, you can pick another one and click the button "Use these cursors". It is much faster than applying them manually with the Mouse Control Panel.
Cursor Commander is a freeware desktop app which works in Windows 10, Windows 7 and Windows 8.x. I have not tested it, but it should work fine in earlier versions of Windows too, like Windows Vista or XP with .NET 3.0 or .NET 4.x installed.
Actually there is a bug in Windows 7 and all later versions where custom cursors/mouse pointers get reset at startup when applied using Mouse Control Panel. The best fix for this is to use Winaero's Cursor Commander to apply them. Then they won't get reset to default and will scale correctly for higher DPI as well.
That's it.
Support us
Winaero greatly relies on your support. You can help the site keep bringing you interesting and useful content and software by using these options:
