In this article, we will see how to select or change the drive for File History. This will allow you to move your backup to another drive and free up space on the current drive you are using for backup with File History.
Advertisеment
File History is a very useful feature of Windows 10. It allows you to create a backup of the important data stored in your Documents, Pictures, Music, Videos and Desktop folders. You can specify the drive where you plan to store your backup. The File History feature was first introduced in Windows 8, and has been improved in Windows 10. It allows browsing and restoring different versions of files.
Note: File History requires using the NTFS file system. File History relies on the journal feature of NTFS to track file changes. If the journal contains records about changes, File History includes the updated files in the archive automatically. This operation is very fast.
Files processed by File History are stored in the FileHistory folder in the root folder of your drive. Here is how to change the drive for File History.
To change the drive for File History in Windows 10, do the following.
- Open the classic Control Panel app.
- Go to Control Panel\System and Security\File History. It looks as follows (the screenshot below is from Windows 10 build 16251):
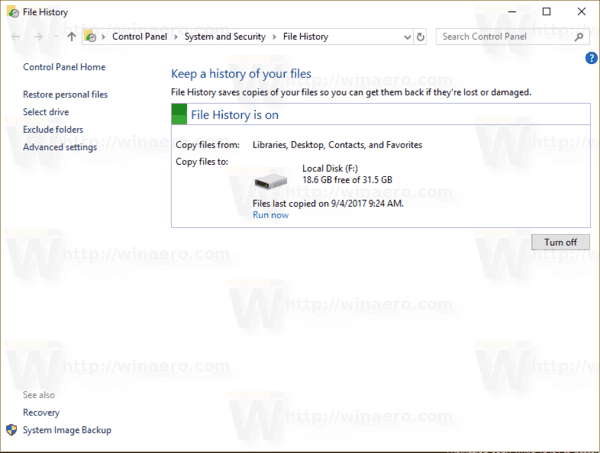
- If you have enabled File History, click Turn off for the desired drive.
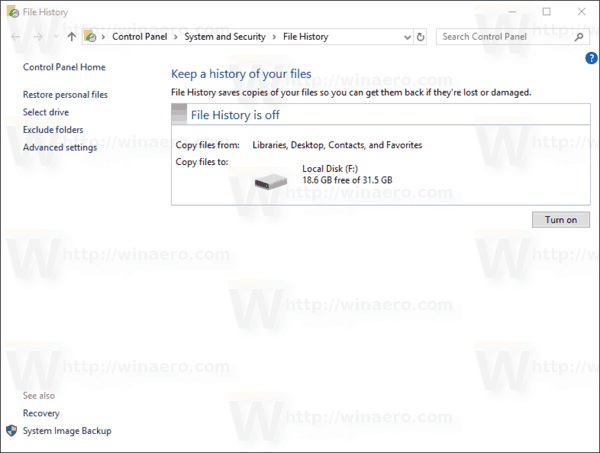
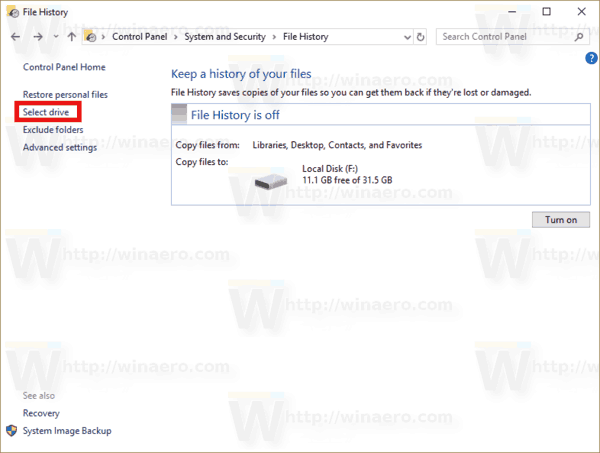
- On the left, click on the link Select drive.
- The following window will appear:
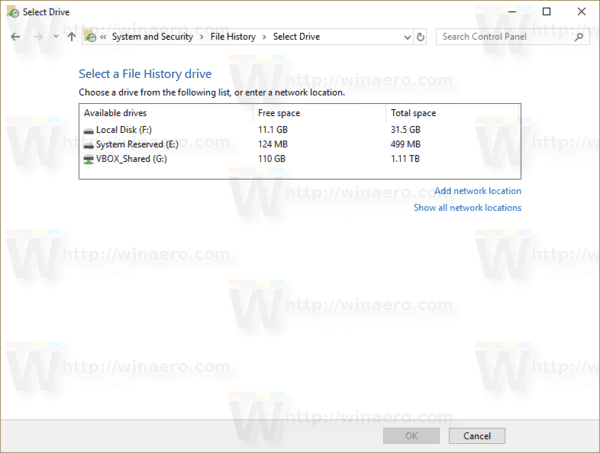 Select a new drive in the list and click OK. The result will be as follows:
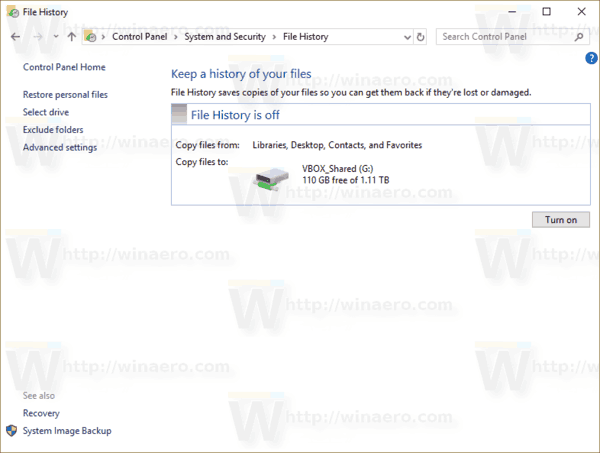
- Click the Turn on button.
Now you can remove the FileHistory folder from the root of your previous drive.
The same can be configured using Settings. Here is how.
Change Drive for File History Using Settings
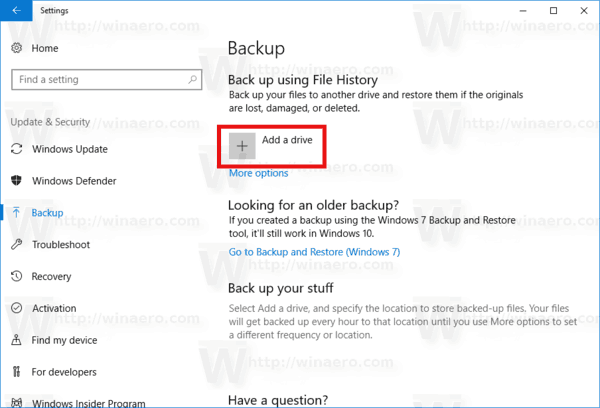
- Open the Settings app.

- Go to Update & Security -> Backup.
- On the right, click on Add a drive if this option is available.
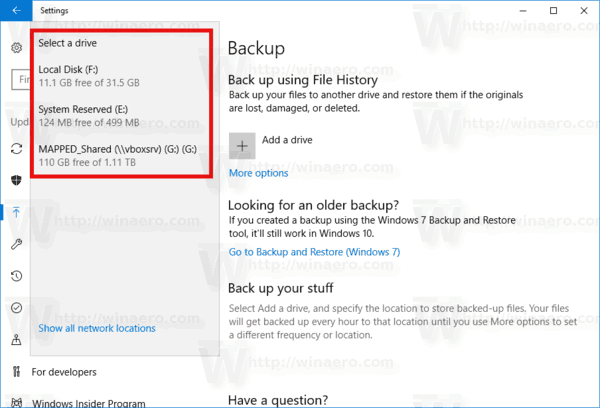
- Select the desired drive in the list.
You are done.
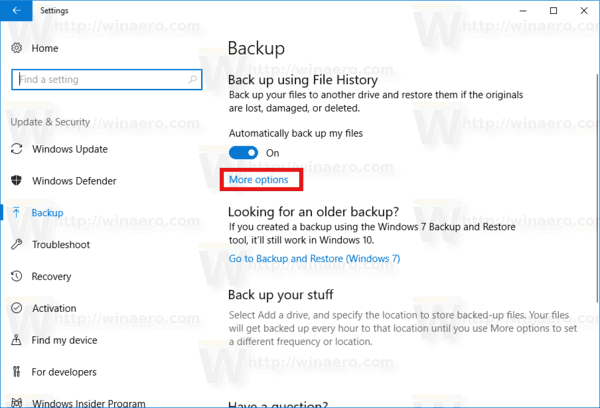
If you have enabled File History, the page mentioned above will look as follows.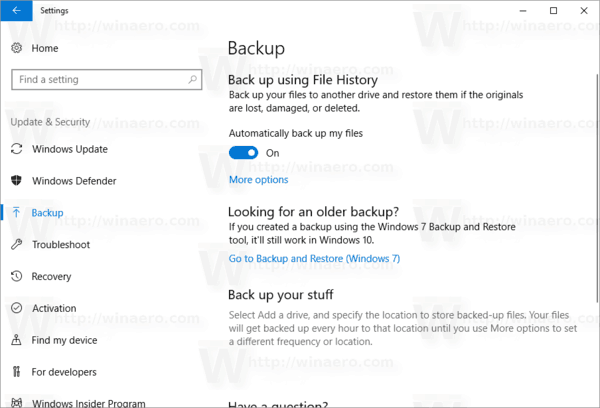
You need to do the following.
- Click on the More options link under the option Automatically back up my files.
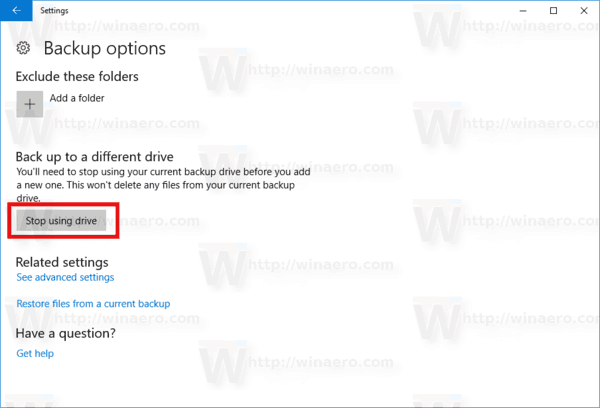
- On the next page, scroll down to the option Backup to a different drive.
- Click on the button Stop using drive. This will allow you to select another drive to use with File History.
That's it.
Tip: See How to Reset File History in Windows 10.
Support us
Winaero greatly relies on your support. You can help the site keep bringing you interesting and useful content and software by using these options:

In the classic control panel example, you have File History currently on drive F. You explain how, in steps 2 to 5, to change the drive to the VBOX_Shared G: drive. You do not explain at that point how the many File History backups that were on drive F migrate to drive G. Do they migrate to drive G automatically, or is it the case that when the drive is changed to G, all of the prior File History backups that were on F are no longer available?
That’s what it seems to do. I just put a new SD card in and selected it as the drive and it moved the files to that drive, seamlessly. You probably posted this a thousand years ago, but since there are no dates on these posts, I’m answering for posterity.
This was posted April 17, 2020
You can see the post date below the article text:
Everything still works here like a charm.
First question to pop in my mind as well.
I love WinAero so far, I find it intelligently written unlike many other sites, but the coverage of this topic leaves a lot to be desired.