Starting in Windows 10 build 21354, you can change Camera Brightness and Contrast.
Modern expensive webcams come with bundled software for adjusting different settings and parameters. These settings can improve image quality and adapt it to your environment for better video conference experience. Unfortunately, not everyone can afford a $200+ webcam.
Advertisеment
Microsoft wants to provide an easy option to change different camera settings on a system level without additional software. Thus Windows 10 received a native webcam settings section. These settings allow you to change camera brightness, contrast, and other parameters depending on a device and its capabilities. Additionally, the updated camera settings page allows you to disable webcam in Windows 10, add a new one, or manage existing devices. It not only works with local devices but also supports IP cameras connected over the network.
Currently, a new camera settings page is available only in Windows 10 preview build 21354 and newer. We do not recommend installing pre-release software on your primary computer to avoid potential bugs and instabilities.
Change Camera Brightness and Contrast in Windows 10
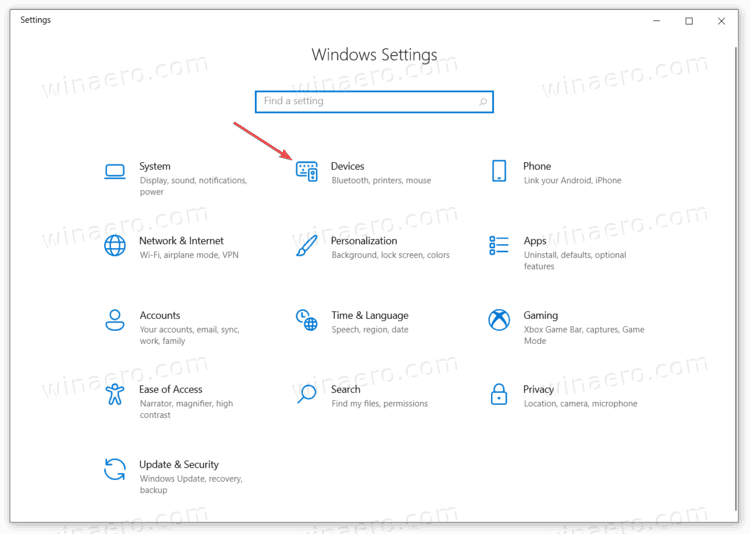
- Open Settings.
- Go to Devices, and click on Cameras in the left pane.
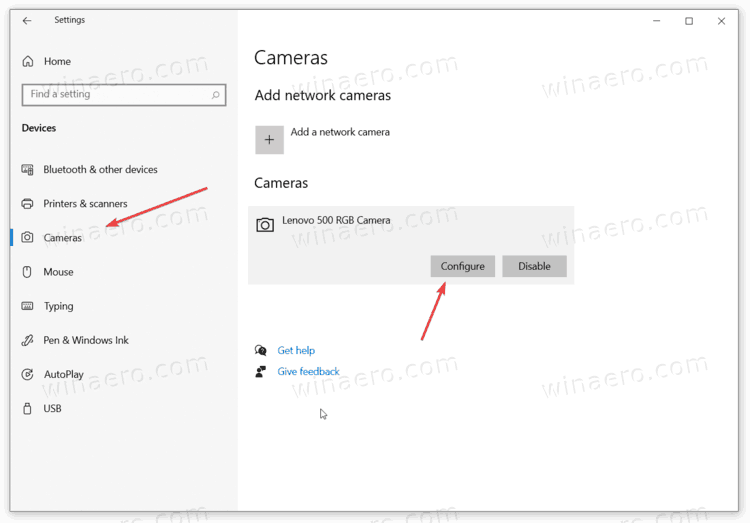
- Navigate to the Cameras section on the right and find the camera you want to adjust image parameters for.
- Click on it to select, and click on the Configure button.
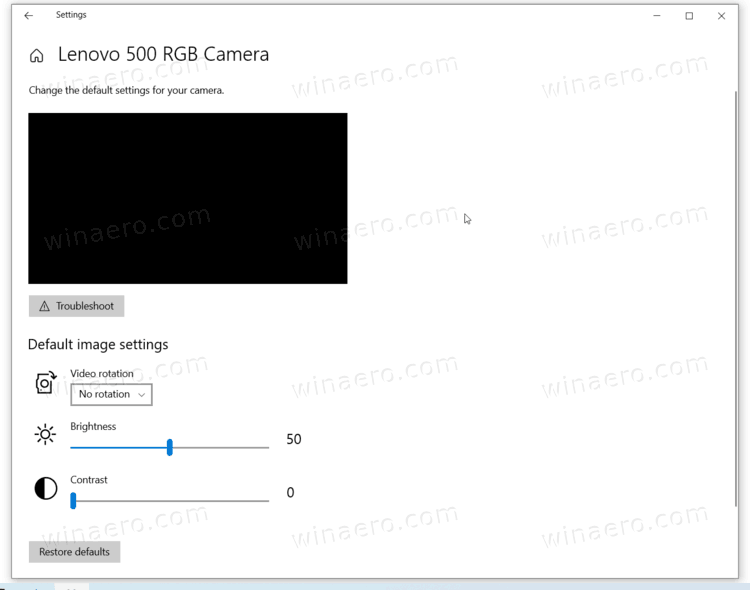
- On the next page, adjust all the available sliders for what you want. There are options to change brightness, contrast, and also rotation, high dynamic range, eye correction, etc.
- You can now close the Settings app if you want.
You are done.
It is worth mentioning that there is an image preview, so you can see how the settings you change affect image quality. Note that the list of available settings depends on what features your camera support. If there are no brightness or contrast sliders, then this means that your camera does not support adjusting these settings.
If you are not satisfied with the changes you have just made, Windows has an option to restore default camera settings with a single click.
Restore default Camera settings in Windows 10
- Open Windows 10 Settings.
- Go to Devices > Cameras.
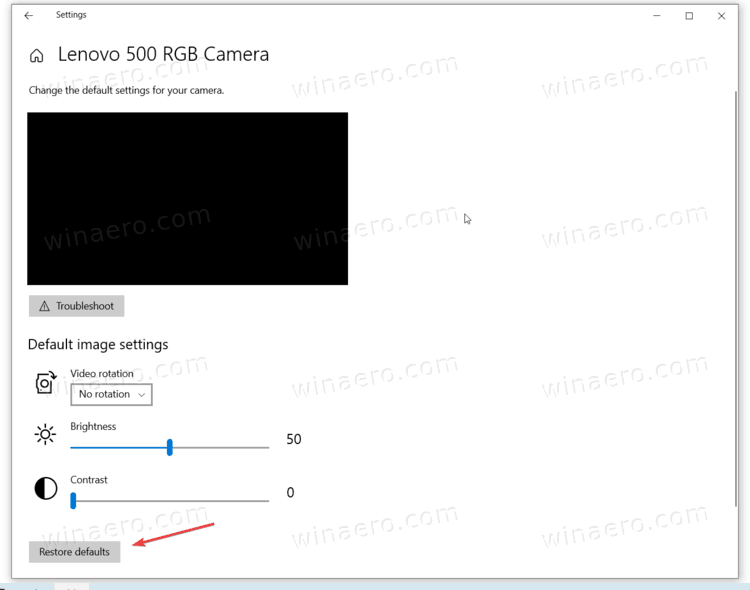
- Find your camera in the Cameras list on the right. Click on it and select Configure.
- On the next page, click on the Restore defaults button.
You are done.
Tip: In case if you have issues with your webcam, click on the Troubleshoot button to run a built-in troubleshooter.
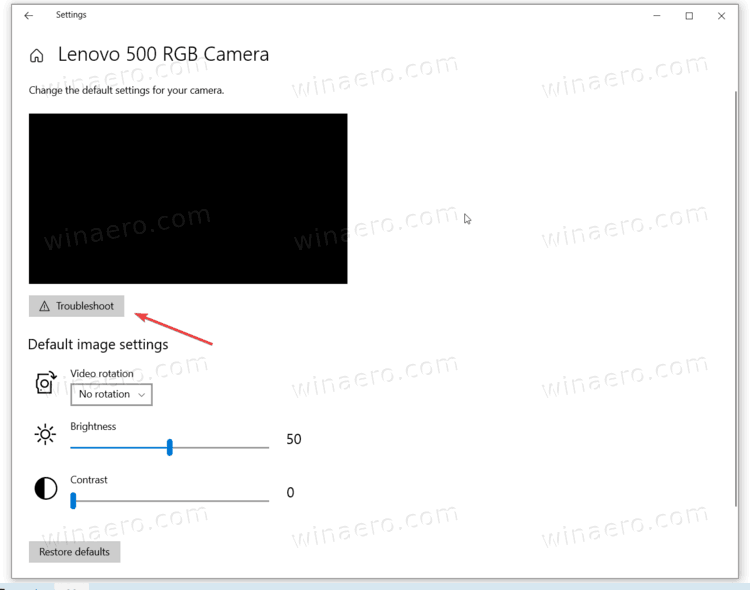
It will go through some basic checks to ensure the camera works and communicates with the operating system properly. You can also fix webcam problems in Windows 10 by heading to Windows Settings > Update and Security > Troubleshoot > Additional Troubleshooters > Camera.
That's it.
Support us
Winaero greatly relies on your support. You can help the site keep bringing you interesting and useful content and software by using these options:

no button configure
It must be supported by your hardware
cameras is not listed under my devices
on my computer it goes right from “Printers & scanners” to “Mouse.” what do I do? the camera works, I just can’t adjust the settings