With Windows 8, Microsoft made changes to the boot experience. The simple text-based boot loader is now disabled by default and in its place, there is a touch-friendly graphical user interface with icons and text. Windows 10 has this as well.
Advertisеment
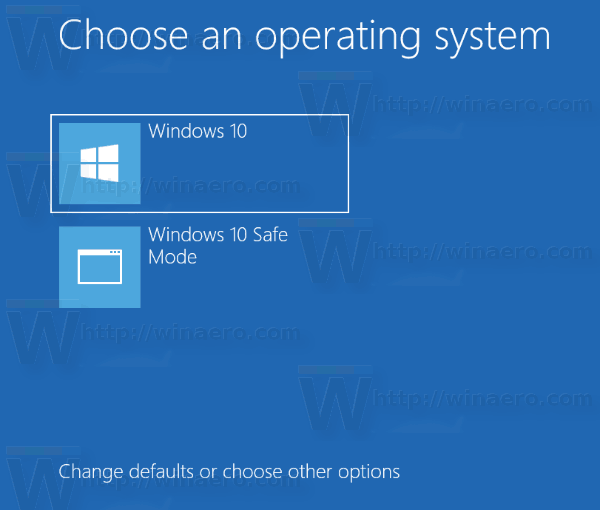
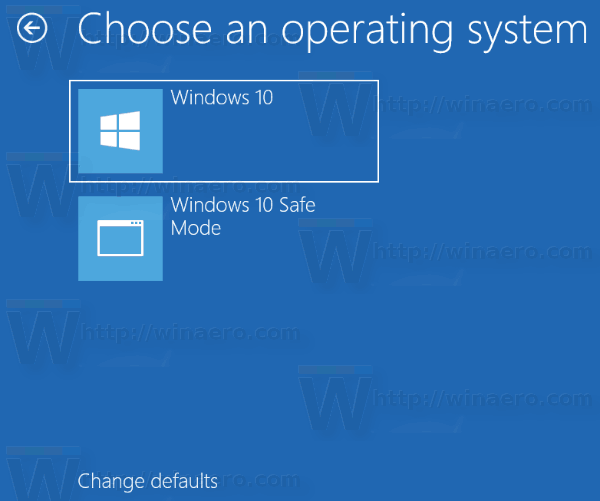
In a dual boot configuration, the modern boot loader shows a list of all installed operating systems for 30 seconds. After this period of time, if the user has not touched the keyboard, the default operating system will be started. You might want to change this timeout to some other value. Let's see how it should be done.
To change the boot menu timeout in Windows 10, do the following.
- Right in the boot menu, click the link Change defaults or choose other options at the bottom of the screen.
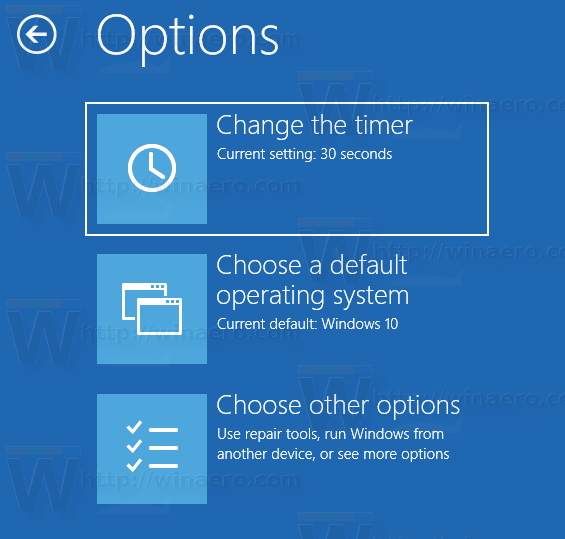
- On the next page, click Change the timer.
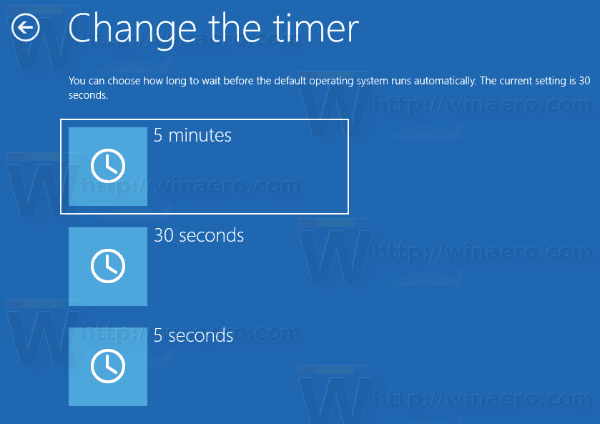
- Set a new timeout value to set how long the user must wait before the default OS boots automatically.
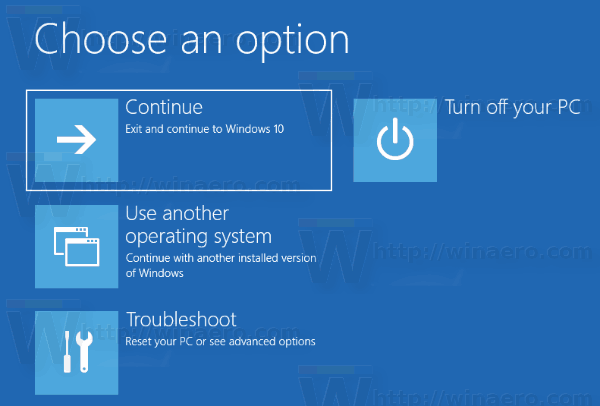
Tip: You can boot Windows 10 into Advanced Startup Options, and pick the item Use another operating system. See the following screenshots.
If you are not happy with the three pre-defined options in the timer, you can set a custom value with the built-in console utility "bcdedit". Open an elevated command prompt and type the following command:
bcdedit /timeout new_timeout_value
The new_timeout_value specifies seconds from 0 to 999. For example, if you want to set the boot timeout to 1 minute, execute the command
bcdedit /timeout 60
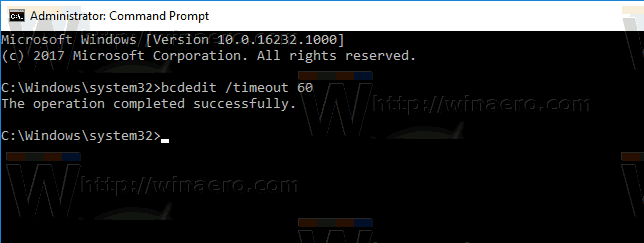
Note: Using 0 seconds will eliminate the boot timeout period. The default operating system will start instantly.
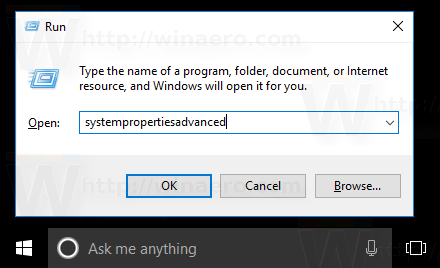
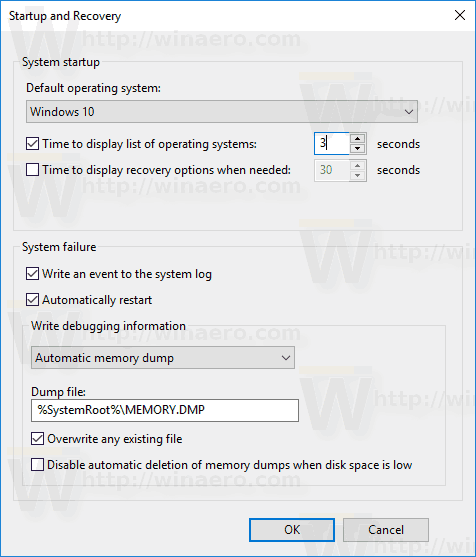
The classic System Properties applet can be used to configure the boot timeout using the GUI.
Press Win + R keys together on the keyboard. The Run dialog will appear on the screen. Type the following into the text box and press Enter:
SystemPropertiesAdvanced
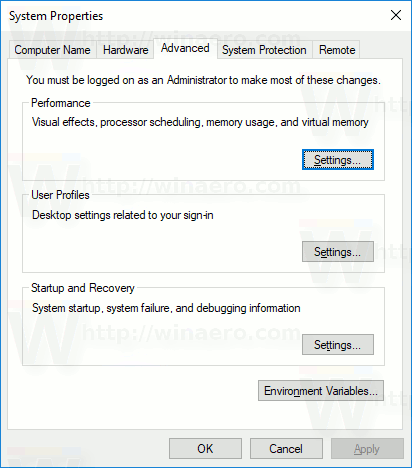
Advanced System Properties will open. Press the Settings button in the Startup and Recovery section on the Advanced tab.
 Change the Time to display list of operating systems option to the desired value:
Finally, you can use the built-in msconfig tool to change the boot timeout. Press Win + R and type msconfig in the Run box.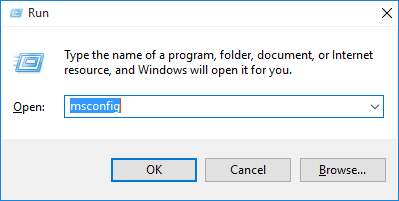
On the boot tab, configure the Timeout option. Then tick the check box Make all boot settings permanent. 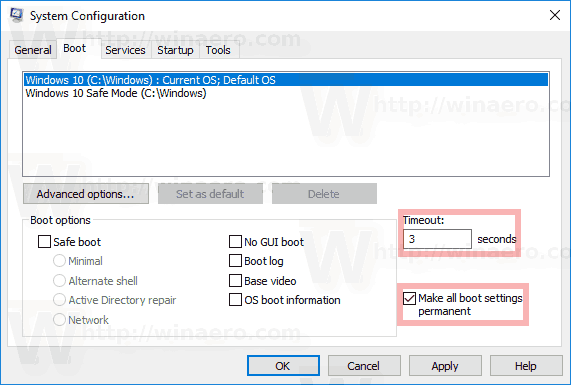 Click the Apply and OK buttons and you are done.
Support us
Winaero greatly relies on your support. You can help the site keep bringing you interesting and useful content and software by using these options:

Very cool, and thank you for help. Keep awesome too.