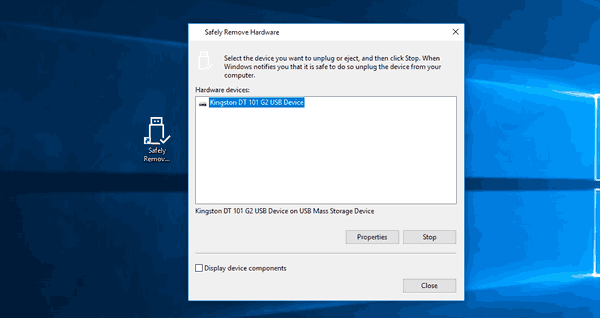
If you have several removable devices connected to your PC, it can be useful to create a special shortcut to the Safely Remove Hardware dialog. It will show a useful UI to manage connected devices quickly. Let's see how it can be done.
Safely Remove Hardware is not a new feature of Windows 10. It is available in many previous Windows versions. This dialog allows the user to quickly turn off and eject a storage device safely to prevent data loss (see the following article about write caching in Windows).
To create the Safely Remove Hardware shortcut in Windows 10, do the following.
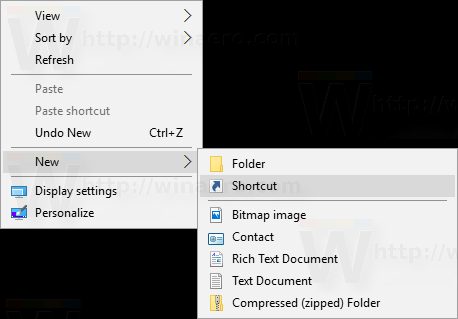
Right click the empty space on your Desktop. Select New - Shortcut in the context menu (see the screenshot).

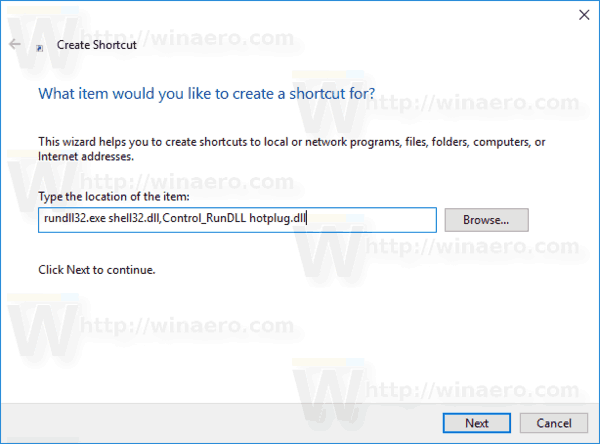
In the shortcut target box, type or copy-paste the following:
rundll32.exe shell32.dll,Control_RunDLL hotplug.dll
Tip: See the list of the Rundll32 commands available in Windows 10.

Use the line "Safely Remove Hardware" without quotes as the name of the shortcut. Actually, you can use any name you want. Click on the Finish button when done.
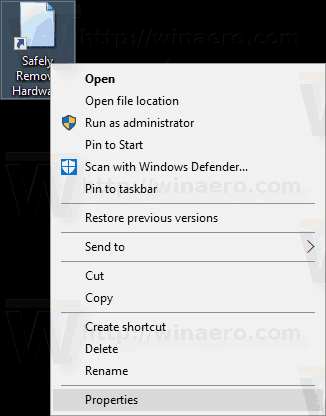
Now, right click the shortcut you created and select Properties.

On the Shortcut tab, you can specify a new icon if you wish. You can use the icon from the c:\windows\system32\hotplug.dll file.
![]()
Click OK to apply the icon, then click OK to close the shortcut properties dialog window.
Now, you can move this shortcut to any convenient location, pin it to taskbar or to Start, add to All apps or add to Quick Launch (see how to enable Quick Launch). You can also assign a global hotkey to your shortcut.
Support us
Winaero greatly relies on your support. You can help the site keep bringing you interesting and useful content and software by using these options:

Is there any force parameter? (Or close / exit running programs / files from drive and remove drive?)