Windows 10 version 1903 "April 2019 Update" comes with a number of interesting changes and improvements made to the WSL feature. These include additional distros in the Store, the ability to browse WSL files from File Exporer via a virtual network share, and the ability to export and import a WSL distro to/from a TAR file.
Advertisеment
The ability to run Linux natively in Windows 10 is provided by the WSL feature. WSL stands for Windows Subsystem for Linux, which initially, was limited to Ubuntu only. Modern versions of WSL allow installing and running multiple Linux distros from Microsoft Store.
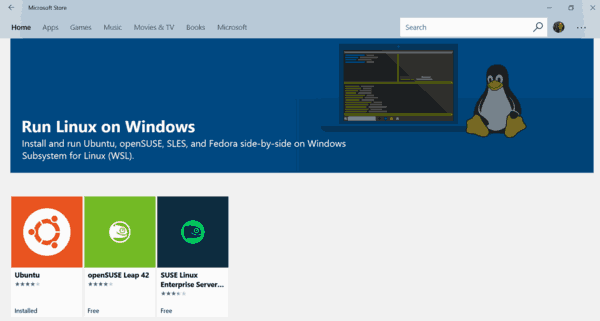
After enabling WSL, you can install various Linux versions from the Store. You can use the following links:
and more.
Export and Import WSL Distros
With Windows 10 version 1903 "April 2019 Update" you can import and export your Linux distros to a TAR file. This will allow you to customize your Linux environment, install desired apps, then export it to a file. Later, you can restore your setup on another PC, or share it with a friend.
This can be done with wsl.exe, a command line tool that allows managing WSL. As of this writing, this feature is implemented in Windows 10 build 18836. It is on its way to the 19h1 branch, so we will see it with the next build.
To export a WSL distro to a file, do the following.
- Start the distro you want to export.
- Update it, install and configure apps, and make any other changes you want.
- Exit the WSL environment.
- Open a new command prompt or PowerShell.
- Run the following command:
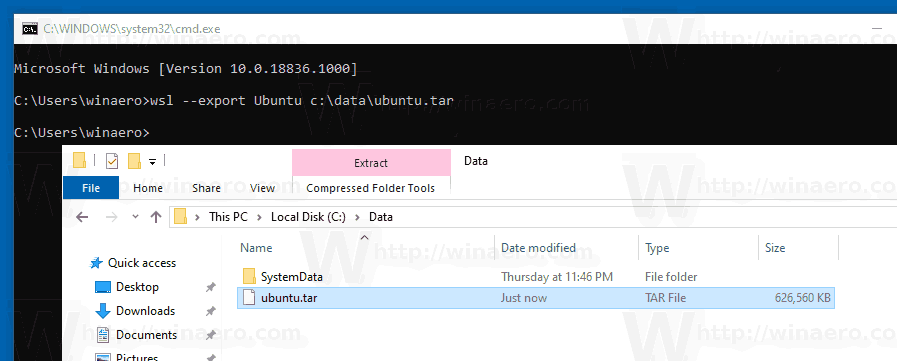
wsl.exe --export <DistributionName> <FileName>. SubstituteDistributionNamewith the actual name of your WSL distro, for example, Ubuntu. Replace<FileName>with the full path to the TAR file to store your distro.
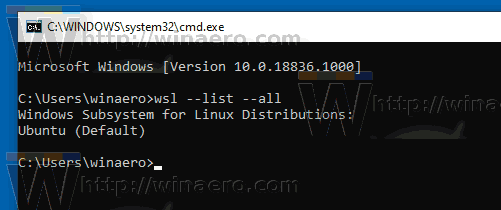
Tip: You can see the list of installed WSL distros and their names with the wsl --list --all command.
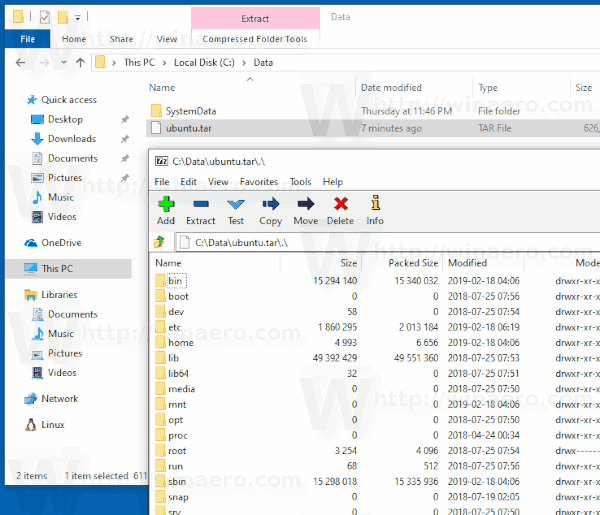
See the following screenshots.
Import a WSL Distro from a file in Windows 10
You can import a tar file that contains the root file system of a Linux distro, which allows you to import any distro you like, with any configuration you’d like. You can specify any name and a custom folder location to store the customized distro.
To import a WSL distro from a file, do the following.
- Open a new command prompt.
- Run the following command:
wsl.exe --import <DistributionName> <InstallLocation> <FileName>. - Substitute <DistributionName> with the name you want to assign for the distro you are importing.
- Substitute <InstallLocation> with the full path to the folder you want to store this WSL distribution.
- Replace <FileName> with the full path to your TAR files.
See the following screenshots.

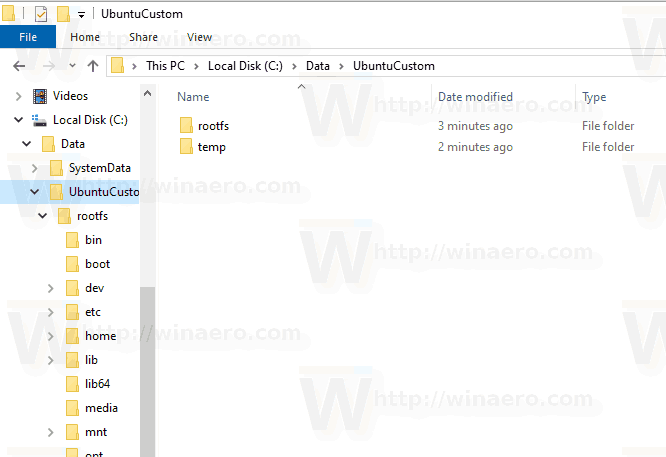
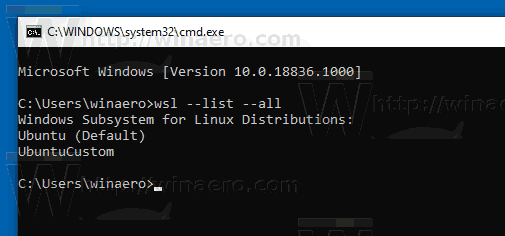
To run the imported distro, issue the following command in the command prompt or PowerShell.
wsl --distribution <DistributionName>
Substitute the <DistributionName> portion with the name you have assigned to the imported distro.
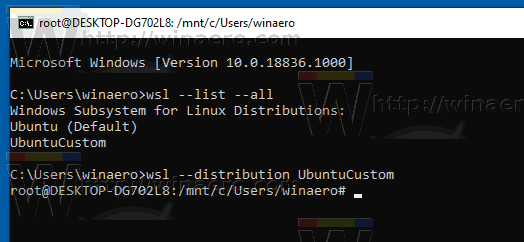
Finally, to remove an imported Linux distribution, execute the command
wsl.exe --unregister <DistributionName>
For example,
wsl.exe --unregister UbuntuCustom
That's it.
Support us
Winaero greatly relies on your support. You can help the site keep bringing you interesting and useful content and software by using these options:

Thanks for this great tutorial. Do you have a suggestion for how I configure the linux distribution launched through the WSL app? Whenever I launch the app it uses the distro that isn’t my newly imported custom distro.
thank you for the tutorial.
I have a problem that when I import it I couldn’t see the files in home directory, or I couldn’t run the software that installed before exporting?
thank you,
Abdulla
Wow, a proper decent guide. You obviously can read peoples minds as they are doing this. Showing how to list existing distros for example. Great stuff, thanks for this.
Thanks for the tutorial. It works properly.
However can you mention how to revert this process, or is it irreversible?