It is possible to enable the boot log in Windows 10. The boot log is a special text file which contains a list of loaded and unloaded drivers during the boot process. It can be helpful when you are troubleshooting startup issues. Here is how it can be done.
Advertisеment
Having the boot log enabled will allow you to analyze the internals of the boot process on your Windows 10 computer. The boot log is stored in the file C:\Windows\ntbtlog.txt and can be opened with your favorite text editor app like Notepad.
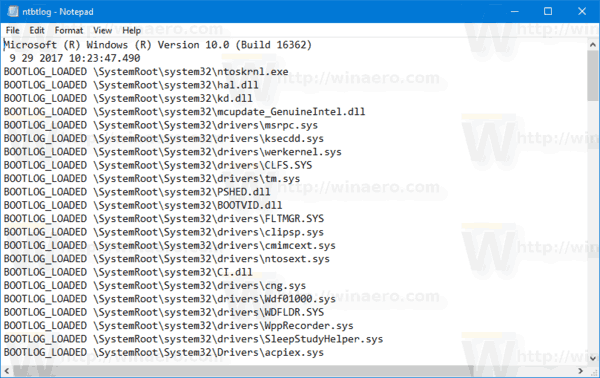
There are two ways to enable or disable this feature. The first method is msconfig, the GUI tool which can be used to configure various startup options of the OS. The second one is the console tool, bcdedit.exe. In this article, we will review both methods.
The boot log feature is disabled by default. In order to enable it, you must be signed in as administrator.
To enable boot log in Windows 10, do the following.
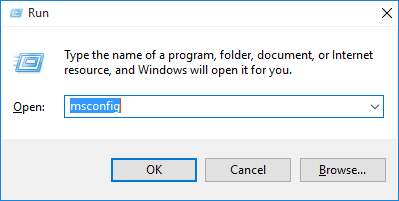
- Press Win + R keys together on the keyboard and type msconfig in the Run box. Press Enter.
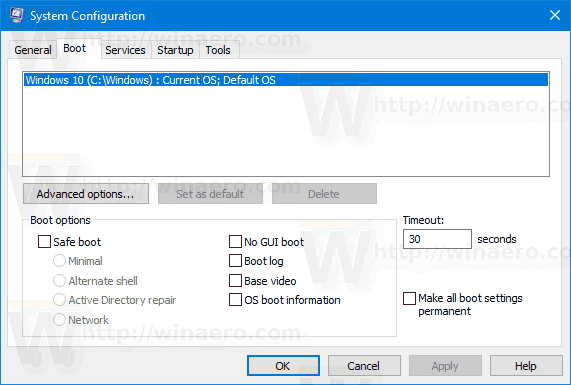
- Confirm the UAC prompt if it appears and go to the boot tab.
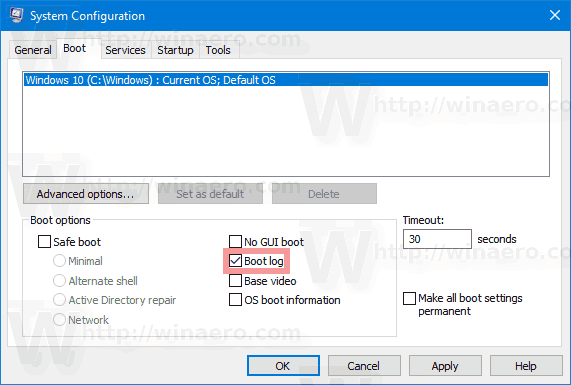
- There, enable the option Boot log under the Boot options group.
- You might be prompted to restart Windows 10. If you click on Restart, the operating system will be rebooted.
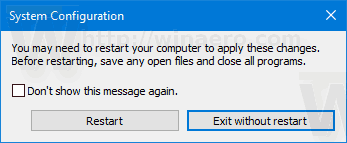 You can safely postpone this action if you have unfinished tasks opened.
How to Enable Boot Log using Bcdedit.exe
The same can be done with the built-in console utility bcdedit.exe. Here is how.
- Open an elevated command prompt.
- Type or copy-paste the following:
bcdedit
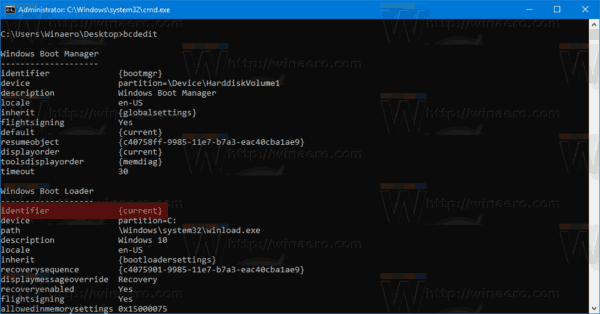
Once you press the Enter key, the tool will list all the installed operating systems and their boot records. You need to note the identifier of the OS for which you want to enable the boot log. See the following screenshot:
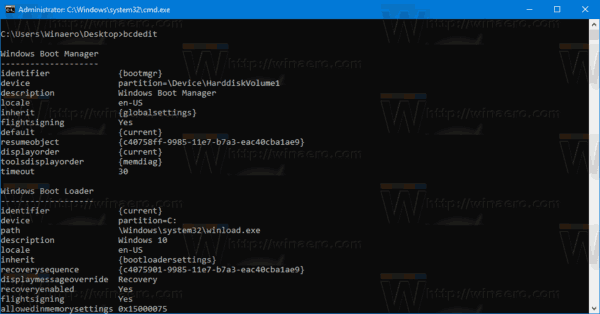
For the currently running instance, the identifier {current} can be used for quick reference.
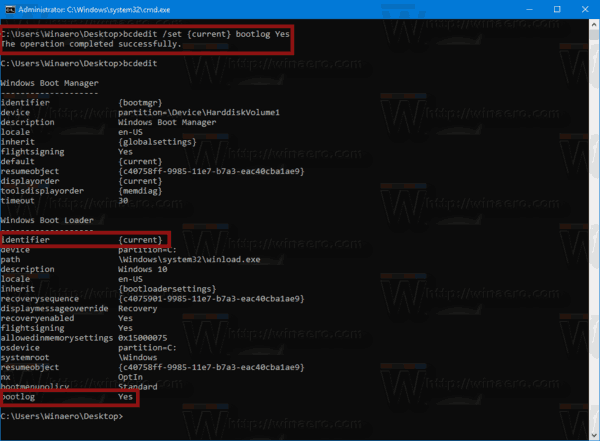
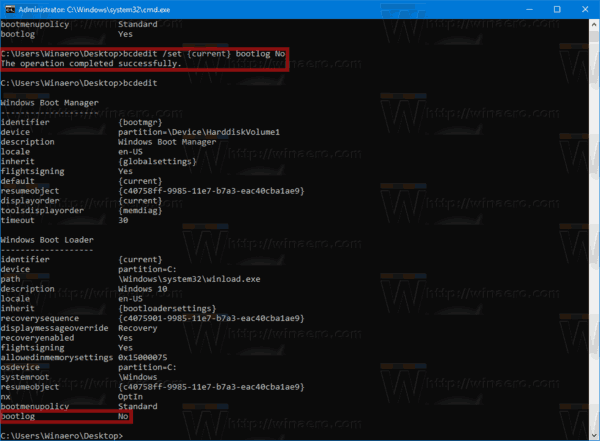
- To enable the boot log, run the command
bcdedit /set {IDENTIFIER} bootlog YesReplace the {IDENTIFIER} with the actual value you noted, e.g. {current}.
- To disable the boot log, run the command
bcdedit /set {IDENTIFIER} bootlog NoThis will disable the boot log feature, which is the default option.
That's it.
Support us
Winaero greatly relies on your support. You can help the site keep bringing you interesting and useful content and software by using these options:

You didn’t tell us where to find the actual ntbtlog.txt file!
Second paragraph. You didn’t read.