Windows 10 comes with a special feature called Battery Saver. It is intended to save your PC's battery by limiting background app activity and putting your device hardware in power saving mode. It is possible to enable Battery Saver automatically when on battery or turn it on manually. Here is how.
Advertisеment
Out-of-the-box, Battery Saver is disabled. You need to turn it on manually, or configure it so it becomes enabled automatically once the battery falls below the specified power percentage. These settings can be changed in the Settings app.
To enable Battery Saver in Windows 10, do the following.
- When your device is running on battery, you should see the Battery icon in the notification area of the taskbar. Click it to see the following flyout:
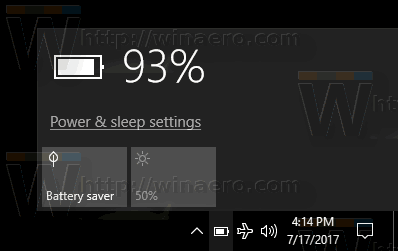
- Click on the Battery saver button to toggle enable this feature.
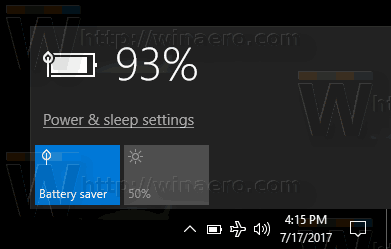
Alternatively, you can press Win + A to open the Action Center and use the appropriate Quick Action button as shown below.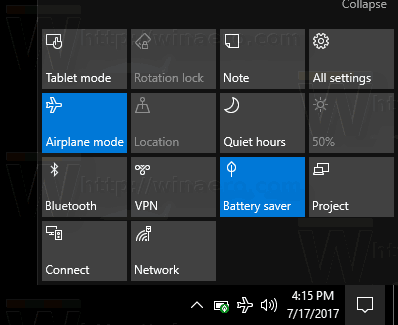
Finally, you can configure Battery Saver using Settings. There, you can enable the feature manually and set options to enable it automatically when required.
Enable Battery Saver in Windows 10 using Settings
- Open the Settings app.
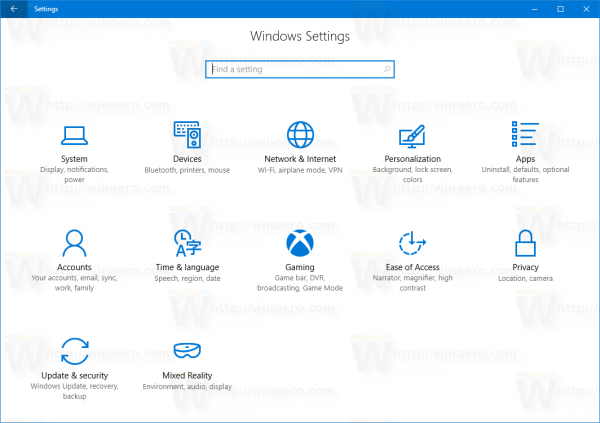
- Go to System -> Battery.
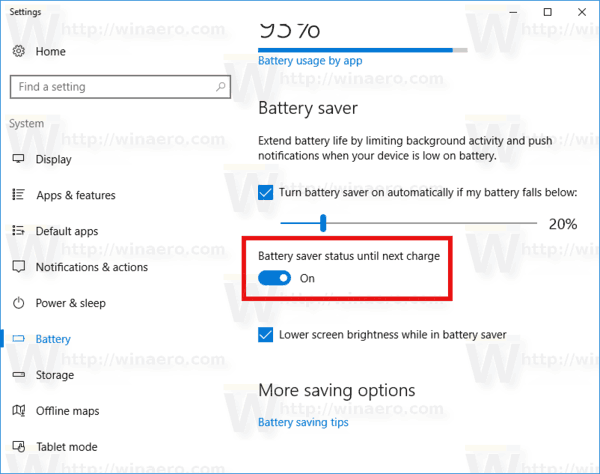
- On the right, you will see a number of options related to Battery Saver. To enable the Battery Saver right now, turn on the switch Battery saver status until next charge. This will enable the battery saver feature immediately.
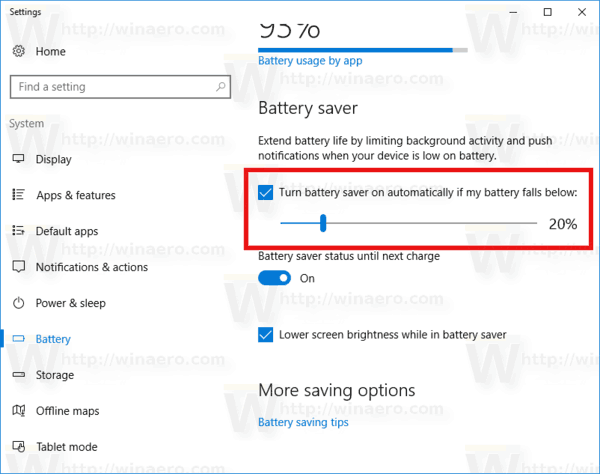
- To enable the automatic Battery Saver feature, tick the check box Turn battery saver on automatically if my battery falls below: and use the slider to set the desired battery percentage. Once the battery level falls below the specified percentage, the Battery Saver feature will be enabled automatically.
Tip: To manage the Battery Saver options quickly, you can create a special shortcut to open the Battery page in Settings directly. Here is how it can be done.
Create Battery Saver Shortcut in Windows 10
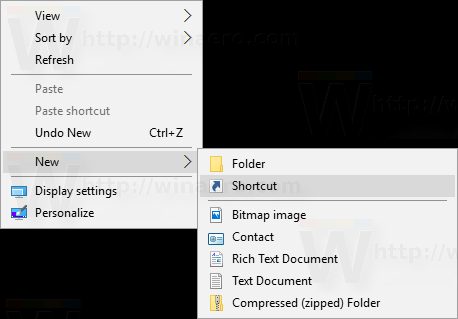
Right click the empty space on your Desktop. Select New - Shortcut in the context menu (see the screenshot).
In the shortcut target box, type or copy-paste the following:
explorer.exe ms-settings:batterysaver
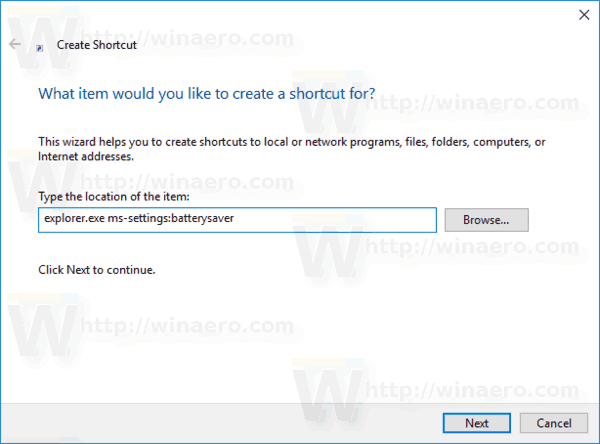
The command above is a special ms-settings command, which can be used to open the desired Settings page directly. Refer to the following articles for details:
- ms-settings Commands in Windows 10 Creators Update
- Create Shortcut to Open Any Settings Page in Windows 10
Use "Battery Saver" as your shortcut's name. Actually, you can use any name you like.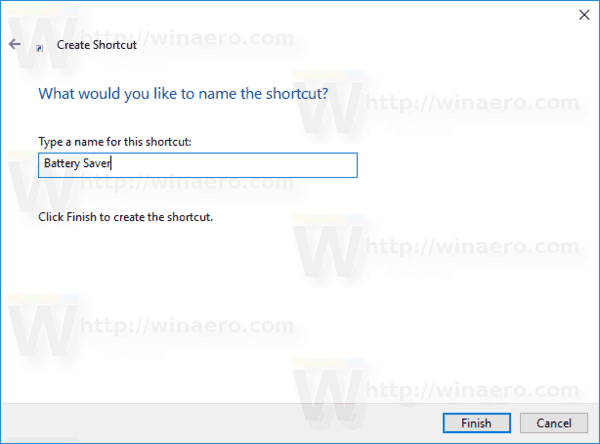
Right-click the shortcut you created and change its icon. An appropriate icon is present in the file %SystemRoot%\System32\taskbarcpl.dll.
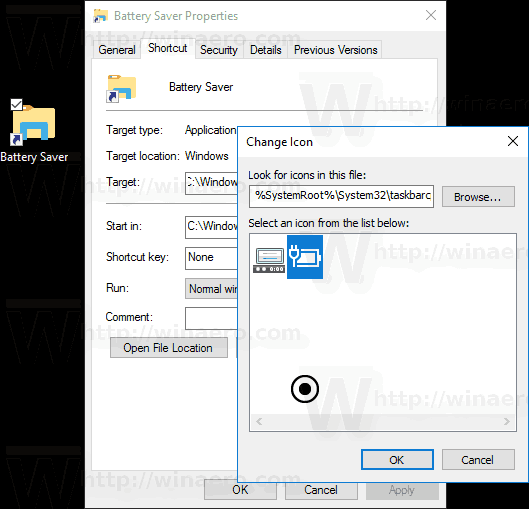
Now, you can move this shortcut to any convenient location, pin it to taskbar or to Start, add to All apps or add to Quick Launch (see how to enable Quick Launch). You can also assign a global hotkey to your shortcut.
That's it.
Support us
Winaero greatly relies on your support. You can help the site keep bringing you interesting and useful content and software by using these options:
