Although the concept of multiple users sharing one device or one PC is getting rarer by the day, there are still cases when you have to share PCs. In such a situation, it is useful to have multiple user accounts on a single PC. Today, we'll see how to create a new user account in Windows 10.
Advertisеment
In modern Windows versions, you usually have a number of system accounts for various services and internal Windows tasks, plus a hidden Administrator account and your personal account. If you need to share your PC with family members or other people, it is a good idea to create a dedicated user account for each person. This increases security and privacy of the OS and allows you to keep your sensitive data private and your settings personalized to your taste.
Before proceeding, ensure that your user account has administrative privileges.
For every user account, Windows 10 will create a separate user profile. A user profile is a set of files and folders to store all the personal preferences, app settings, documents and other data. Every user account has an associated user profile. Usually, it is stored in the folder C:\Users\Username and includes a number of subfolders like Desktop, Documents, Downloads, etc along with hidden folders like AppData which store the settings for various Windows features and installed apps. The main purpose of the user profile is to create a personalized environment with individual options tailored to the end user.
To Create a User Account in Windows 10, do the following.
- Open the Settings app.
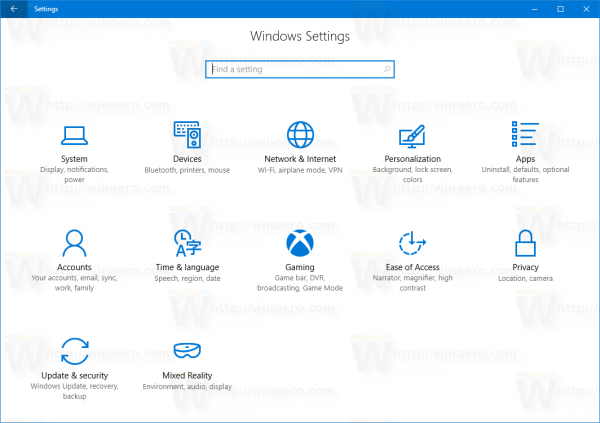
- Go to Accounts - Family and other people.
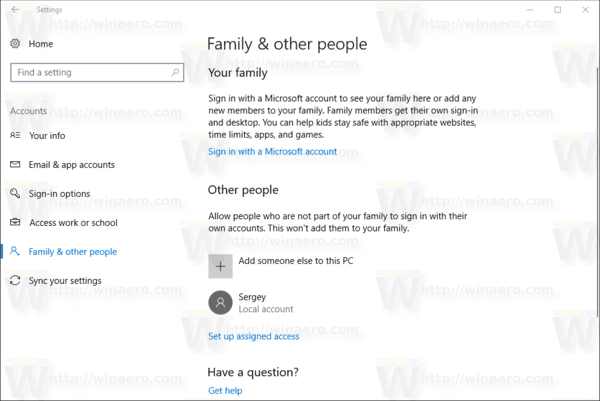
- On the right, click on the button Add someone else to this PC.
- The following window will appear:
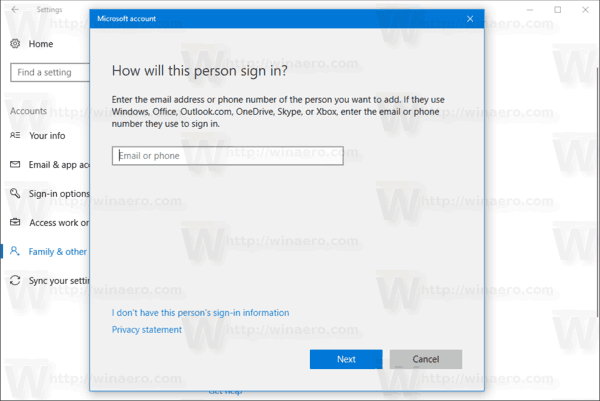 By default, it suggests you to proceed with a Microsoft Account. However, you can still create a local account if you click the link I don't have this person's sign-in information at the bottom. To find the difference between local and Microsoft accounts, see the following article: Find If You Use Local Account or Microsoft Account in Windows 10
I will continue with a local account by clicking on that link.
- On the next page, I click the link Add a user without a Microsoft Account.
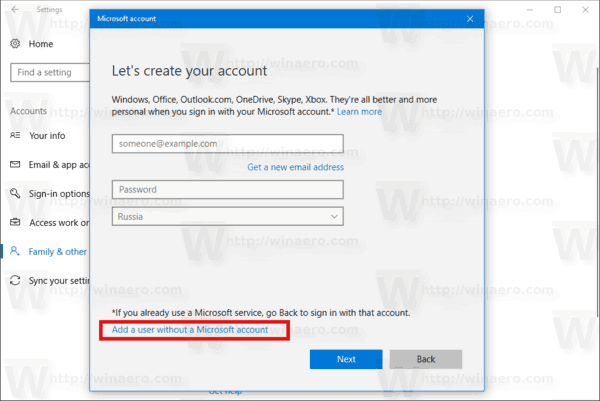
- Fill in the next form and click Next:
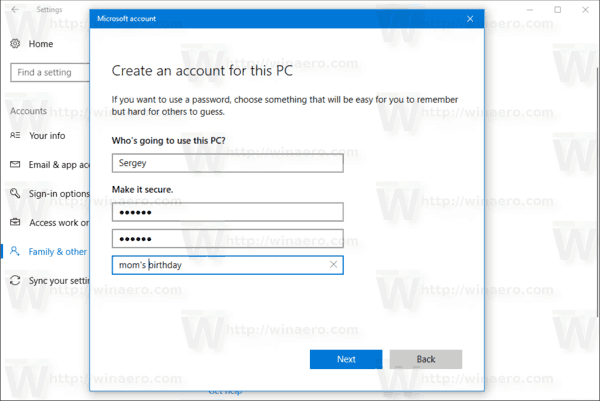
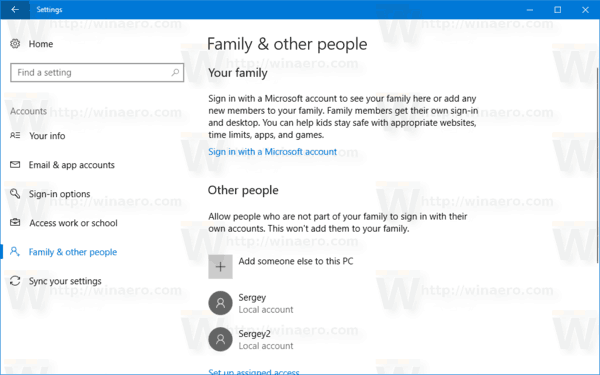
You just added a new local user account. The procedure is the same for a Microsoft Account, but you will need to fill in extra fields like e-mail, age, phone number, etc.
Alternatively, you can use two more methods to create a new user account in Windows 10. Let's review them.
If your Windows 10 edition is Enterprise, Pro, Education or Education Pro, you can use the Local Users and Groups snap-in of Microsoft Management Console (MMC). Here is how it can be done.
Create a New User Account with Local Users and Groups
- Press Win + X shortcut keys on the keyboard to open the Power user menu. Alternatively, you can right-click on the Start menu.
- In the menu, select the item Computer Management.
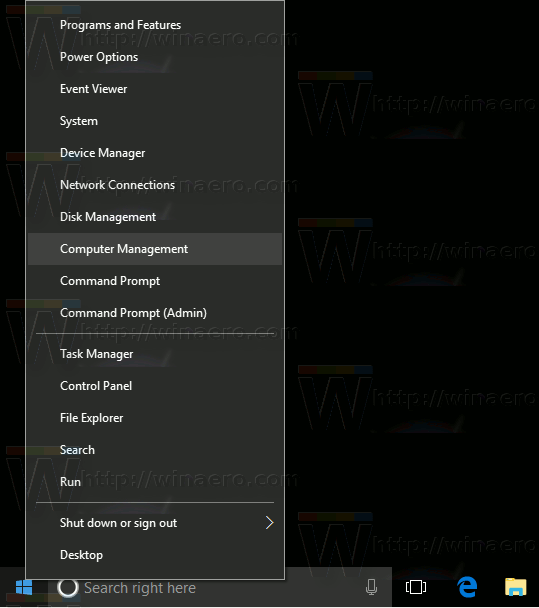
Tip: You can tweak and customize the Win + X menu in Windows 10. Refer to these articles:
- The Computer Management utility will open. On the left, expand the tree view to Local Users and Groups\Users.
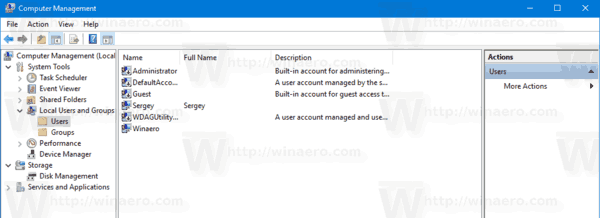
- Right-click on the empty space on the right and choose "New user..." in the context menu.
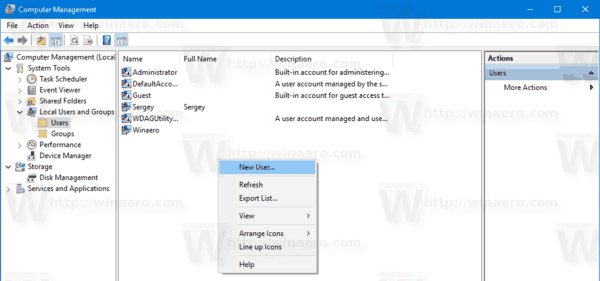
- Fill in the following dialog:
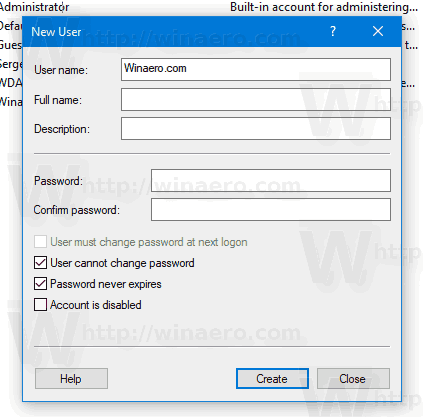 You can customize options like User must change password at next logon, User cannot change password, Password never expires according to what you need.
 - The new user will be created with standard privileges. It is possible to change the account type of the user to be administrator instead. See the following article:Change Account Type in Windows 10
Finally, you can use the console tool net.exe to add a new user account. Let's see how it can be done.
- Open an elevated command prompt.
- Type or copy-paste the following command:
net user "UserName" /add
Substitute the UserName portion with the actual login name you would like to assign to the new user. The new user account will be a local account without a password. Note that user accounts with blank or no passwords cannot be used to login over the Windows network.
- To create a new password-protected user account, use the following syntax:
net user "UserName" "Password" /add
Substitute UserName and Password with actual values.

Again, the new user will be created with standard privileges.
That's it.
Support us
Winaero greatly relies on your support. You can help the site keep bringing you interesting and useful content and software by using these options:
