By default, PowerShell restricts running scripts on end user PCs. This setting is good from a security point of view. However, if you are using a lot of scripts that you have downloaded or coded by yourself, it can be really annoying. In this article, we will review how to change the default execution policy for PowerShell scripts in Windows 10.
Advertisеment
Windows PowerShell has four different execution policies:
- Restricted - No scripts can be run. Windows PowerShell can be used only in interactive mode.
- AllSigned - Only scripts signed by a trusted publisher can be run.
- RemoteSigned - Downloaded scripts must be signed by a trusted publisher before they can be run.
- Unrestricted - No restrictions; all Windows PowerShell scripts can be run.
- Undefined - No execution policy has been set.
If the execution policy is not set and not configured, it is displayed as "Undefined". Here is how you can see the current value.
How to see the PowerShell Execution Policy
- Open PowerShell.
- Type or copy-paste the following command and press the Enter key:
Get-ExecutionPolicy -List
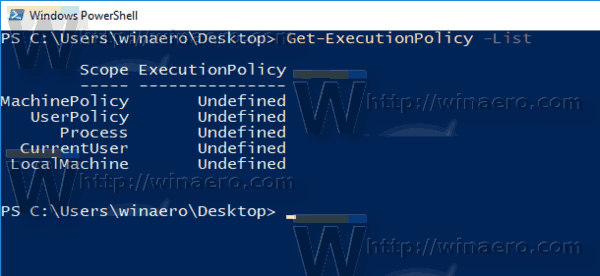
The command will display all execution policies. As you can see, there are a number of scopes for which the execution policy can be defined. It can be set globally for all users, for the current user only, or for the current process. The current process policy has priority above the current user's settings. The current user policy overrides the global option. Keep this in mind. Now, let's see how to change the script execution policy for PowerShell.
Change the PowerShell Execution policy for a process
- Open a command prompt or PowerShell.
- Launch the powershell.exe file with the -ExecutionPolicy Unrestricted argument. For example,
Powershell.exe -ExecutionPolicy Unrestricted -File c:\data\test.ps1
This will start your script using the Unrestricted execution policy. Instead of the script, you can start a cmdlet or what you want. Instead of "Unrestricted", you can use any other policy mentioned above.
Tip: For an open PowerShell console, you can switch the execution policy using the command:
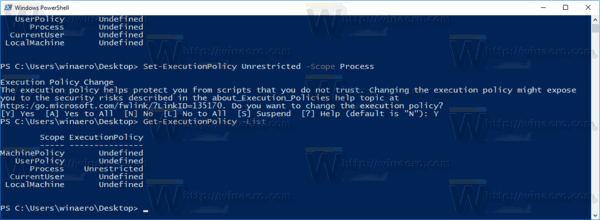
Set-ExecutionPolicy Unrestricted -Scope Process
It will remain active until you close the current PowerShell window.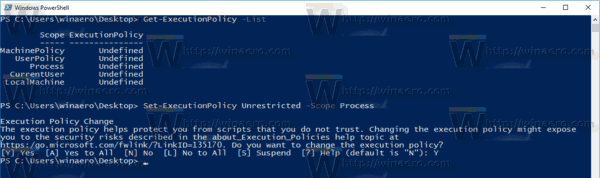
Change PowerShell Execution policy for the current user
- Open PowerShell.
- Type or copy-paste the following command and press the Enter key:
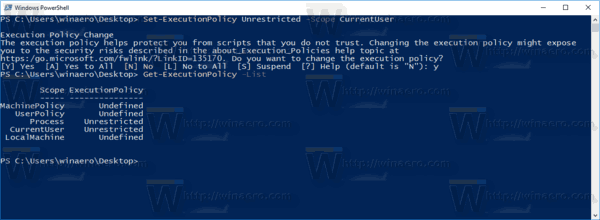
Set-ExecutionPolicy Unrestricted -Scope CurrentUser
 Tip: If the policy is not set after the command above, try to combine it with the -Force argument, like this:
Set-ExecutionPolicy Unrestricted -Scope CurrentUser -Force
When the execution policy is set for the current user, it will override the "LocalMachine" scope. Again, for a process, you can override it for the current PowerShell instance as described above.
Change the global PowerShell Execution policy
This execution policy applies to the computer, meaning it is effective for those user accounts which have no execution policy applied individually. With the default settings, it will be applied to all user accounts.
To change the PowerShell Execution policy in Windows 10, do the following.
- Open PowerShell as administrator.
- Execute the following command:
Set-ExecutionPolicy Unrestricted -Scope LocalMachine
You are done.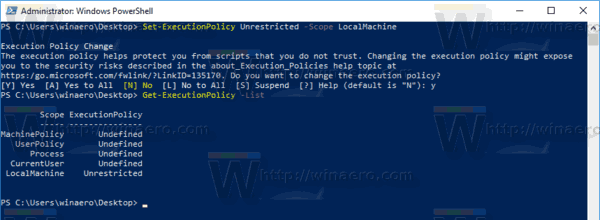
Change PowerShell Execution policy with a Registry tweak
It is possible to change the execution policy with a Registry tweak for both the current user and the computer. Here is how it can be done.
- Open the Registry editor.
- To change the execution policy for the current user, go to
HKEY_CURRENT_USER\SOFTWARE\Microsoft\PowerShell\1\ShellIds\Microsoft.PowerShell
- Set the string value ExecutionPolicy to one of the following values: Restricted, AllSigned, RemoteSigned, Unrestricted, Undefined.
- To change the execution policy for the LocalMachine scope, go to
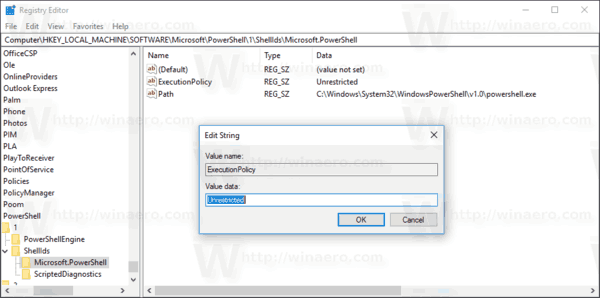
HKEY_LOCAL_MACHINE\SOFTWARE\Microsoft\PowerShell\1\ShellIds\Microsoft.PowerShell
- Set the string value ExecutionPolicy to one of the following values: Restricted, AllSigned, RemoteSigned, Unrestricted, Undefined.
Tip: See how to go to a Registry key with one click. Also, you can switch between HKCU and HKLM in Windows 10's Registry Editor quickly.
That's it.
Support us
Winaero greatly relies on your support. You can help the site keep bringing you interesting and useful content and software by using these options:

Windows PowerShell is a window command line shell. I am working as a window administrator in an organization. Always, I used PowerShell command line for my working purposes. It’s very secure and I love to use it. After reading your article about PowerShell execution policy it’s sound to me. Thanks. for sharing this. Keep updating.
You are welcome.
Great article Sergey! Very thorough and informative. Spasibo!