In this article, we will see how to get a useful context menu item to create a New -> Windows PowerShell script. It will save you time if you need to create them from time to time. You get a new file with the PS1 extension instantly with one click.
Advertisеment
Usually, to create a PowerShell file, you can either create a new text file and rename its extension every single time to .ps1, or you can use Notepad.
Using Notepad, it is possible to save the entered text as a PowerShell file by selecting the File > Save menu item and typing the filename with the ps1 extension in quotes. It is necessary to add quotes to save it with the correct extension.
Another option is the app Windows PowerShell ISE, which starts very slowly, but allows saving your scripts directly to a .ps1 file.
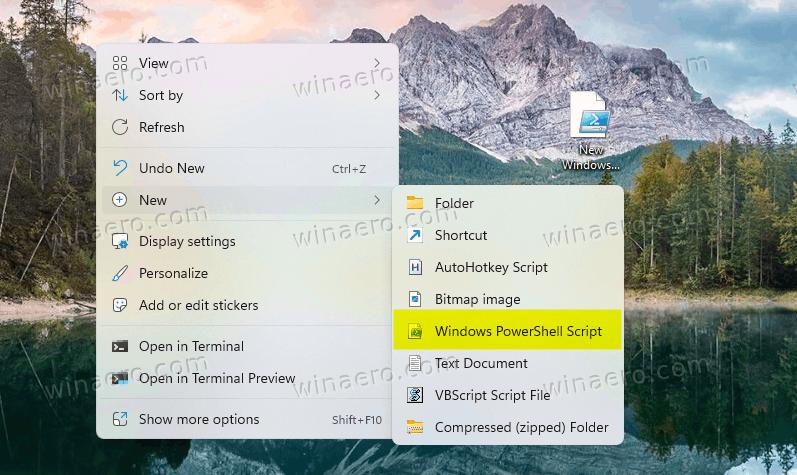
Obviously that the New > Windows PowerShell Script context menu item is more useful. To get it in your File Explorer, you need to apply the following simple Registry tweak.
Note: for Windows 11, the Registry tweak is slightly different and includes an additional editing. We will review it in a dedicated chapter.
Windows 11
- Press Win + R, type regedit into the Run box, and hit Enter to open the Registry editor.
- Navigate to the HKEY_CLASSES_ROOT\.ps1 key. For that, simply paste this path into the address bar of the regedit app.
- Look at the right pane. If the (default) unnamed value is empty, double-click it to edit it, and set it to ps1legacy.
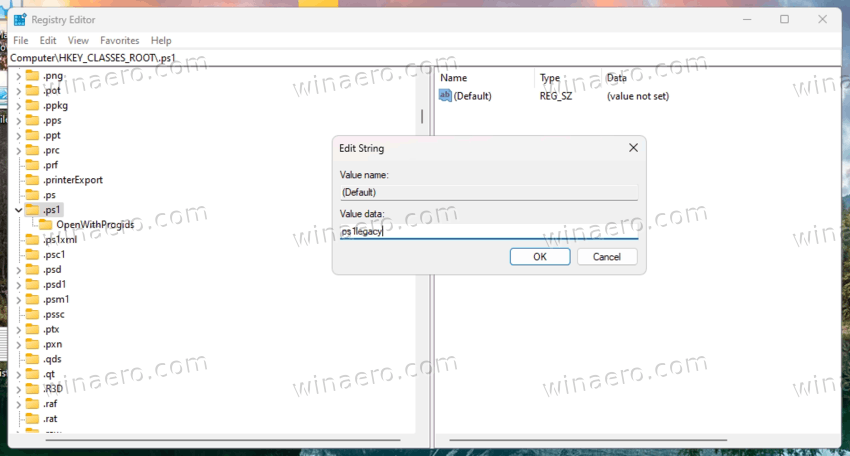
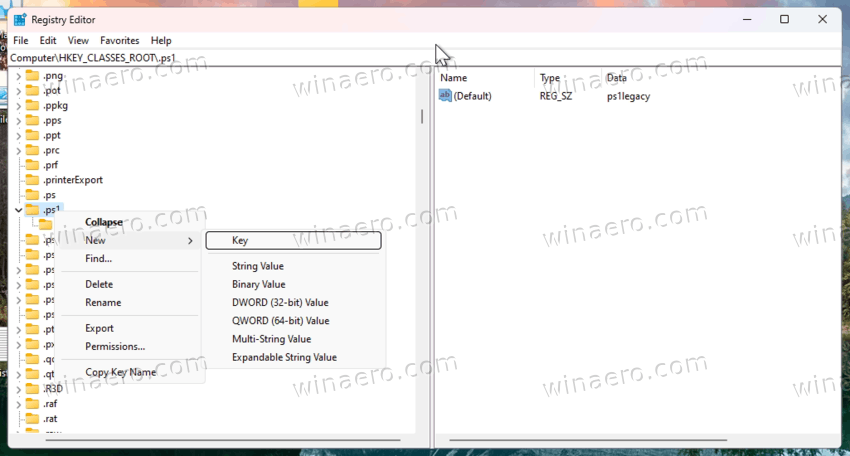
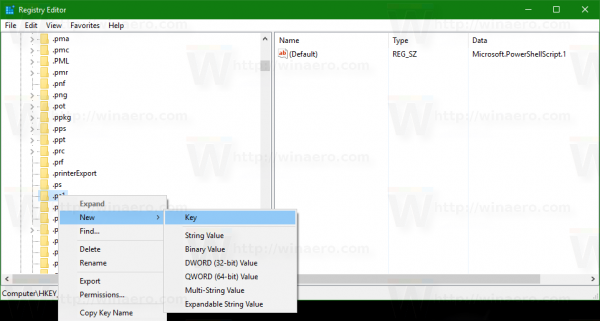
- On the left, right-click the .ps1 key, and select New > Key from the menu.
- Name the new key as ShellNew.
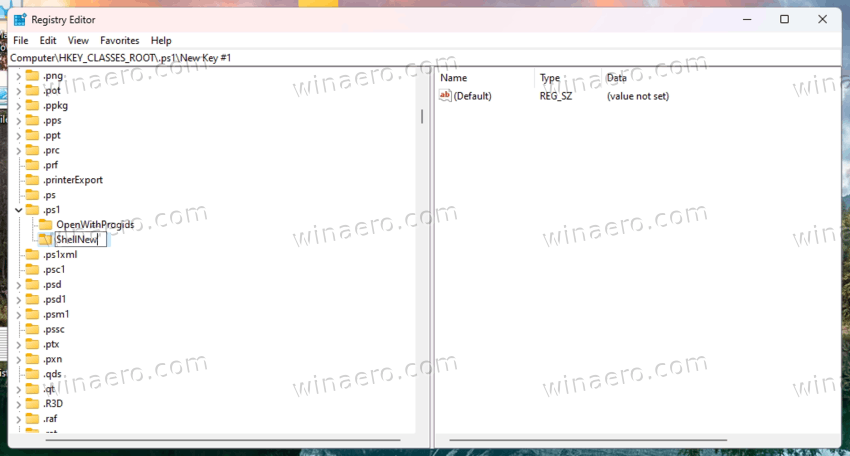
- Now, right-click the ShellNew key and select New > String value. Name it NullFile, and keep its value data empty.
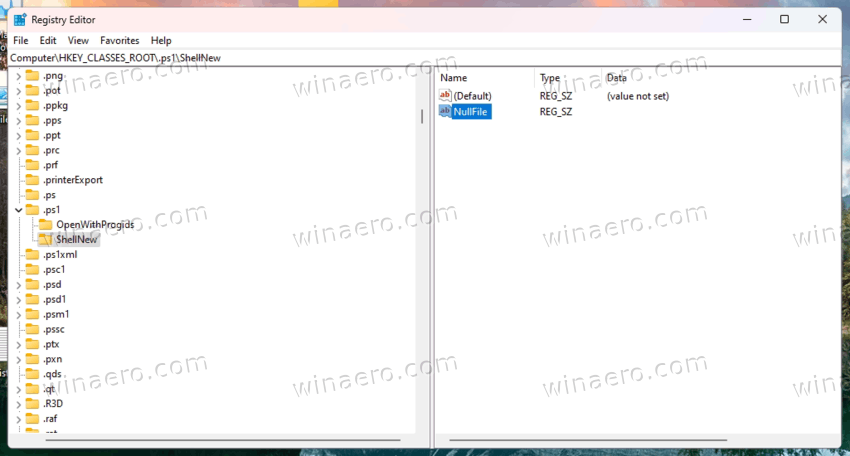
These steps are fine enough to add the new Windows PowerShell script to the "New" menu in File Explorer. However, it won't be visible. That's because PowerShell on Windows 11 receives updates from the Microsoft Store, and ps1 files are associated with that "Store" app in a different way from what it used to be in Windows 10.
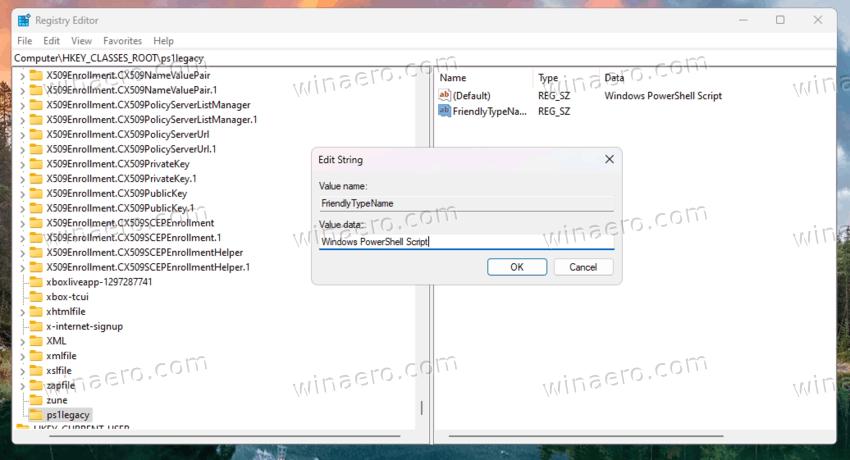
You need to add one more key to the Registry which is called "ProgID" for the file. It can contain several parameters, but we in our case need just one of them. It is a string (REG_SZ) value FriendlyTypeName that will appear in the New menu in File Explorer. Its value data must be set to something like "Windows PowerShell Script".
- Open the regedit.exe tool.
- Right-click the HKEY_CLASSES_ROOT key and select New > Key.
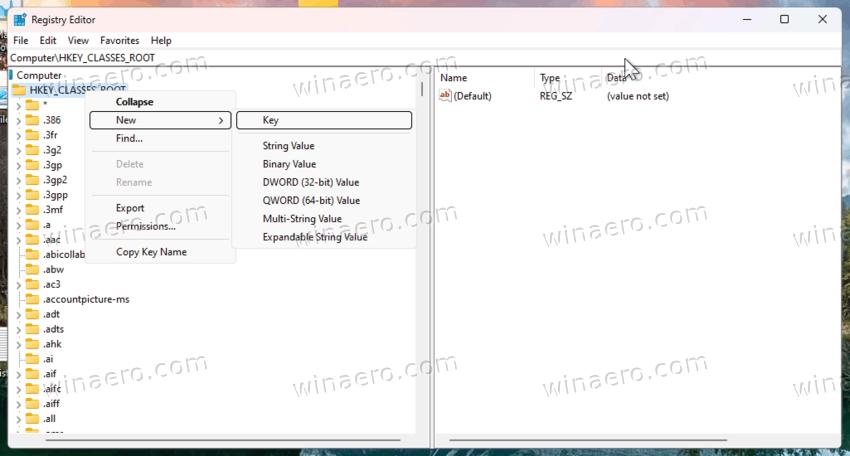
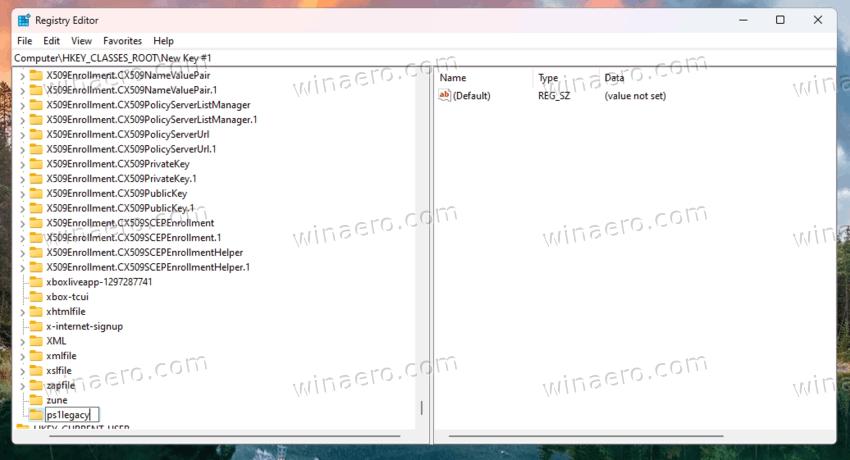
- Name it as ps1legacy, as we referred to this name in the previous chapter.
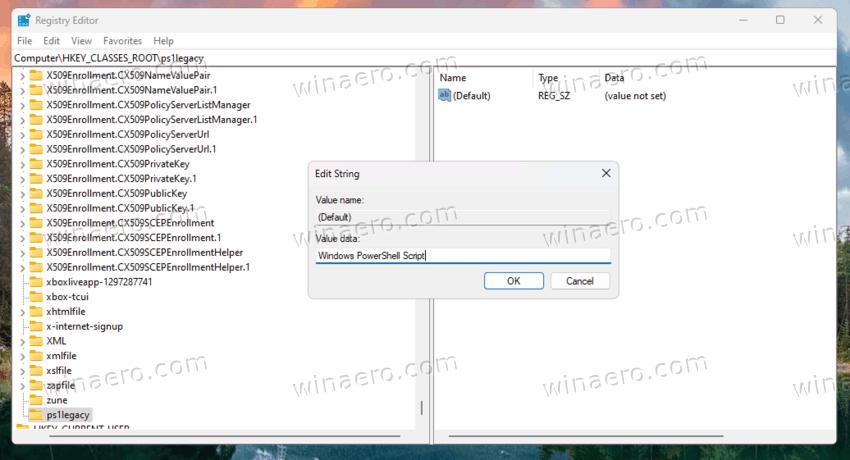
- Double-click the (default) value to the right of the ps1legacy key, and set it to Windows PowerShell Script.
- Now, right-click anywhere in the right pane and select New > String value.
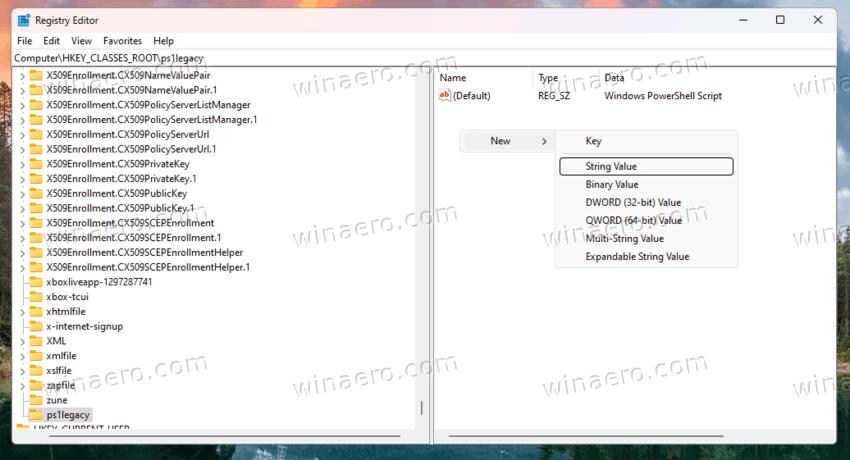
- Name the new value as FriendlyTypeName. Double-click it and also set its value data to Windows PowerShell Script.
Done! Finally you can right-click anywhere in File Explorer, say on Desktop. You will see New > Windows PowerShell Script. Clicking it will create a new PowerShell file with the .ps1 extension.
Note: If you don't see the new item immediately, try to sign out and sign in to your user account. Open the Start menu, click on your user image, and select Sign out from the menu. Alternatively, you can restart File Explorer. That will also update the menu.
The REG files for automation and time saving are available for download in the last section on this post down below.
Windows 10 and older OS versions
- Open Registry Editor (regedit.exe).
- Go to the following Registry key: HKEY_CLASSES_ROOT\.ps1. Tip: You can access any Registry key with one click.
- Create a new subkey here named "ShellNew". You will get the following path: HKEY_CLASSES_ROOT\.ps1\ShellNew.
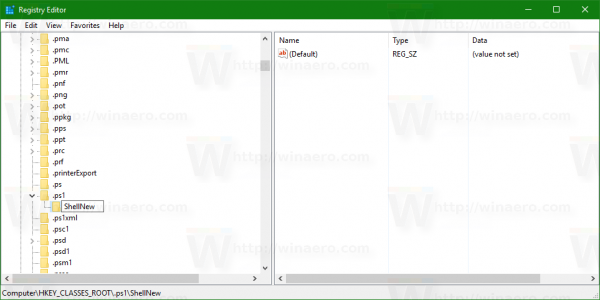
- Under the ShellNew subkey, create a new string value named NullFile. Don't set its value data, leave it empty. This value indicates that Windows should create an empty file without any content.
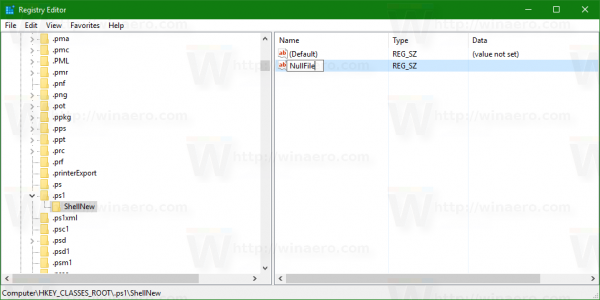
You are done! Now, open the context menu of any folder. You can just right click the empty space on your Desktop. It will have a new item in the "New" context menu: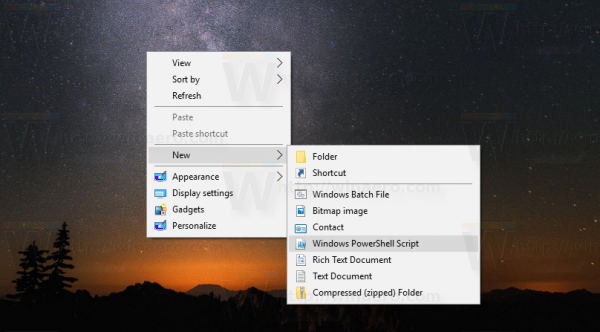 Once you click it, a new empty *.ps1 file will be created:
 The next time you need to create a PowerShell script file, you can use this context menu item to save your time.
Ready-to-use REG files and apps
To save your time, I have created ready-to-use Registry files, so you can avoid manual Registry editing. They are available for both Windows 11 and Windows 10. The undo tweak is also included.
Extract the archive to any folder of your choice. You will get two folders, "Windows 11" and "Windows 10 and below." Open the appropriate folder, and double-click the Add_New_PowerShell_Script_Context_Menu.reg file. Confirm the UAC prompt and merge operation. That is fine enough to have PowerShell in the "New" menu.

The second file, Remove_New_PowerShell_Script_Context_Menu.reg, restores the defaults.
The files work in Windows 7, Windows 8, Windows 10 and Windows 11 (I have tested it up to version 22H2). It should work in older Windows versions too.
Winaero Tweaker
As an alternative, you can use Winaero Tweaker. It has the appropriate option under Context Menu\New Menu in File Explorer:
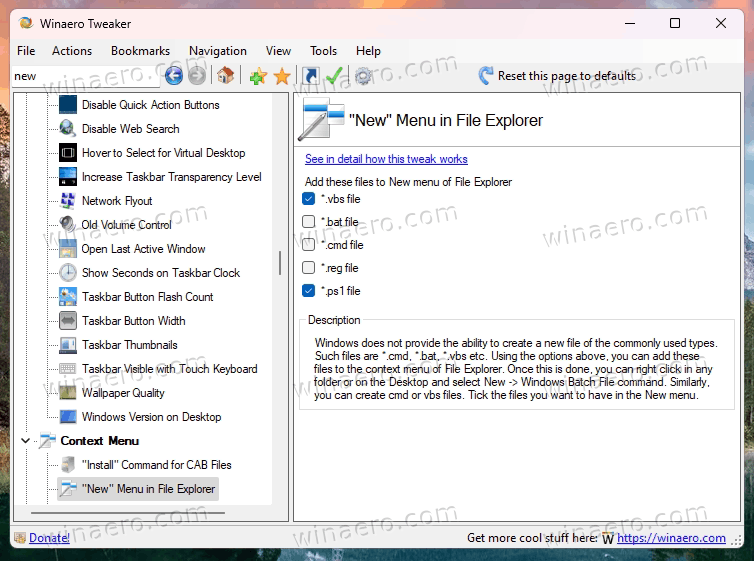
The app will allow to quickly add or remove extra items to the New menu. It also allows exporting these preferences on one PC and importing them later on a different device.
You can get the app here: Download Winaero Tweaker.
Support us
Winaero greatly relies on your support. You can help the site keep bringing you interesting and useful content and software by using these options:

Thank you very much