How to Add or Remove PowerShell 7 Open Here Context Menu in Windows 10
Microsoft has recently announced general availability of PowerShell 7, so interested users can download and install it. This release contains many improvements and additions to the PowerShell engine and its tools. Here's how to add or remove the PowerShell 7 Open here and Open here as administrator context menu entries in Windows 10 File Explorer.

PowerShell is an advanced form of command prompt. It is extended with a huge set of ready-to-use cmdlets and comes with the ability to use .NET framework/C# in various scenarios. Windows includes a GUI tool, PowerShell ISE, which allows editing and debugging scripts in a useful way.
Advertisеment
PowerShell 7, also known as PowerShell Core, is a cross-platform scripting solution available on Windows, MacOS, and Linux.
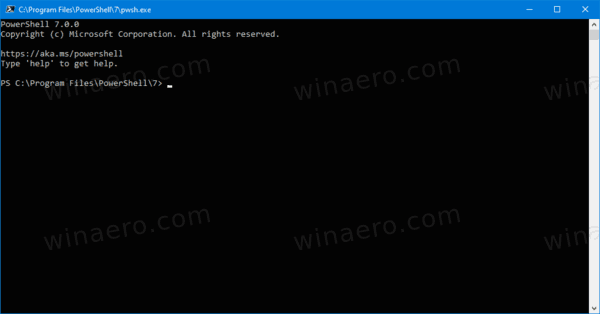
PowerShell 7 utilizes .NET Core 3.1, but keeps backward compatibility with modules previously available for the classic PowerShell product. Also, PowerShell introduces a new argument, -UseWindowsPowerShell, to force run a cmdlet under the classic engine.
It is easy to add or remove PowerShell from the File Explorer context menu in Windows 10.
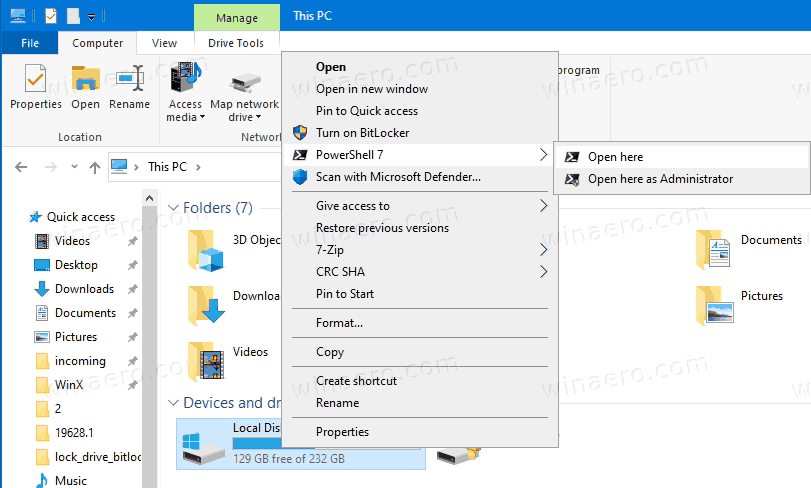
To Add PowerShell 7 Open Here Context Menu in Windows 10,
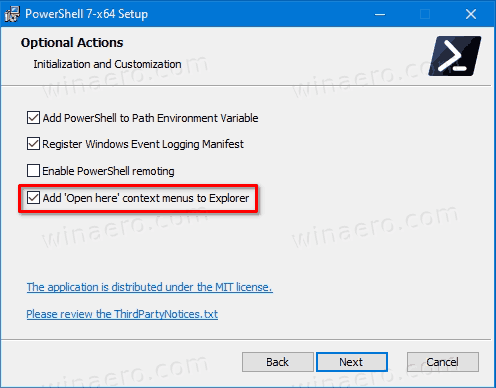
- Run the installation program of PowerShell 7 (32-bit or 64-bit).
- When prompted, turn on (check) the option Add 'Open here' context menus to Explorer.
- You are done. It will add the following PowerShell entries to File Explorer context menu.
Note: You cannot install a 64-bit PowerShell 7 version on a 32-bit Windows 10 edition. The opposite is possible, 64-bit Windows 10 supports 32-bit PowerShell 7.
Alternatively, e.g. if you already have PowerShell 7 installed, you can download the following ready-to-use Registry files.
Add PowerShell 7 Open Here Context Menu with REG Files
- Download this ZIP archive: Download Registry files.
- Unblock the downloaded file.
- Unpack the Registry files from the archive.
- If you have 64-bit PowerShell 7 installed in 64-bit Windows 10, double click on the file
Add 64-Bit Powershell 7 Context Menu On 64-Bit Windows 10.reg. - If you have 32-bit PowerShell 7 installed in 64-bit Windows 10, double click on the file
Add 32-Bit Powershell 7 Context Menu On 64-Bit Windows 10.reg. - If you have 32-bit PowerShell 7 installed in 32-bit Windows 10, double click on the file
Add 32-Bit Powershell 7 Context Menu On 32-Bit Windows 10.reg.
You are done. This will add the PowerShell 7 context menu to Windows 10 File Explorer.
- Download the above ZIP archive if you didn't already.
- Unblock the downloaded file.
- Unpack the Registry files from the archive.
- To remove 32-bit PowerShell on any (32-bit or 64-bit) Windows 10, double-click on the file
Remove 32-Bit Powershell 7 Context Menu.reg. - To remove 64-bit PowerShell on 64-bit Windows 10, double-click on the file
Remove 64-Bit Powershell 7 Context Menu.reg.
You are done!
Support us
Winaero greatly relies on your support. You can help the site keep bringing you interesting and useful content and software by using these options:
