How to Add SFC Scannow Context Menu in Windows 10.
The sfc /scannow command is a well known way to do an integrity check of all Windows 10 system files. sfc.exe is the System File Checker tool which can be helpful in many scenarios and fix various issues with Windows 10. You can save you time by adding a special context menu entry to launch it directly with one click.

The SFC command scans and verifies the integrity of all protected system files and replaces incorrect versions with correct versions. It requires Administrative privileges to fix the files and their permissions. The tool replaces corrupted or modified versions with correct file versions released and signed by Microsoft.
Advertisеment
Note: If you get the following message: Windows Resource Protection could not start the Repair Service, when launching SFC, then ensure that the Windows Modules Installer service is enabled and its startup type is set to Manual.
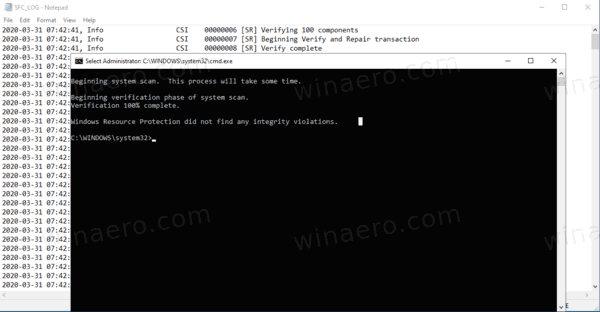
How to Launch SFC
- Open a new elevated command prompt.
- Type
sfc /scannowcommand and hit the Enter key. - Wait till it finishes. Reboot if prompted.
Note: If SFC could not fix some file, try to run it again to see if it may be able to the next time. Try running the sfc /scannow command up to 3 times with Fast Startup disabled, and restarting Windows 10 after each time to fix all the issues.
Even if for some reason you are unable to boot into Windows 10, you are still able to run the System File Checker. It supports offline scanning of a Windows installation even if does not start properly.
In addition to existing methods, you can add a special entry to the Desktop context menu to run the sfc /scannow command instantly with one click. Before proceeding, ensure that your user account has administrative privileges. Now, follow the instructions below.
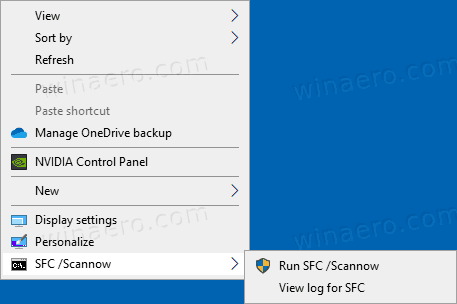
To Add Sfc Scannow Context Menu in Windows 10
- Download the following ZIP archive: Download ZIP archive.
- Extract its contents to any folder. You can place the files directly to the Desktop.
- Unblock the files.
- Double click on the Add Sfc Scannow Context Menu.reg file to merge it.
- To remove the entry from the context menu, use the provided file Remove Sfc Scannow Context Menu.reg.
You are done!
How it works
The context menu includes two commands. The first one runs sfc /scannow elevated from PowerShell. The other entry executes a PowerShell, Select-String, to filter the file c:\Windows\Logs\CBS\CBS.log for lines that contain the [SR] statement. Such lines are added by SFC, so you can clearly see its output. The result will be saved to the SFC_LOG.txt file on your desktop.
That's it.
Support us
Winaero greatly relies on your support. You can help the site keep bringing you interesting and useful content and software by using these options:

This is a very useful little tweak, many thanks Sergey.