Here's how to add or remove startup apps in Windows 11 in order to manage startup items. The more apps you have in the autostart, the longer it takes for the operating system to prepare your work space, Desktop, and shortcuts.
Advertisеment
In this article, we will review some basic ways to manage startup apps in Windows 11, so you can organize your work efficiently. When you turn on your computer, it is useful to have some software to start automatically. Outlook is a prime example, as checking email is often the first step after signing in to your account.There are several ways to add or remove a program from the list of the software that automatically runs with the OS.
Add or Remove Startup Apps in Windows 11
Most common places to make some app to start automatically are the Start menu's Startup folder, and Registry. These locations can also be used to prevent apps from running automatically. Also, they can be used to auto-start apps for all users or for the current user only. Windows 11 have startup related options in Task Manager and Settings. Using them, you can simply disable or enable auto-starting programs with a couple of clicks. Let's look at the available options.
Add apps to the Startup folder
The best way to add an app to the startup is to put its shortcut to the Startup folder. The folder is physically located at the following path: C:\Users\Your user name\AppData\Roaming\Microsoft\Windows\Start Menu\Programs\Startup.
Do the following.
- Press Win + R on the keyboard and type
shell:startupinto the Run box. This shell command will open the Startup folder for you.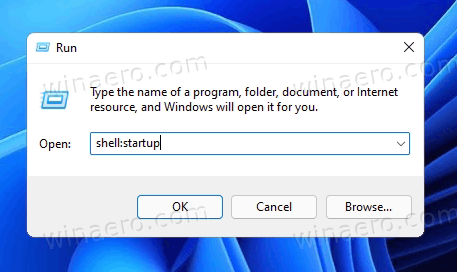
- Copy a shortcut to an app to this location to make it start with Windows 11.
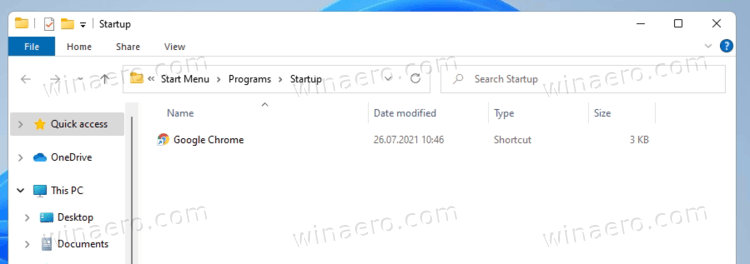
- Also, you can drag and drop an executable file, but hold the Alt key presses while you are dragging it. This will create a new shortcut to your exe file.
That's how you add shortcuts to the Startup folder.
Alternatively, you can add an app to the Startup in Windows 11 in the Registry.
Add Startup Apps in Windows 11 Registry
- Open the Registry editor app; press Win + R and type
regeditfor that. - Go to the following key:
HKEY_CURRENT_USER\Software\Microsoft\Windows\CurrentVersion\Run. There you will find existing startup items (if any) for the current user. - Right-click in the left pane and select New - > String value.
- Set its name to the name of the app you want to add to the startup, e.g. "Notepad".
- Set its value data to the full path of the application which you want to load at startup.
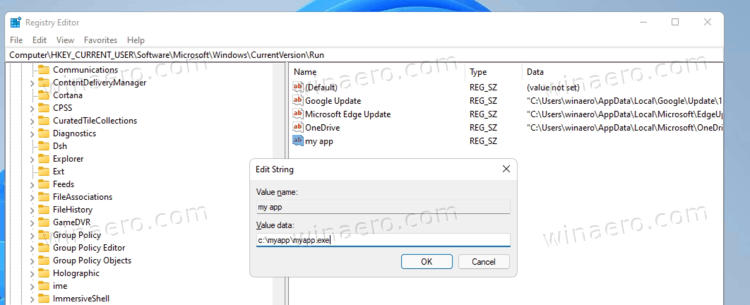
- Repeat the 3-5 steps above for all apps you want to have launched automatically with Windows.
Next time you turn on the computer, the specified apps will be loaded automatically.
Add Apps to Startup for All Users
You can also make some app(s) load automatically for all users. The method is pretty much the same as adding an app for the current user. Luckily, Windows 11 didn't deprecate this handy option. All you need to do is to open the common Startup folder, or the Registry branch that the OS reads regardless of who is signing in.
To add an app to startup for all users, do the following.
- Press Win + R and type
shell:Common Startupinto the Run dialog; press Enter.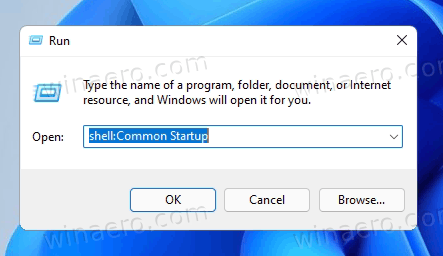
- This will open the following folder:
C:\ProgramData\Microsoft\Windows\Start Menu\Programs\Startup. Place here a shortcut for one or more apps you want to start automatically.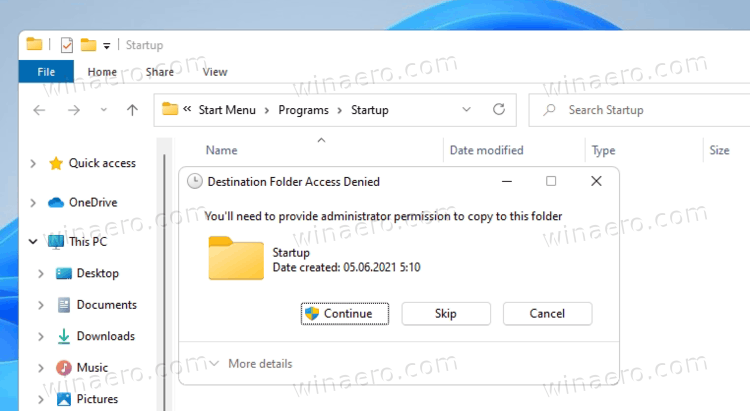
- If prompted, click on Continue.
- Alternatively, open the
regedittool (Win + R >regedit> Enter), and navigate to the following key:HKEY_LOCAL_MACHINE\SOFTWARE\Microsoft\Windows\CurrentVersion\Run. - Create here a new string value for one or several apps you want to auto-launch for all users. For each values, specify the full path to the executable file of the appropriate app.
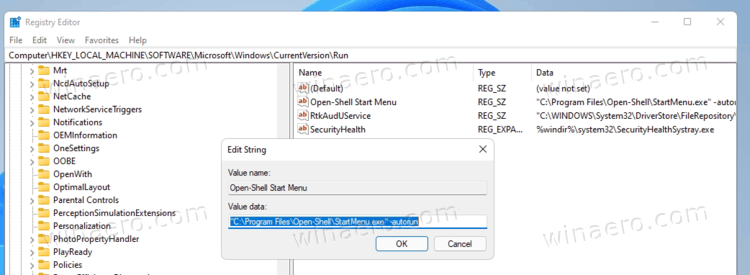
Now you know how to add Startup apps in Windows 11. Similarly, you can removed unwanted apps from starting automatically.
Remove Startup Apps in Windows 11
Depending on how you have configured your app to start with Windows, you may need to remove its entry from the Registry, or delete its shorcut from the Startup folder.
Remove an app from the Startup folder
- Open File Explorer with the Win + E shortcut.
- Navigate to the
C:\Users\Your user name\AppData\Roaming\Microsoft\Windows\Start Menu\Programs\Startupfor the current user's Startup folder. Use theshell:Startupcommand to open it faster. - Delete all shortcut to apps you want to remove from the Startup folder.
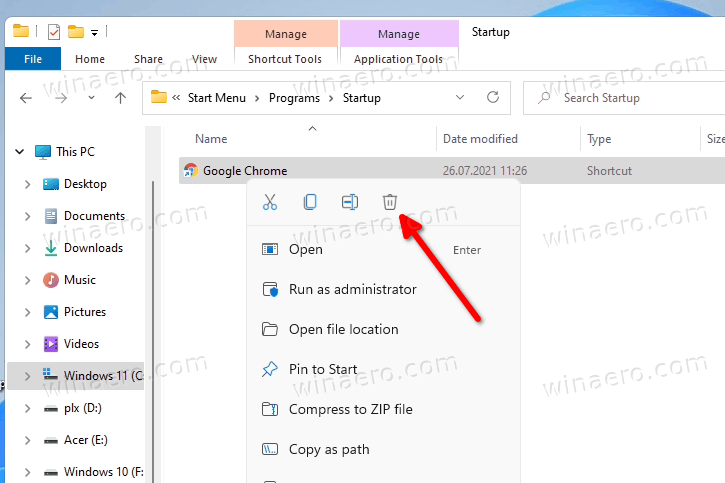
- If the app starts for all users, navigate to the folder
C:\ProgramData\Microsoft\Windows\Start Menu\Programs\Startup. The corresponding command isshell:Common Startup.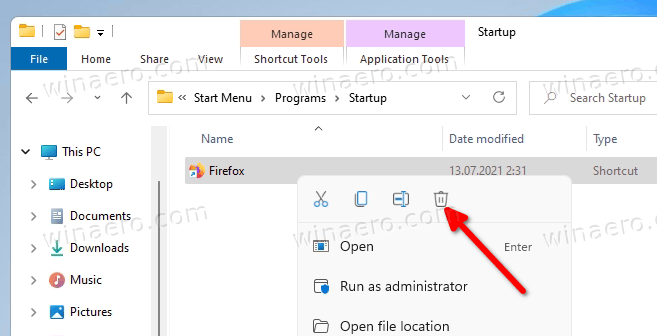
- Similarly, remove the unwanted and redundant shortcuts from here.
Now, let's go to the Registry and remove the keys there.
Remove an app from Startup in the Registry
- Open the Registry editor app; press Win + R and type
regeditin the Run box. - To remove an app from Startup for the current user, open the
HKEY_CURRENT_USER\Software\Microsoft\Windows\CurrentVersion\Runkey. - On the left, find a value that represents the app you want to stop from starting with Windows 11, and right-click it.
- Select Delete from the context menu.
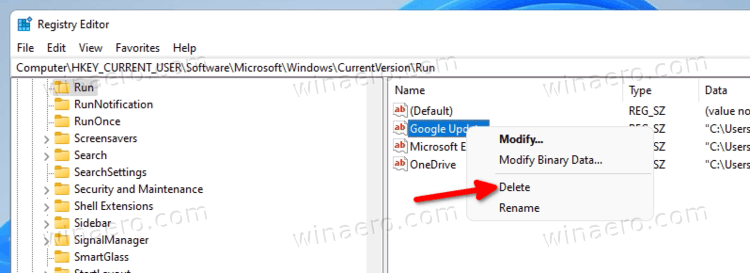
- If you have added your app's entry for all users, repeat the steps 2-3 under the key
HKEY_LOCAL_MACHINE\SOFTWARE\Microsoft\Windows\CurrentVersion\Run.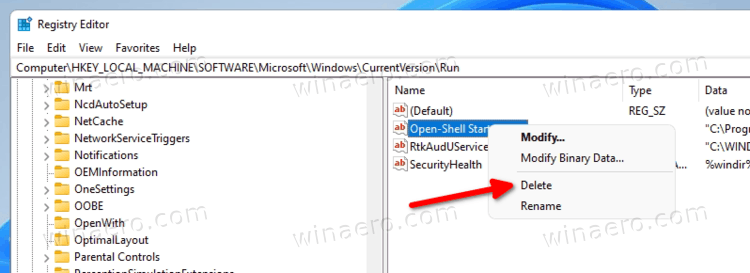
- You can now close the Registry editor.
Besides the classic apps, Windows 11 includes a bunch of Store apps, and you can install more. Let's see how to manage startup for those apps.
Add or Remove Store apps from Startup in Windows 11
- Open the Settings app using the Win + I keyboard shortcut.
- Click on Apps on the left, then click on Startup on the right.
-
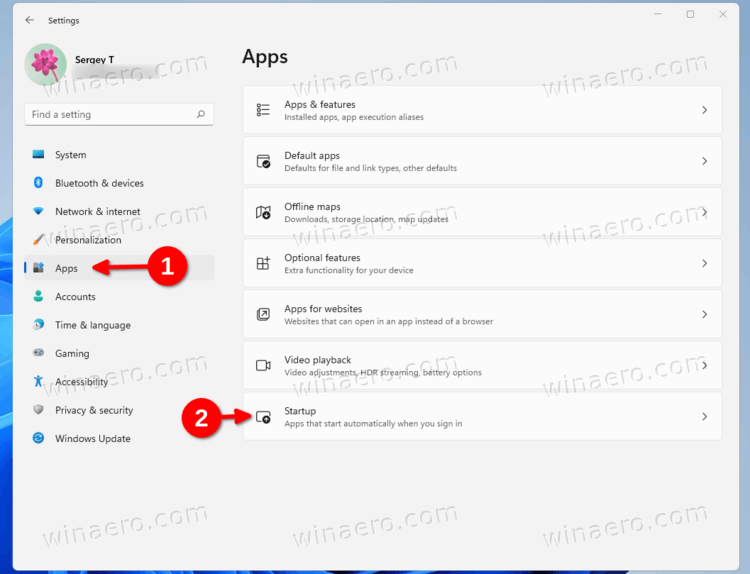 On the next page, turn on or off the toggle switch for the apps you want to add or remove from startup under the Startup Apps list.
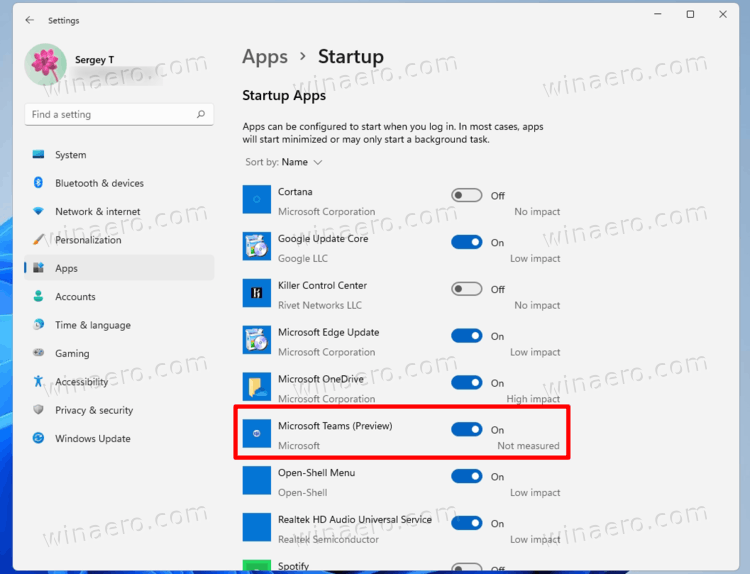
- You can now close the Settings app.
The same can be done in app's advanced options. There is a special "Runs at log-in" option that is available for Store apps that support an auto-start permission.
Manage "Runs at log-in" option in App Advanced options
- Open the Settings app with the Win + I hotkey or using any other method you like.
- On the left, select Apps. In the right pane, click on Apps and features.
- Find the app you want to enable or disable the Start at Log-in option.
- Click on the three vertical dots button to see more actions, and select Advanced options.
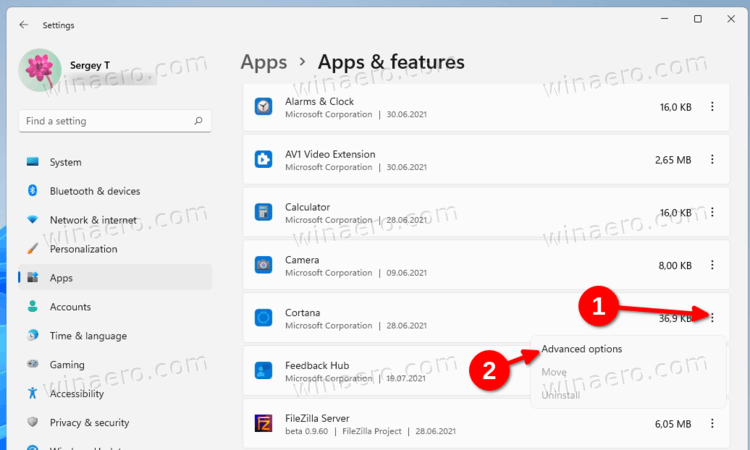
- On the next page, turn on or off the Runs at log-in option for what you want.
However, you may find that some of the Store apps are missing in the list of "Startup apps" in Settings, but you may need to make the auto start. Let's say you want to make the built-in Camera app start automatically, but it doesn't support such a feature in Settings. I will show you a workaround.
Add a Store app to the Startup manually
- Open the Start menu and click on "all apps" button.
- In the list of Store apps, find the app you want to launch automatically, say Camera.
- Drag and drop the app entry from the Start menu to the Desktop to create a shortcut to that app.
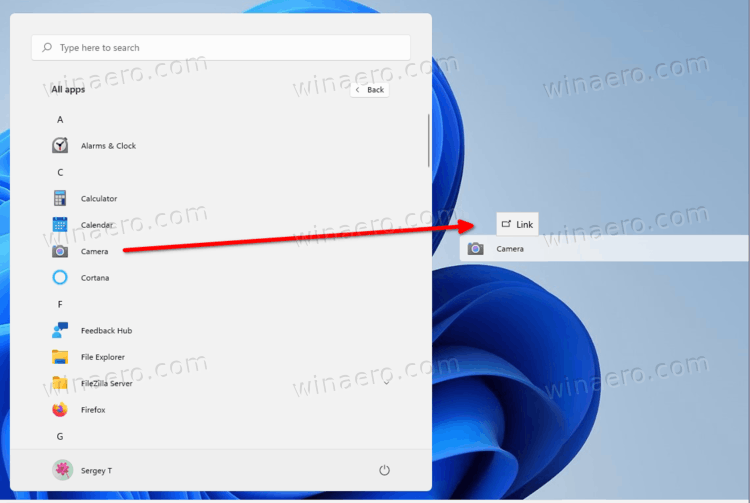
- Now, open the Startup folder using the
shell:Startupcommand. - Move the shortcut from the Desktop to the
C:\Users\Your user name\AppData\Roaming\Microsoft\Windows\Start Menu\Programs\Startupfolder.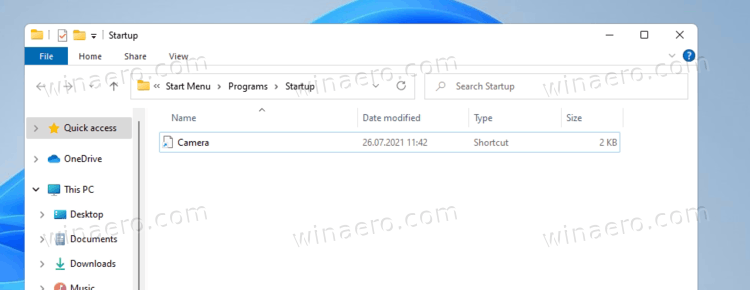
- Next time you sign in, Windows 11 will launch that app automatically.
You are done.
In addition to the Settings app, the good old Task Manager can be used to manage Startup apps in Windows 11. There, you can use the Startup tab to permanently prevent an app from starting with Windows, or re-enable the disabled app.
Enable or disable a startup app with Task Manager
- Open the Task Manager (Ctrl + Shift + Esc).
- If you have it in compact mode, click on More details.
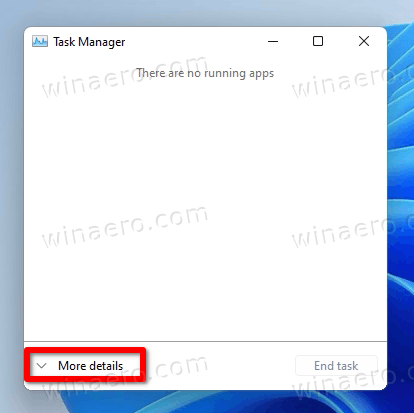
- Switch to the Startup tab.
- Select an app in the list you want to remove from Startup, and click on Disable.
- Similarly, select a disabled app you want to make start with Windows 11, and click on Enable.
You are done!
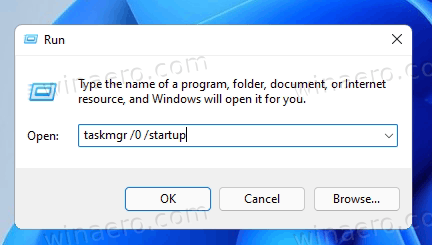
Tip: You can open the Startup directly in Task Manager. For that, press Win + R dialog, and type taskmgr /0 /startup in the Run box. This will open the Task Manager app directly at the startup folder. You can also create a shortcut to this command, as covered here.
Well, the above methods review widely used startup locations that most consumer software use. In fact, Windows 11 supports much more startup locations. I recommend you to always have Sysinternals Autoruns tool anywhere on your disk. That app is a Swiss knife when it comes to managing Windows Startup. Decpite the name, Sysinternals is now part of Microsoft, so it is a must-have first party app.
Manage Windows 11 Startup apps with Sysinternals Autoruns
Download the Sysinternals Autoruns tool from here: Autoruns for Windows, and run it.
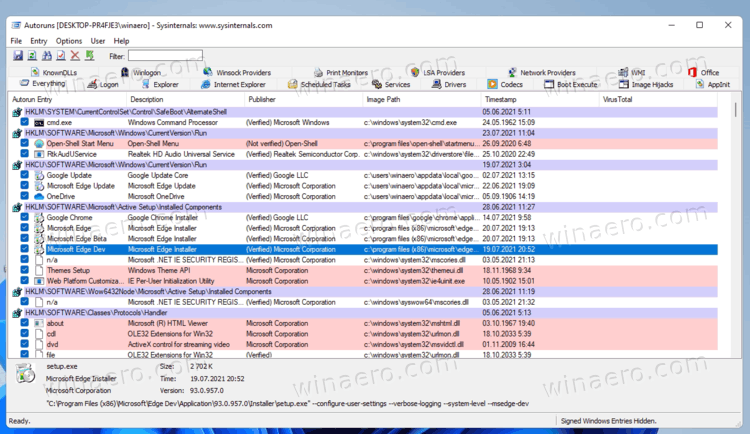
Warning: Autoruns is a tool for advanced users. If you see some app that you don't understand what it does, do not disable it. Autoruns assumes that you know what you are doing. Otherwise, your actions my affect the stability and reliability of the OS.
On the "Everything" tab, you will see pretty much information on every single startup app that runs automatically on your computer.
You'll find that there is also a number of scheduled tasks that start a galore of built-in and third-party software on startup. There are also "services" and several additional Registry locations that Windows processes when your computer starts, and when the user signs in.
Here you can carefully check what every entry does, and disable anything unwanted by simply unchecking this or that entry.
Support us
Winaero greatly relies on your support. You can help the site keep bringing you interesting and useful content and software by using these options:
